
How to record video with sound on our MacBook Air or Pro? What is the best way to make YouTube, Facebook, or TikTok video recording effortlessly and efficiently for us Mac users? And which video editor applies to higher-level recording?
Solved! Two-guide to record video on Mac with sound, in line with built-in features & user experience, will be introduced for you: the default screen recorder on Mac and the best Mac video recorder – AceMovi Video Recorder & Editor.
- Ⅰ How to Record Video by Mac Screen Recorder
- Ⅱ. How to Record Video on Mac with AceMovi
- Ⅲ Last Words
Ⅰ Mac Built-in Screen Recorder – Efficient & Direct
The video recording function is internally installed on our MacBook Air or Pro. Let’s see the 5-step guide of recording video with sound below.
Press Shortcut “Shift + Command+5” to Begin
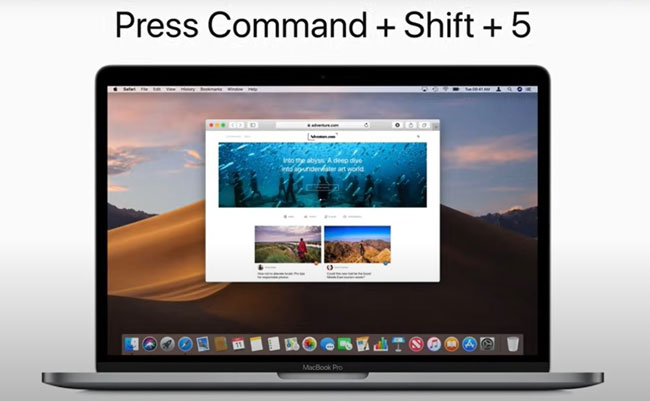
The screen-recorder toolbar will appear after clicking the three keys at one time.
Choose Full or Portion Screen to Record
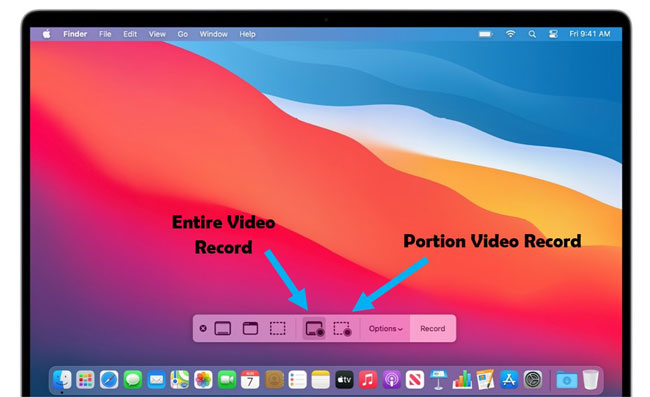
You can record full screen by tapping on the left button arrowed in the picture or make your customizable video recording by the right button. If you choose the Portion, click-n-drag window into the designated area, then adjust its size.
By the way, the three icons not arrowed beside are used for the screenshot.
Choose Microphone to Record with Sound

The video is going to be recorded without sound by default, so you should right-click the Options and choose the Built-in Microphone. In the meantime, you can change the Timer to 5 or 10 seconds, or preset the Save-to as Desktop, Documents, Mail, or Messages. Also, other settings like Show Floating Thumbnails and Remember Mouse Clicks are available here as well.
Now, it’s time to move your mouse to press the Record.
Stop Recording & Check Video Thumbnail
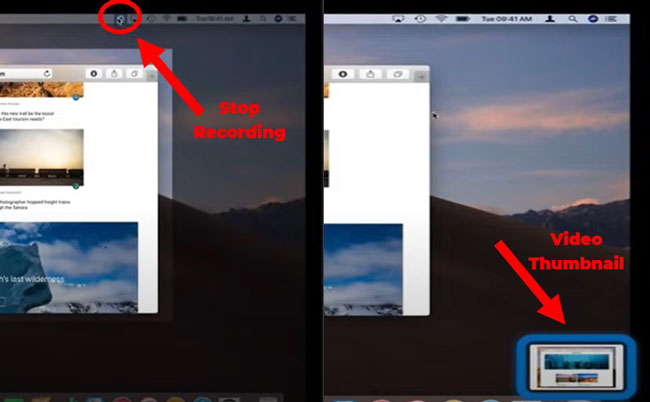
Click on the Stop sign in the menu bar when the recording is over. Then your video thumbnail will appear in the right below, and you can open it right now or see it later.
Trim & Save the Recorded Video
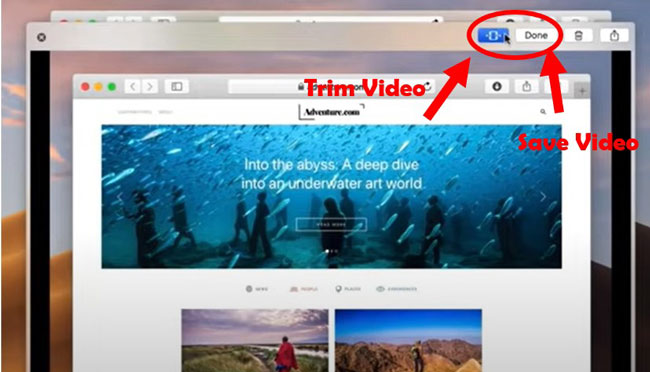
If you want to cut your video, left-click the Trim, then move the yellow line to adjust the start & end timing. Finally, press the Done to get your works!
Ⅱ AceMovi Screen Recorder – Easy & Powerful
More interested in a screen recorder designed with pro video editing functions for a better user experience on Mac? Got you!
AceMovi is an easy-to-learn & wonderfully-operated screen recorder. With AceMovi, not merely can you record video, but you’re also available to edit the recorded video such as cut clips, add texts & filters & transitions, or post to more formats & social websites, etc.

TunesKit AceMovi Video Editor
Security Verified. 5,481,347 people have downloaded it.
- Customizable windows to make video record
- Provide both basic and advanced video recording features
- Multiple filters, transitions, text, sound effects, music, etc.
- Lots of output options to choose from, like format, device, social platform
- User-friendly UI and easy to operate
Let’s see how it works!
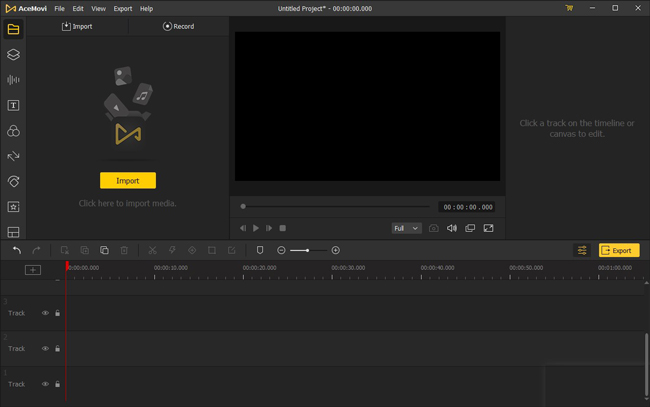
Download AceMovi for Mac & Launch AMRecorder
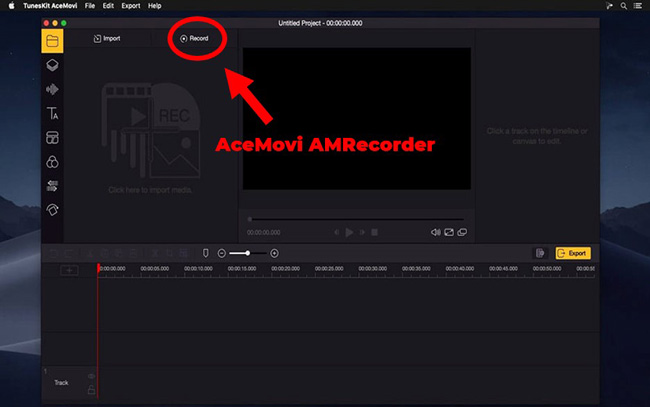
Downloading AceMovi on the official website is recommended for personal information safety and more beneficial price policies. Then, press the Media in the Menu to run AceMovi AMRecorder.
You can click here to Download TunesKit AceMovi for or Mac.
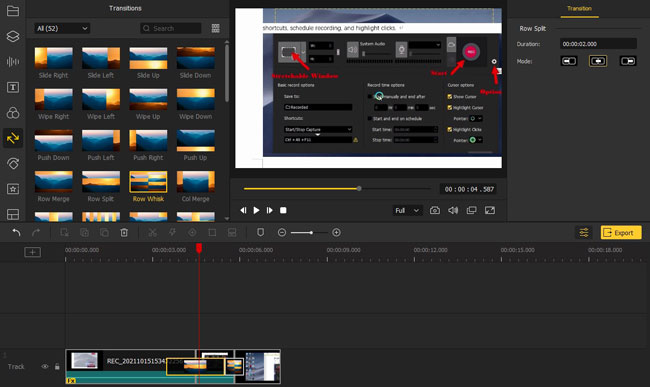
Start Video Recording & More Settings
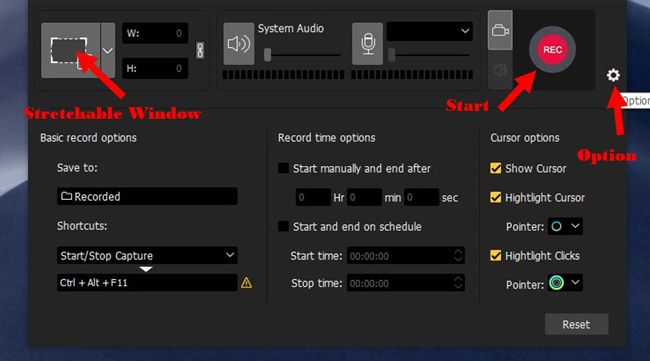
You can either click-n-drag the stretchable window to set the area or select the area as 1920 * 1080 or others by clicking the dropdown sign. Next, press the REC to begin recording your video.
For more settings, you can choose the Option, which contains download location, shortcuts, scheduled recording, and highlight clicks.
It’s must be crystal clear for you, I believe, so tap on the REC to hit the road!
Pause, Restart, or Stop Video Recording
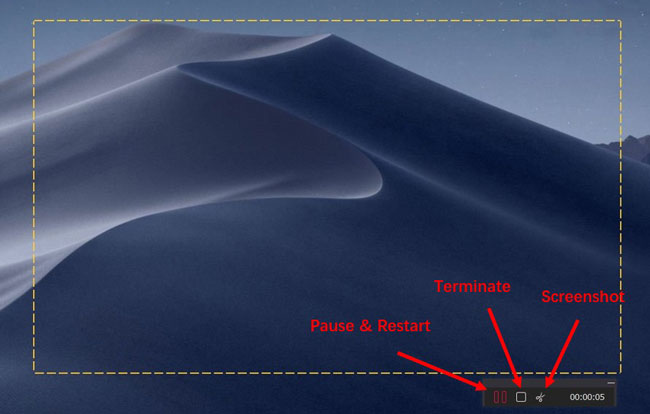
Now we’re in video recording, three buttons from left to right for you to click in the right below: Pause & Restart, Terminate, and Screenshot.
To Edit & Export the Recorded Videos
Like we’ve said, AceMovi offers both video recording and footage editing. Time to choose-n-drag felicitous stickers, texts, transitions, effects, and try advanced features such as Keyframing, screen-split, PiP after the video recording is finished.
Moreover, AceMovi is consists of three channels of export selections: usually-seen video formats, like MP4, M4V, AVI, etc., mobile devices such as iPhone, Huawei, and Xiaomi, as well as direct channels to local social websites, for example, YouTube, Facebook, and Vimeo, and so on.
Ⅲ Last Words
Whatever the default Mac Screen Recorder or AceMovi, both of them were created to offer you more convenient & efficient way of recording video on Mac, even we can see some little differences between them such as the Mac screen recorder doesn’t need you to download, while with AceMovi you’re accessible to more video editing features except recording.