

A simple yet advanced video editing software for everyone. Make and enhance your videos with amazing effects and resources.
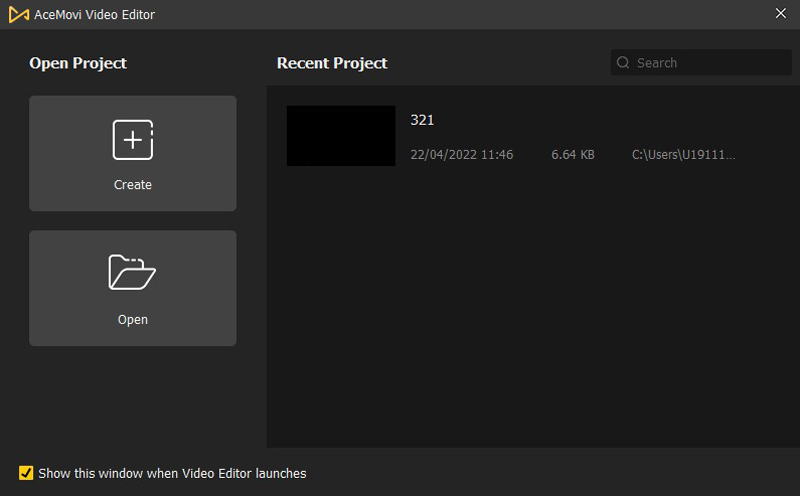
After launched TunesKit AceMovi on your computer, the Startup window will appear and you can see three options. It allows you to create a new project or open a recent project quickly.
Open Project – On the left of the window, you can click the Create button to make a new project and then enter the main interface of AceMovi to start editing a video. Or, you can click the Open button to select a project (.tkproj file) that was saved on your computer to continue editing the video.
Recent Project – On the right of the window, there are all the recent projects that you’ve saved on the computer in chronological order. Double click on the one you want to edit and it will enter the editing interface, with all media files and changes you’ve made last time retained. You can also type a keyword to quickly find the recent project in the upper right corner of this section.
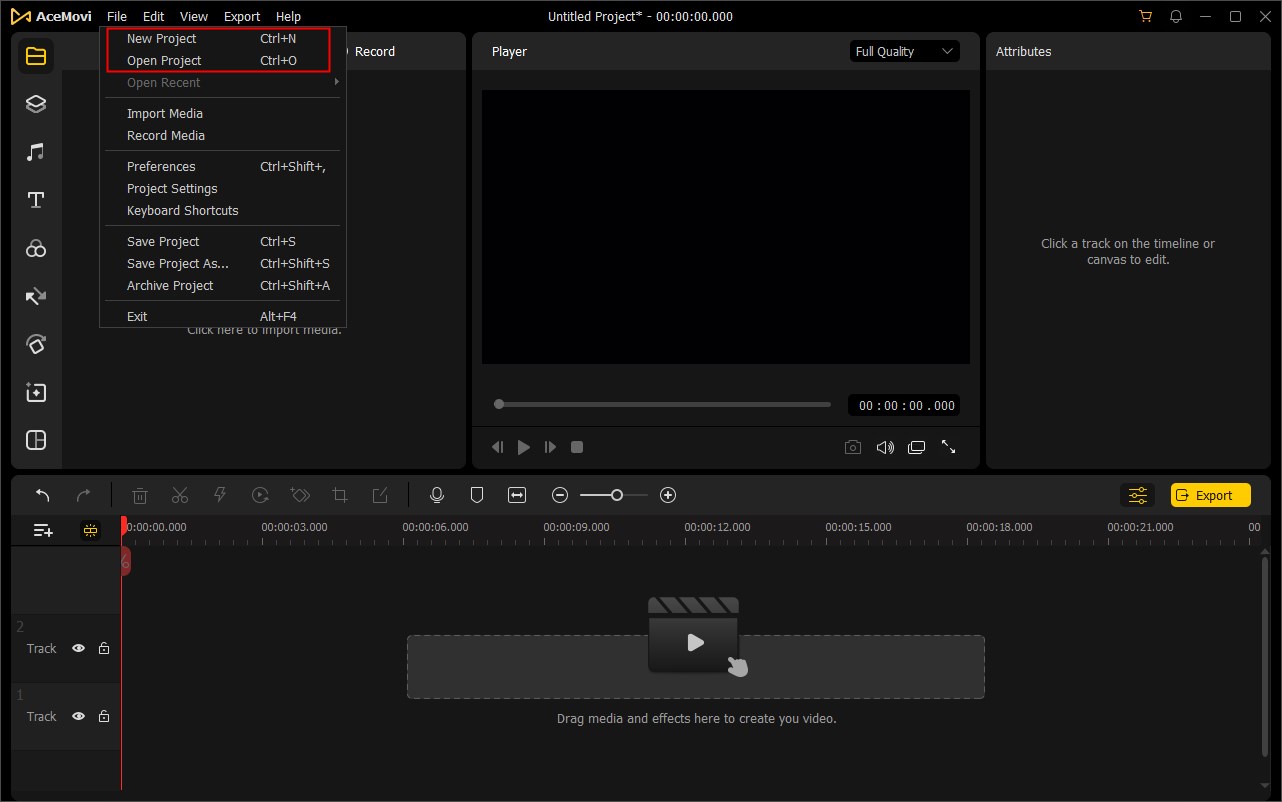
After you enter the main interface of AceMovi, you can navigate to the File > New Project to create a totally new project. To open a recent project, you can head to File > Open Project to open an existing project on your computer, or File > Open Recent to open a project that has been edited recently.
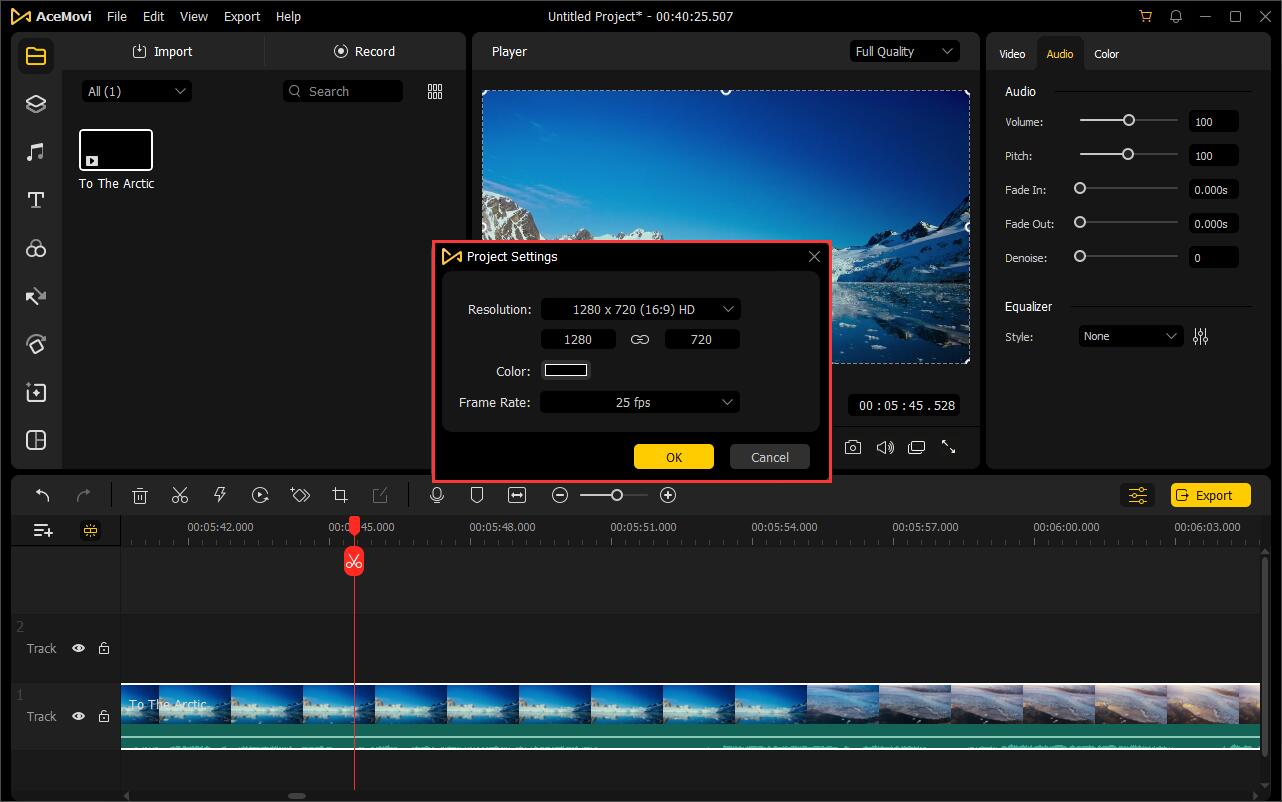
Project Setup - The default resolution of the AceMovi project file is 1280*720. If you want to change the resolution, you can go to the File > Project Settings and select a proper size from the dropdown menu. In the same popup window, you are also allowed to choose a specific frame rate and background color for your project.
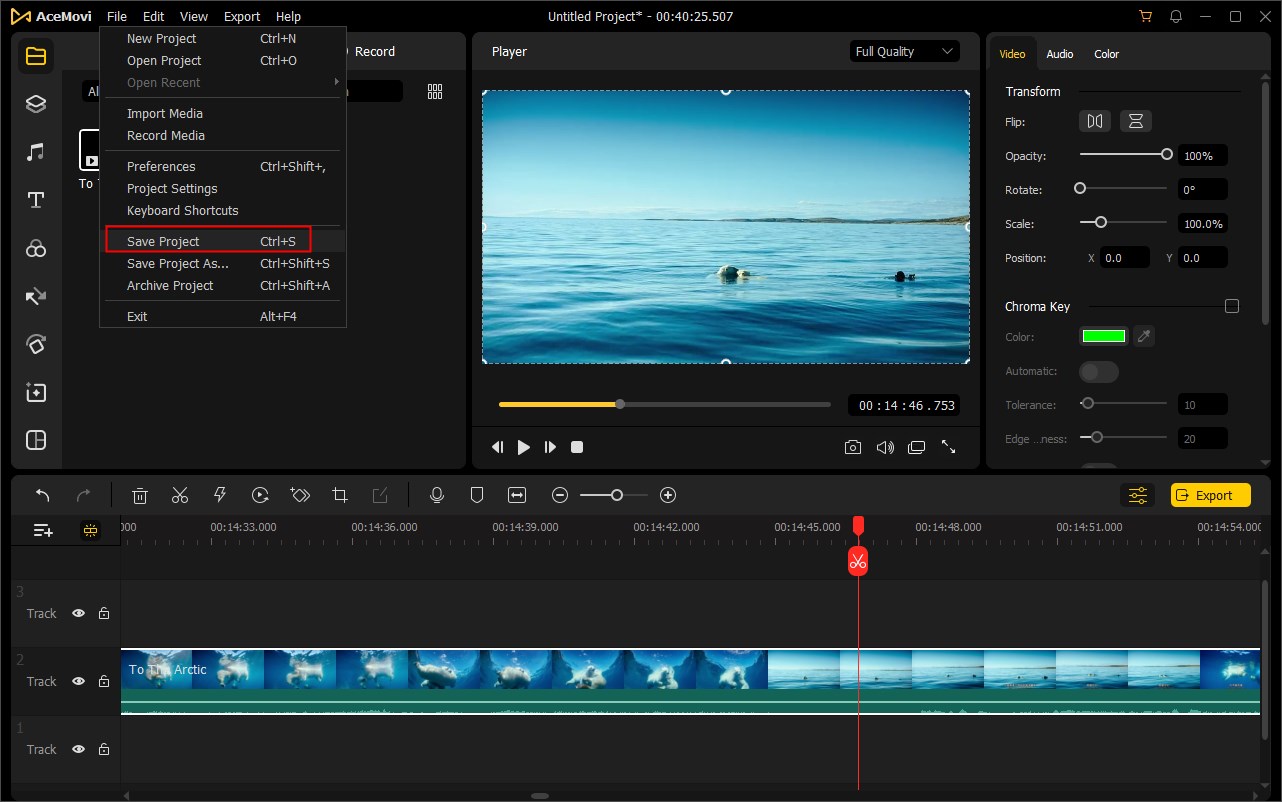
Save Project - You can always save the project during the editing by clicking the File > Save Project (Ctrl + S) to avoid any loss. Or click the File > Save Project As... (Ctrl + Shift + S) to save your project to the computer after finished the editing.
Once you create or open a project, you can see the interface of the AceMovi program as follows:

On the left side of the TunesKit interface, you'll see a "Media Library" section where you can import media into the program such as videos, images or audios, etc.
The "Timeline" is on the bottom with multiple music or video tracks. This is the place for you to arrange and edit media clips or effects.
Between the Media Library and Timeline is the "Toolbar", where you can find some simple editing tools to trim, split, crop, zoom, or mark your video.
At the center of the interface is the "Preview Window", and it enables you to have an instant preview of your project whatever changes you made in the timeline.
Of course, you can also click the "Properties" icon to adjust the media file's parameters like position, equalizer, volume, brightness, saturation, contrast, hue, etc. in the "Edit Window" on the right side of the interface.
Now it's your time to unleash your imagination and creativity. To use any of these effects, you can simply drag the file and drop it to the appropriate place of the timeline you want.
![]() "Element" – This is TunesKit AceMovi's preset resources. Here you can find a growing number of background images, stickers, arrows, and more.
"Element" – This is TunesKit AceMovi's preset resources. Here you can find a growing number of background images, stickers, arrows, and more.
![]() "Audio" – In this tab, you can add royalty-free background music and inspiring sound effects like Explosion, Impact, Super Mario, etc. by drag-and-drop.
"Audio" – In this tab, you can add royalty-free background music and inspiring sound effects like Explosion, Impact, Super Mario, etc. by drag-and-drop.
![]() "Text" – Use shapes, arrows, callouts, lower thirds, and sketch motion to highlight those important points in your video.
"Text" – Use shapes, arrows, callouts, lower thirds, and sketch motion to highlight those important points in your video.
![]() "Effects" – To enhance your video, you are able to apply different creative filters and overlays to make your gorgeous video to the next level.
"Effects" – To enhance your video, you are able to apply different creative filters and overlays to make your gorgeous video to the next level.
![]() "Transitions" – To make your video more natural and smooth, you can add a transition between two videos or images, or a single video clip and image.
"Transitions" – To make your video more natural and smooth, you can add a transition between two videos or images, or a single video clip and image.
![]() "Animation" – You can apply various animations like Breath, Fade, Expansion, etc. to make your video more attractive.
"Animation" – You can apply various animations like Breath, Fade, Expansion, etc. to make your video more attractive.
![]() "Regional" – Here are some useful regional effects you can apply to the video clips, such as mosaic, magnify, blur, etc.
"Regional" – Here are some useful regional effects you can apply to the video clips, such as mosaic, magnify, blur, etc.
![]() "Split Screen" – Split your screen into two or more parts in a unique way to multiply your fun with video editing.
"Split Screen" – Split your screen into two or more parts in a unique way to multiply your fun with video editing.