To split an audio track, drag the playhead to the position where you want to split. Click the Split icon ![]() in the toolbar or right click on the clip and choose the Split option to split the audio file into two parts.
in the toolbar or right click on the clip and choose the Split option to split the audio file into two parts.

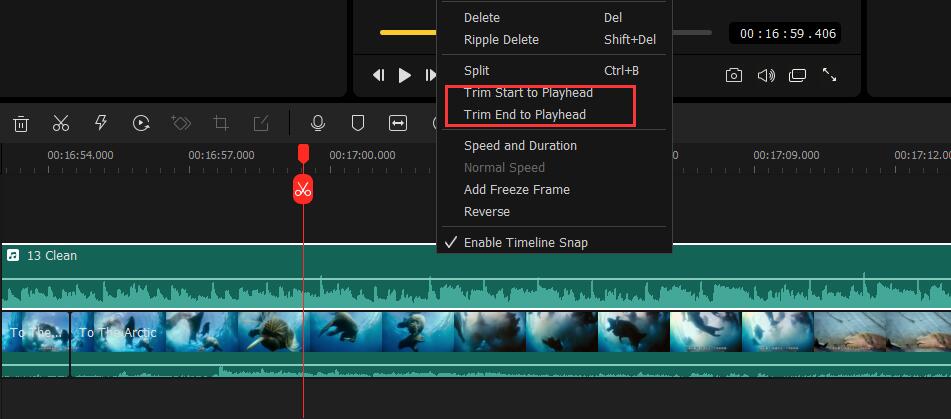
To trim from the start or end of the audio, you can hover the mouse over each edge of the clip in the timeline. When it becomes like this, you can then drag the edge to any place you want to trim. Or right click the audio file and choose Trim Start to Playhead or Trim End to Playhead to get rid of unwanted portions.
If you want to trim a part of the clip in the middle, you can move the playhead to the beginning of this unwanted section, use the Split button (Scissors icon) ![]() to split it. Then place the playhead to the end of your unwanted section, and split the clip again. Now click on the middle part, and hit the Delete button
to split it. Then place the playhead to the end of your unwanted section, and split the clip again. Now click on the middle part, and hit the Delete button ![]() to remove it.
to remove it.
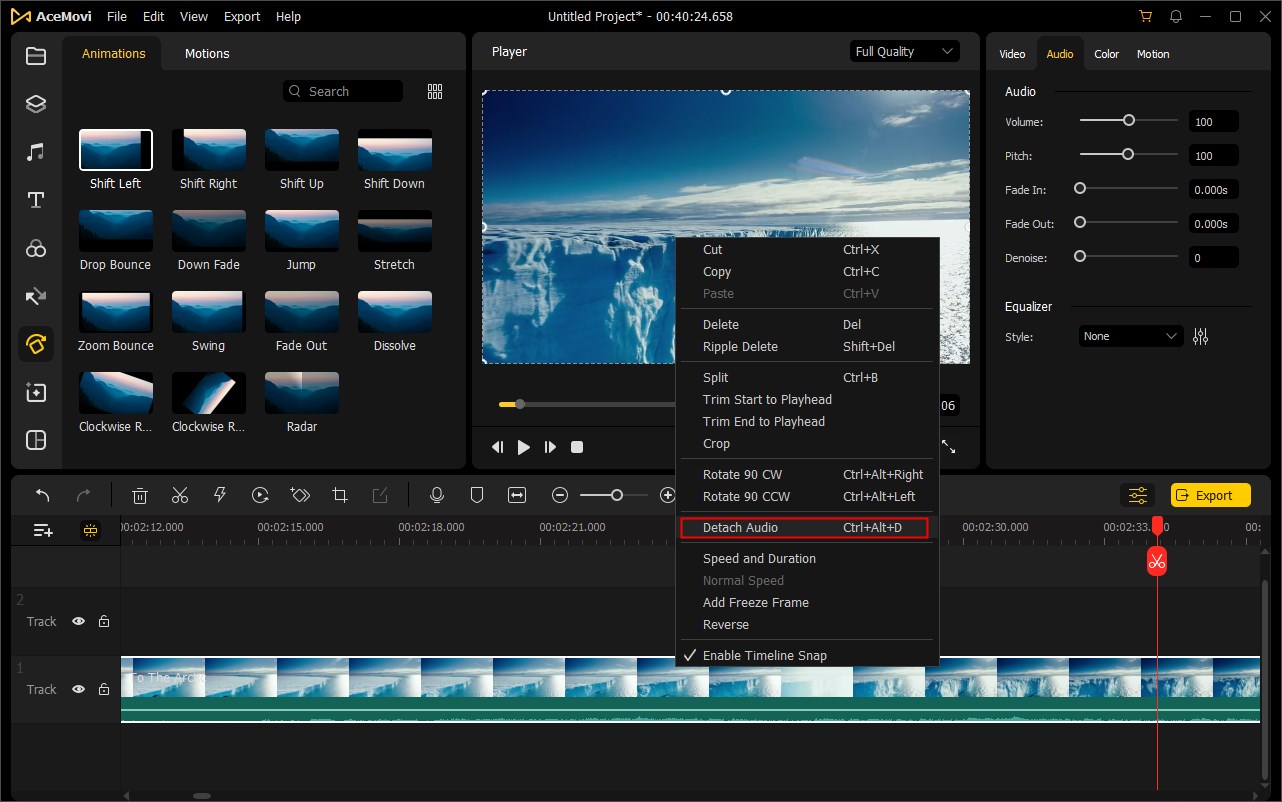
To detach audio from one video file, you can right click the clip in the timeline and choose Detach Audio. The detached audio will be placed automatically on the track above the video. Now you can delete it or edit it without affecting the original video clip.
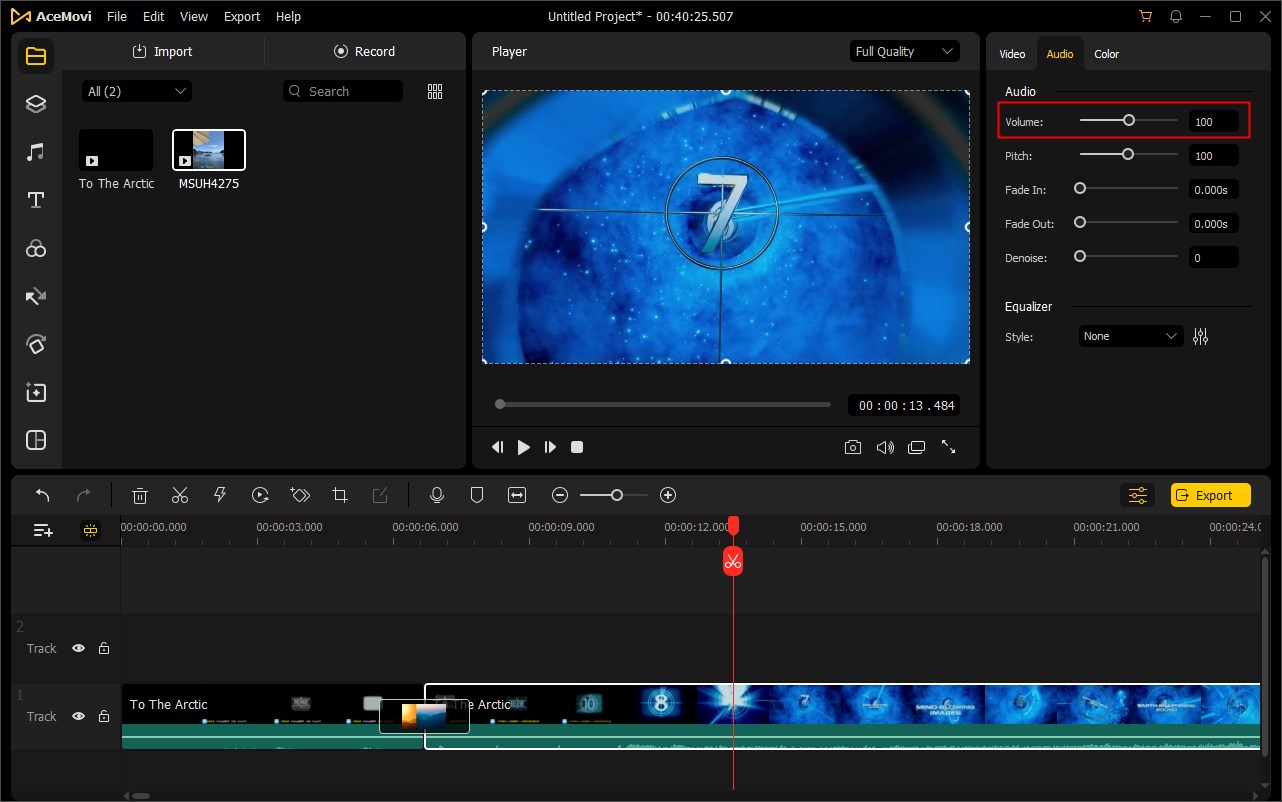
To adjust the volume of your audio clip, you can click on the clip and then press the Properties icon ![]() . In the Edit Window, you can change the volume of the audio track by dragging the slider up or down.
. In the Edit Window, you can change the volume of the audio track by dragging the slider up or down.
The second method is to adjust the audio volume in the timeline. Hover your mouse over the audio file. When it changes to the Hand icon, you can drag the handle up or down to increase or decrease the volume.
Click on the audio clip in the timeline and hit the Properties icon to open the Audio adjustment panel. Drag the sliders to apply Fade In/Out effects to your audio.
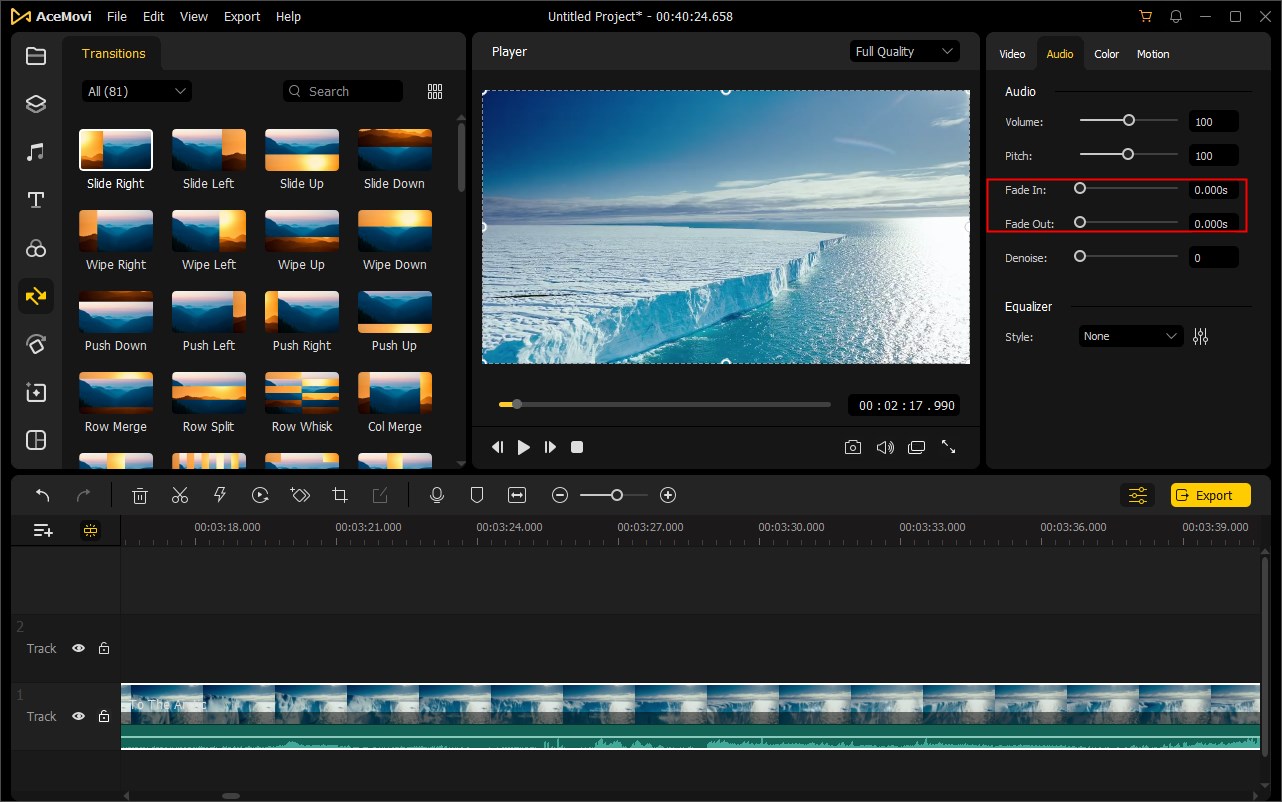
Alternatively, you can click on the audio in the timeline, drag the Fade In maker in the audio waveform area to the right to apply a fade-in effect; or drag the Fade Out maker to the left to add the fade-out effect. The further you drag, the longer the effect will last.
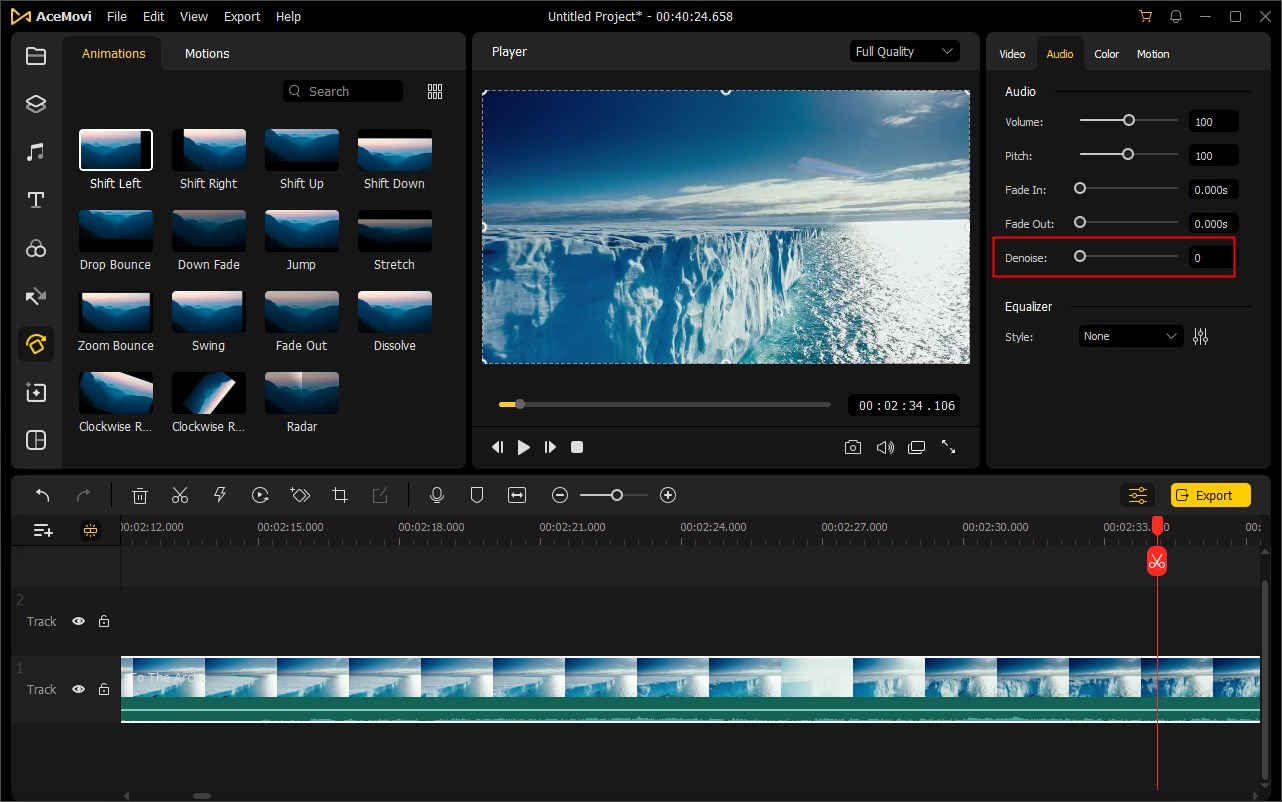
The Denoise feature allows you to remove the background noise from the audio file. Click on the target audio and press the Properties icon. In the Edit Window, move the Denoise slider to adjust the level of denoising. After that, you can play it to check in the Preview Window.
To adjust the audio speed, you can click on the clip, and press the Speed icon ![]() in the toolbar to speed up or slow down the audio file. Alternatively, you can right click the clip and choose Speed and Duration option to set the speed of the audio.
in the toolbar to speed up or slow down the audio file. Alternatively, you can right click the clip and choose Speed and Duration option to set the speed of the audio.

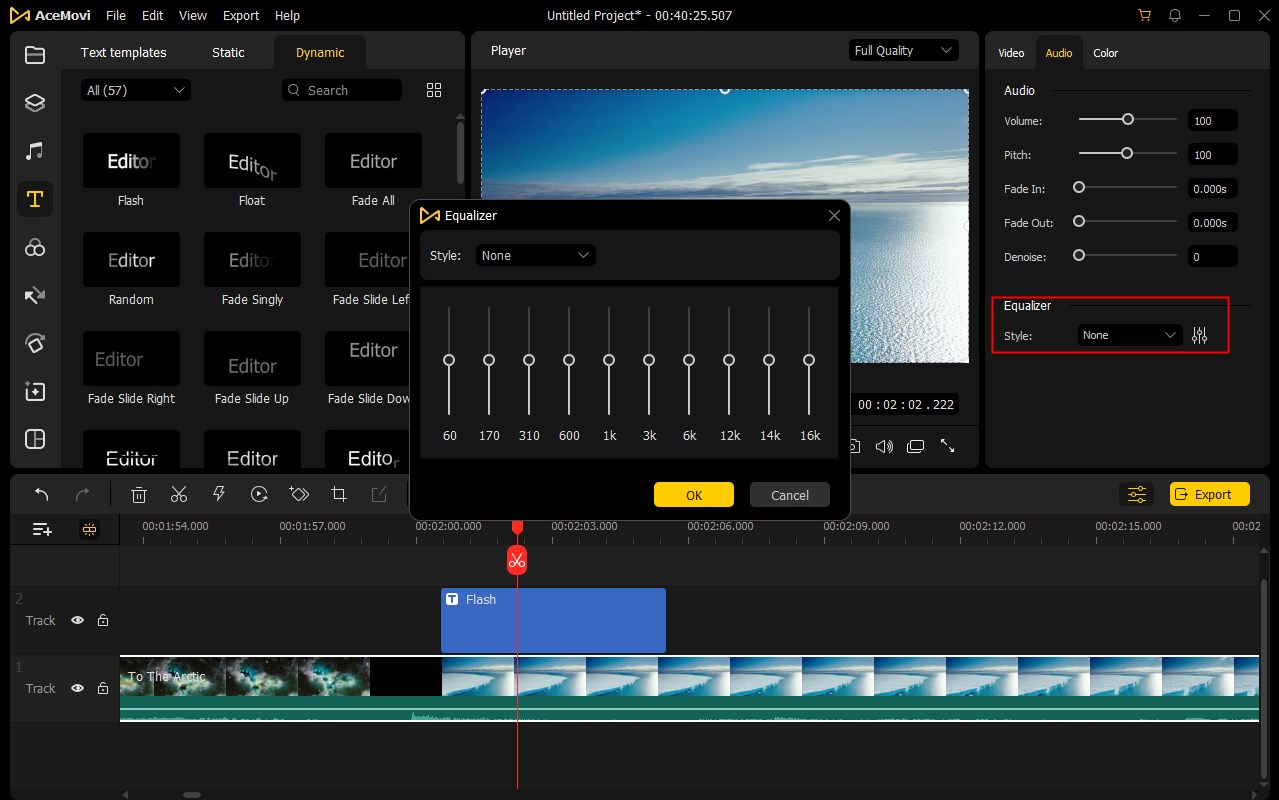
In the end, you can choose an audio equalizer or customize it to get a better listening experience. The Audio Equalizer (EQ) allows users to raise and lower the loudness of an audio frequency.
To use EQ, just click on the audio clip and open the Audio panel by pressing the Properties icon. Select a preset from the Equalizer dropdown list, such as Full Bass, Full Treble, Large Hall, Pop, Rock, and Custom. You can also click the Equalizer icon and adjust the gain based on your preferences in the popup window.
