
No matter what type of video someone has recorded, if the video quality isn't right, the video-watching experience won't be good either. This is why the internet is overloaded with a wide range of video quality enhancer software. What one will typically notice while exploring different tools to improve video quality is that every one of them promises to be the best. But it's only when one starts to use it that they realize that's far from the truth.
If you have a few videos whose quality of resolution and FPS you would like to enhance, this guide will introduce you to the best video enhencers that has been tested and rigorously reviewed for your sake. So, without further ado, let's start our journey.
- The Best Video Quality Enhancement Software in Windows & Mac
1. AceMovi Video Editor (Tutorial to Increase Resolution)
 2. TunesKit Video Converter
3. Lightworks
4. OpenShot
5. Topaz Video Enhancer AI
6. AVCLabs Video Enhancer AI
7. Adobe Premiere Pro
2. TunesKit Video Converter
3. Lightworks
4. OpenShot
5. Topaz Video Enhancer AI
6. AVCLabs Video Enhancer AI
7. Adobe Premiere Pro
- 5 Tips for Producing High-Quality Videos
7 Best Video Ehancement Software for Mac & Windows
Now that you’ve learned a few techniques to make a professional video correctly, it's time to disclose the best video enhancer software. With the help of these tools, you’ll be able to enhance the quality of your videos in no time. Since video content is in demand these days, ensure your videos reach the right set of audiences in the right way.
Top 1. AceMovi Video Editor
AceMovi is a user-friendly, multipurpose video editor and will let you enhance and edit your footage intelligently. It supports up to 4K and 60FPS output options. If you are new to AceMovi and looking for free video enhancer, get its trial version that is free and has no expiry.
When it comes to enhancing a video with AceMovi. You can improve both video and audio files with a couple of clicks. Trimming out unwanted clips, cropping out black bars, and converting the audio bit rate and frame rate are at your disposal.
As for compatibility, AceMovi works seamlessly on both Mac and Windows 10. The interface is straightforward, meaning even if you are not a pro, using it won't be a hassle. Many elements and resources are available, including stickers, music, sound effects, transitions, and filters.

AceMovi Video Enhancer
Security Verified. 10,269,300 people have downloaded it.
- Software with free trial versions
- Convert video resolution easily
- 480p, 720p, 1080p, & 2160p are available
- Multi-track timeline
- High-quality formats supported
- MP4, WMV, MKV, DivX, and more
- Improve file quality automatically
- A plethora of elements and effects
Top 2. TunesKit Video Converter

Another good video enhancement software to try is TunesKit Video Converter. This is easy-to-learn video enhancer software that is available for free download on both Mac and Windows. Besides, this software is able to rip DVD movies without a couple of clicks.
It comes loaded with multiple video formats, such as WAV, MKV, DivX, MP4, and so forth, as well as features a series of video editing tools of key-framing, split-screen, color adjustments, and resolution settings. With TunesKit Video Converter, you can import batch video files to the Media for enhancing quality.
Pros:
- Up to 60FPS & 3000 Kbps
- DVD and iOS folders
- Hundreds of formats given
- Export to AutoFit format for webs like YouTube, Facebook, Vimeo, and FLV
- Clean timeline
Cons:
- For free licenses, you can download 1/3 video files
Top 3. Lightworks
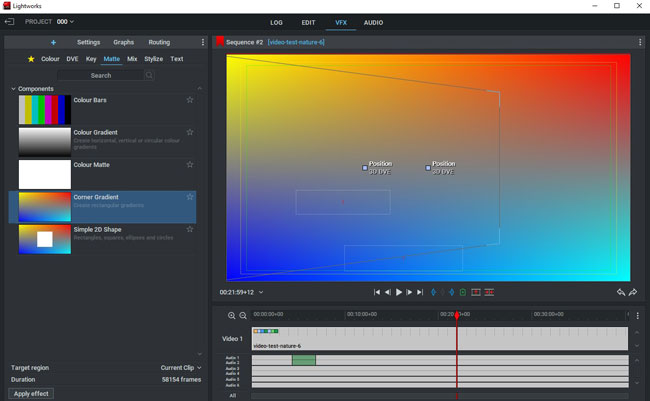
For anyone wanting to create high-quality and professional videos, you must try Lightworks. When it comes to system requirements, Lightworks is a robust video enhancement tool for Linux, Mac, and Windows.
It has many advanced-level video editing features, such as custom format, Apple ProRes decoding, 10-bit export, motion graphics, advanced tilting, MP4 and H.264 support, and more. Although Lightworks is a fantastic video enhancer software, it is unsuitable for beginners since it has a steep learning curve.
Pros:
- A mountain of VFX
- Pro panel for enhancing video color
- Sound waveform
- Apple ProRes decoding
- Saves your editing automatically
Cons:
- With the free version, only MP4/Codec H.264 with 720p resolution can you set
Top 4. OpenShot
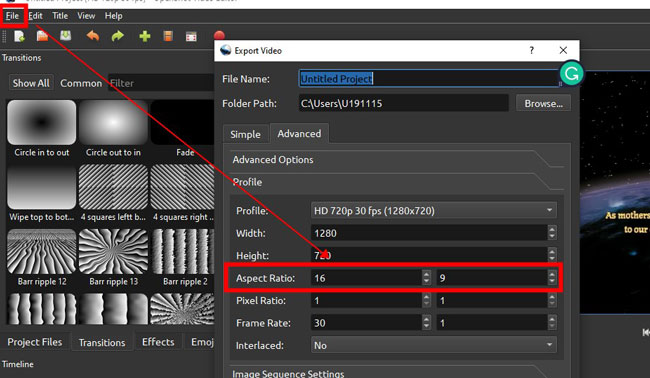
If you’re searching for open-source video quality enhancer software, OpenShot is ideal for commercial and personal use. You can try it for free without any hassle. One good thing about OpenShot is that it is trusted by companies such as Comcast, Deloitte, etc. So, this should tell you that it is a good video enhancer software.
Users are allowed to import multiple files to the timeline and choose the improve their quality via parameter settings of output format and aspect ratio. Although there are no music libraries that can be picked up, you can upload your own soundtracks to edit and enhance.
Pros:
- Cross-platform and no watermarks
- High-fidelity file transitions
- Multiple tracks on the timeline to manipulate batch files
- 3D subtitles
- Improve file bit rate
Cons:
- There is no built-in music resource
- This software cannot operate 8k files
Top 5. Topaz Video Enhancer AI
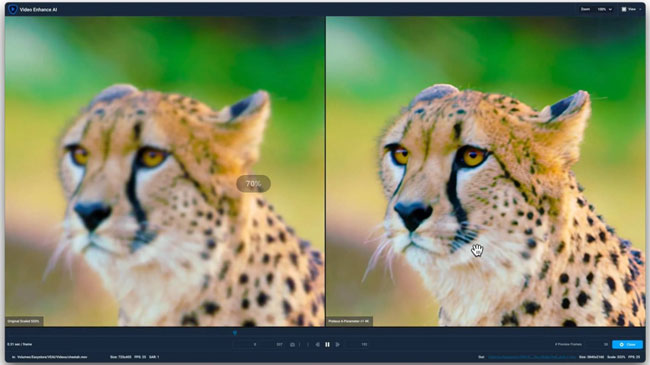
If you are a professional video maker and looking for a video enhancement tool that will enhance the video quality of your videos in the best way, you should consider Topaz Video Enhancer AI.
No, it's not free and pricey, but if you have the budget, try it. It uses machine learning to enhance the quality of videos. The result is glitch-free, sharp, and flawless videos. Topaz Video Enhancer AI is available for both Mac and Windows users at present.
Pros:
- Convert SD to HD and HD to 4k/8k
- Denoising and removing grain from videos
- Support 60FPS
- Slow-motion effect
- Frame sampling and blending
Cons:
- It’s an expensive option for $199.99, and in fact, some of the features that are offered by some cost-efficient tools like AceMovi and OpenShot
Top 6. AVCLabs Video Enhancer AI
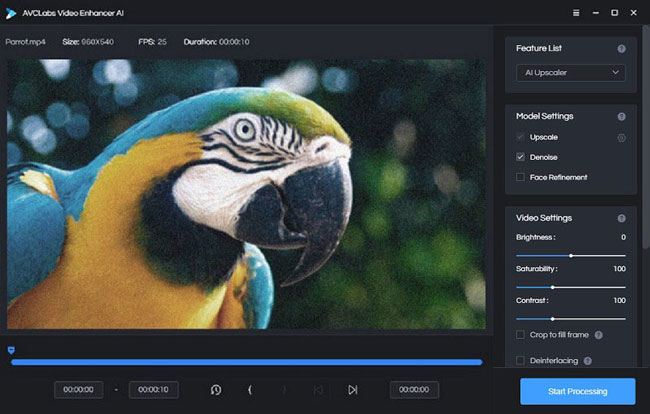
As a free video enhancement software, AVCLabs Video Enhancer AI is another good contender. It is available for Windows 11/10/7 users. The same as Topaz, AVCLabs also uses AI to uplift the quality of a video.
What it does is it scans the video and analyses it properly. Once done, it takes care of the video resolution, color enhancement, denoising, sharpening, and color correction. You will enjoy using AVCLabs Video Enhancer AI if you have low-quality videos.
Pros:
- Easy-to-understand guides
- Convert fps up to 60
- Reverse audio and video clip
- Crop out unwanted parts of your videos
- Deinterlacing feature
Cons:
- There is only one track for the video quality enhancement project
Top 7. Adobe Premiere Pro
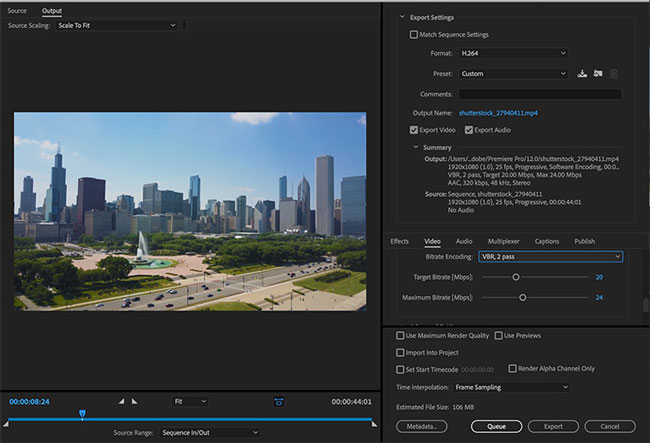
Finally, we have Adobe Premiere Pro, which is arguably one of the most used video editors and enhancing software. It is available for both Mac and Windows users and lets you enhance the quality of videos without any fuss.
Even if you need to enhance a large amount of footage, Adobe Premium Pro will do that for you. Some aspects to boost video quality that this tool can look after are tone, contrast, colors, output quality, dimensions, format, and a few more.
Pros:
- Great color matching
- Cinematic filters
- Export to social channels bluntly
- Online user guides provided
- Edit Full HD, 4K, or even 8K clips
Cons:
- Hard-to-learn user timeline
- Registration required even downloading the trial version
More Tip about Making a High-Quality Video (5 Tips)
Before sharing the top video enhencer software, why not understand what it takes to make a high-quality video? In this case, you’ll save a lot of time and make workflow efficient. There are a few basic tips that every video editor can try and ensure the video their shooting is up to the mark.
Tip 1. High video resolution & bit rate
| Type | Video Bit Rate, Standard Frame Rate [24, 25, 30] | Video Bit Rate, High Frame Rate [48, 50, 60] |
|---|---|---|
| 2160p (4k) | 35 - 45 Mbps | 53 - 68 Mbps |
| 1440p (2k) | 16 Mbps | 24 Mbps |
| 1080p (Full HD) | 8 Mbps | 12 Mbps |
| 720p (HD) | 5 Mbps | 7.5 Mbps |
| 480p (SD) | 2.5 Mbps | 4 Mbps |
| 360p (LD) | 1 Mbps | 1.5 Mpbs |
While capturing a video, ensure that you are shooting in high resolution - 1080p or 2160p. Videos that have high-resolution always look better. On top of that, you need to set corresponding settings of video bit rate and frame rate based on the requirements.
If you’re using your mobile phone, record a video with the back camera rather than the front camera. If using a camera, look for cameras with high resolution settings. If you are not a professional, any decent camera with a good resolution will do. Just do a bit of research before buying one. By the way, don’t forget to check the storage left.
Tip 2. Stable Recording

While recording a video, there is one big thing that you should always be mindful of, and that's stability and focus. If you want your videos to look standard, you need to hold the camera still to keep every frame stable. See if the camera you are using has a built-in image stabilization option. If yes, keep it enabled so that in case you shake a bit, the video doesn't look out of focus.
Tip 3. Fit Aspect Ratio
The aspect ratio is another critical point. If you didn't know already, the aspect ratio decides how your video will look once you are done shooting. However, the aspect ratio must be accurate if you plan to share the video on multiple platforms. If you want the best-fit aspect ratio and want the video to fit into any screen, try the widescreen ratio, which has a 16:9 ratio and is commonly used.
Tip 4. High-Quality Video File Format
Try to save your videos in MP4 or otherwise known as MPEG-3 format. This is the most widely recognized format accepted by most digital platforms and devices. So, if your device saves a video in, let's say, MOV format, but if someone tries to play the video on a device that doesn't accept MOV format, what will happen is the video will become unplayable.
Tip 5. Proper Audio Settings
You can't have a video without audio in case it’s a dumb show. A video without audio settings is almost the same as seeing a static image. Moreover, poor audio quality won't do any good to the video. In case of poor audio quality, the worst that can happen is viewers stopping the video in between. So, ensure that the audio settings of bit rate (Kbps) and pitch are accurate and each sound is getting recorded seemly.
Lastly
The video enhancers we have mentioned here are thoroughly reviewed, meaning you can try any of them after downloading. What we’ll recommend to the readers is if you are a beginner, don't invest in any tool randomly. Take your time and try the free trial first before making a decision. AceMovi may be a good choice to be your first try.