
Have you ever thought about giving life to a still photo? Well, this is absolutely accessible for almost everyone who wants to enhance their pictures. Thanks to modern technology, you can now make a moving picture easily in several methods - Apply an animation, add animated texts or stickers, use a moving background, or try the AI tool to make moving photos.
Indubitably, all these elements and effects bring life to your picture and you'll have a blast making it. Right now, follow me to discover how to make a picture move in simple steps!
- Method 1. The Best Software to Make a Moving Picture in Windows & Mac

- Method 2. How to Create a Face-Animated Image Online
- Method 3. How to Make Moving Photos on iPhone & Android
- Extra Tips to Enhance Your Moving Photos
TunesKit AceMovi: Easily Create a Moving Photo on Computers
In this part, I'm going to show you the step-by-step user guides to make motion picture. Before getting started, make sure that you've prepared all the pictures you want to edit. And to make a moving picture, you'll need software that can load still pictures and animated videos.
TunesKit AceMovi is the best choice for this job. You can load as many pictures, GIFs, or Videos as want and edit them right away on the timeline. With an abundance of animated texts, effects, transitions, and animations, users can easily make a moving picture.
As a versatile video editor that provides multiple effects and transitions, AceMovi comes with a screen recorder that can record images as well as the sound coming out of your computer. Besides that, AceMovi is mounted with features like split screen, color filters and music library. The user-friendly interface comes with all the effects and tools you need to embellish your media.

AceMovi Photo Editor
Security Verified. 6,113,097 people have downloaded it.
- Edit batch images or videos
- Crop unwanted portions
- Export for YouTube or Facebook
- Pro color grading
- Convert images to GIFs
- Photo slideshow maker with music
- Record screen or take a snapshot
User Guides: How to Make a Picture Move by AceMovi
Next up, I'm going to show you how to create a moving picture in TunesKit AceMovi. Before you edit your pictures, make sure that you have already installed TunesKit AceMovi on your computer, this software currently supports Windows and Mac systems.
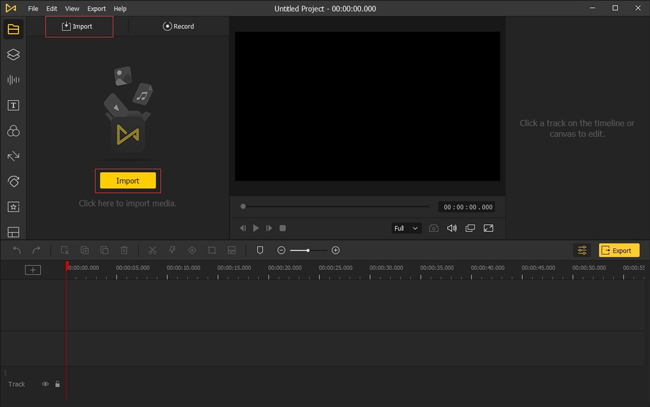
Import files and add them to timeline
Open TunesKit AceMovi on your computer, then import your photos to the media box. You can click on the "Import" button to upload or directly drag and drop the media f
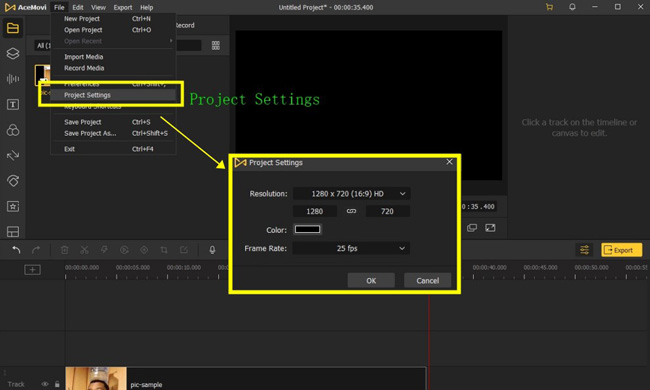
Set preference about the output video
When it comes to the presets, you'll need to go to "File" and "Project Settings" to set up the possible results, including the resolution, background color, and frame rate. When finished, click "OK" to save the settings. You can customize the parameters for different social media.
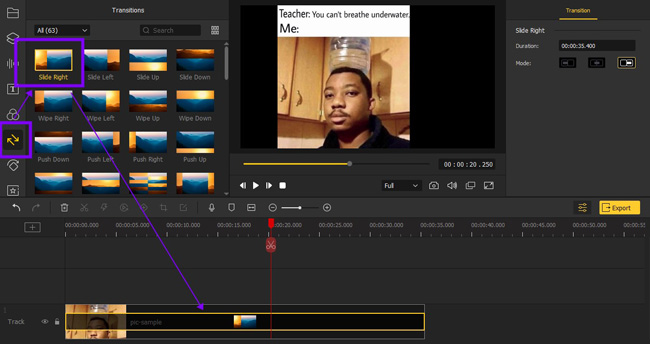
Make motion video: Transition/Animation
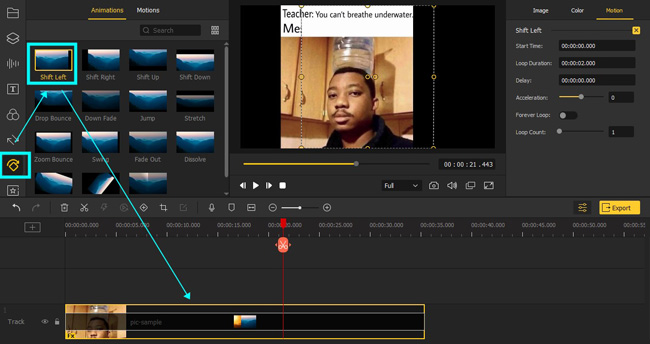
Now go to the left-side bar, and click the "Transition" to add a sample from the stock at the start or end of your photo. You can adjust the duration of the transition in the top right panel or directly drag the transition on the timeline to fine-tune it.
Then tap on "Animation" to add animation and motion to your photo to make it active. To control the animation, click on the photo track, then turn to the top right panel. Under "Motion", there you can change the duration, acceleration, and loop count of the highlighted animation. Now, play the effect to check whether it suffices you.
Export edited video
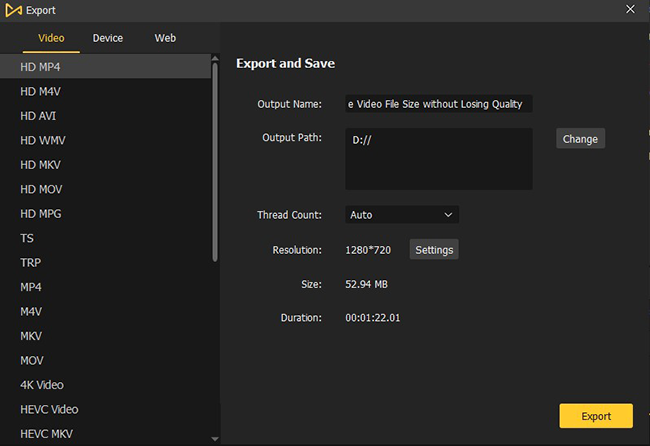
Once done editing your picture, click the "Export" button on the middle left and export your video. Click "Settings", you'll be able to choose the output parameters. And by clicking the "Change" button, you can change the output location.
The following video tutorial will help you understand those steps more.
Method 2. Cutout.Pro: How to Make a Moving Profile Picture Online
Apart from TunesKit AceMovi software, you can choose to create a moving photo online, and the pick is called Cutout.Pro. What makes it popular is that users are empowered to animate the portrait in their photo and then turn the image into a video automatically. On top of that, downloading this program on cell phones is supported. Here is the tutorial you can learn.
How to Make a Picture Move via Cutout.Pro
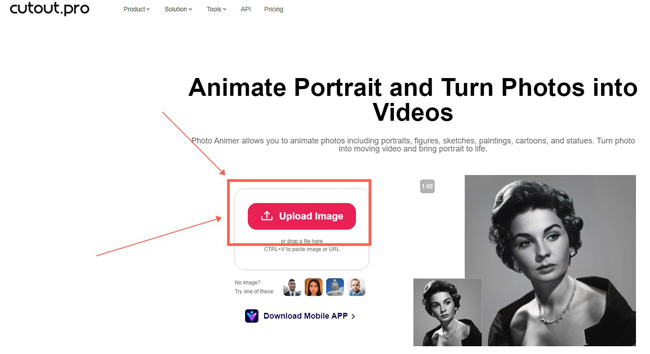
Step 1. Browse the Cutout.Pro on any browser, afterward, add your images to the interface. Surprisingly, you can add uploading files by the media URL.
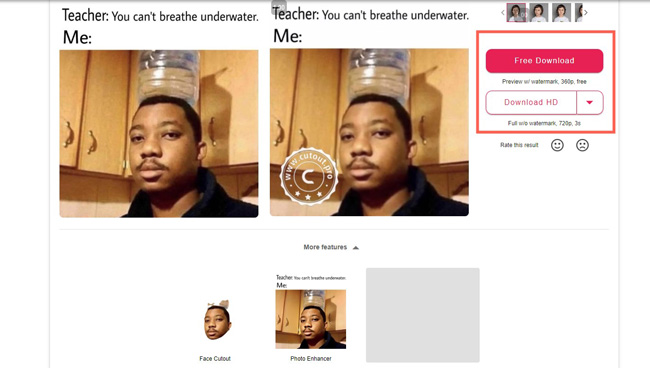
Step 2. The window is able to play the moving picture in real-time. Once you think it is okay, you can change the output quality in the right-side area. However, there is a watermark on your final media if you're not a premium user. On top of that, face cutout and photo enhancement are embedded on the page.
Method 3. KineMaster: How to Make Moving Pictures on iPhone & Android
We usually take a photo and save them to the album of our smartphones. Nevertheless, editing photos and videos are different on your computer because the screen is small and apps are unfit for batch files. If you want to make a fast moving picture slideshow or merely create moving pictures, KineMaster can be a good option, which is a one-stop tool with horizontal workflow. Just continue to follow us.
How to Make a Picture Move via KineMaster
Step 1. With that said, KineMaster is available for both iPhone and Android. You can find and download it inside the app store. Upon the interface, you can select images from the album.
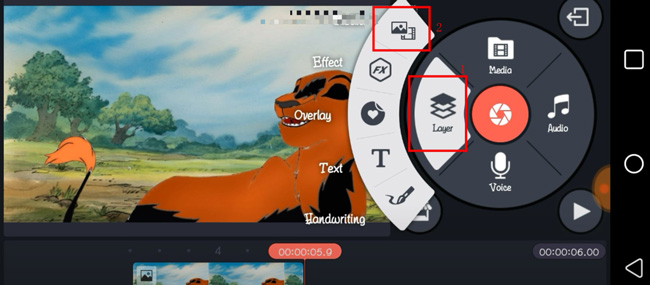
Step 2. The first thing you need to do is create a new layer. To do that, click "Layer" from the slider and hit the first option. Then, you can add a new photo to the timeline.
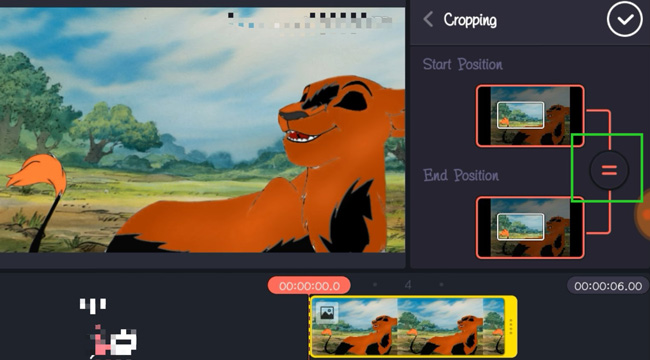
Next up, crop out some portions from your phot using the "Cropping" feature. And you need to link them together.
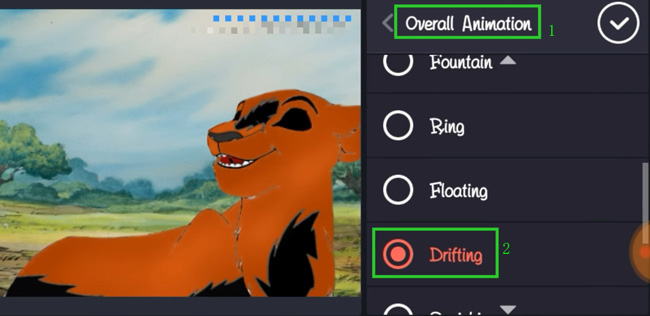
It is time to apply animation to your photo. Go to "Overall Animation", and select an animation sample from the interface as you want. You can try and play each sample with the performance monitor. You will find the picture is moving based on the effect.
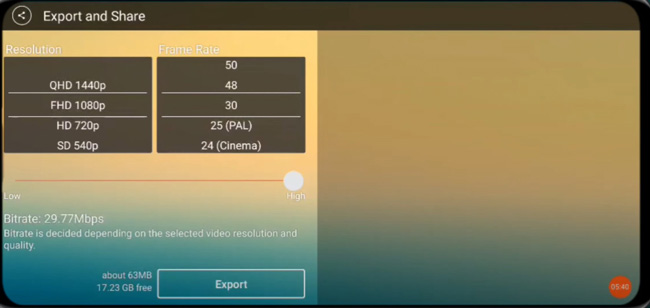
Step 3. The downloading button is set on your left hand. In the final step, manipulate the resolution from QHD 1440p, FHD 1080p, HD 720p, or SD 540p are supported. It's available for users to upgrade the frame rate.
3 Extra Tips to Polish Your Moving Pictures on Computers
Besides transitions and animations, you can do more editing in TunesKit AceMovi to make your moving picture stand out. Here're some of the tips to embellish your moving photo with more features in AceMovi. Let's see it!
1. Add Animated Captions
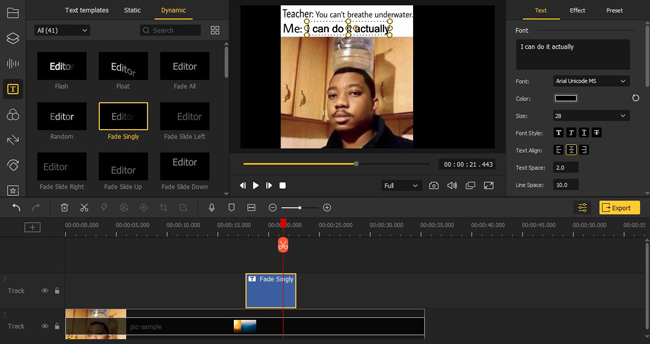
Add an animated caption to explain or tell a joke on your moving photo can easily catch viewers' eyes. Click on the "Text" icon on the left menu. Under the "Dynamic" tab, choose a ready-made text template and drag it onto the timeline.
To edit the text, click on the text track and head over to the top right panel. There you can change the scale, position, color, font, size, and background of the text. You can add multiple texts to the track.
2. Apply Filters
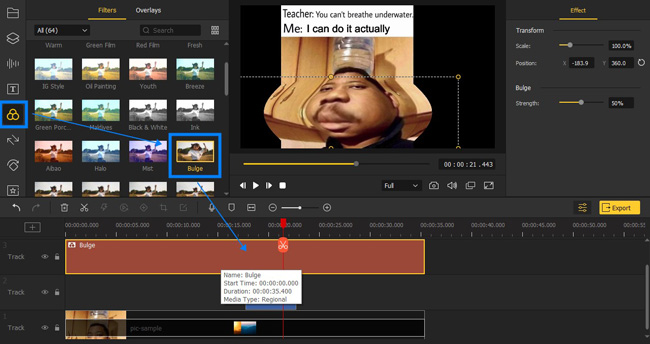
If you're crazy about those fancy color filters on Instagram or TikTok, you can now get it and overlay a filter to your media on TunesKit AceMovi. Click on the "Filters" icon on the left menu, then apply a filter on top of your moving picture. You can adjust the filter on the top right panel to make it fit into the picture.
3. Put Sound Effects
Sound effects can be unexpected surprises to viewers. For adding SFX to videos, click on the "Audio" icon on the left menu. Under the "Sound Effects" tab, drag the sound effects onto the timeline. You can directly change the duration of the sound effect on the timeline. You can change the volume or convert the pitch on the interface as well.
The Last Line
You may find that the three moving picture makers in this post provide you with different technologies and effects on how to make a picture move. In fact, you can discover more fantastic features and functions from them on your device like split-screen and green screen, and finally, share the great content on your social account. TunesKit AceMovi is the most recommended on among them. But which one you choose is still up to you. Try them personally.