

Updating the audio in your YouTube videos can breathe new life into your content, whether you're refreshing old videos or enhancing new ones. Whether you're looking for ways to correct audio issues, add background music, or insert voiceover, replacing audio is a straightforward process. In this guide, we'll walk you through the steps to replace audio in a YouTube video seamlessly.
- Method 1. How to Replace Audio on YouTube Studio
- Method 2. How to Change Audio on YouTube Video via TunesKit AceMovi

- FAQ about Audio in YouTube Videos
Method 1. How to Replace Audio on YouTube Studio
When you want to edit your YouTube video on YouTube, YouTube Studio would be the best choice to edit your audio or replace it directly. But you should know that if your video has over 100,000 views, the replaced version may not be able to be saved on your channel. In addition, the replacing feature is only available for videos shorter than 6 hours. Now let’s see the detailed steps to replace audio in your YouTube video via YouTube Studio.
Step 1: Enter the YouTube website on your computer;
Step 2: Swipe down the panel list on the right of the YouTube home page to find the YouTube Studio option under the More from YouTube panel;
Step 3: Click the Content icon on the right to find the video you want to edit audio;
Step 4: Click the video and then click the Editor icon to enter the YouTube Studio video editor;
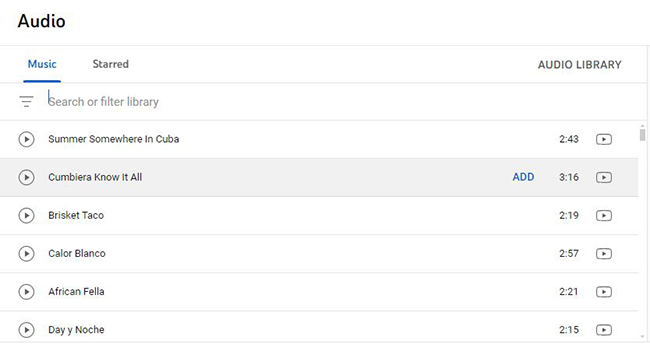
Step 5: If the original audio in this video is from the Audio Library of Studio, you need to click the Audio option under the Blur option to find the audio you added before and then click the REMOVE text to remove the audio from your video; and then you can find another audio you want and then click the ADD text to add it to your video;
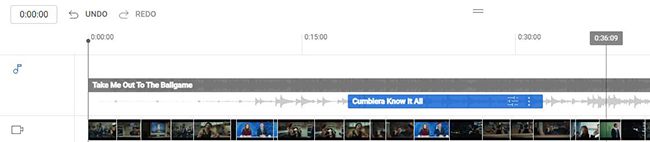
Step 6: Wait a minute until the audio is fully swapped; move your mouse to the left and right to adjust the length and which part you need to apply to your video;
Step 7: When you finish, you can click the SAVE button to save this change; this step will take a few minutes.
Method 2. How to Change Audio on YouTube Video via TunesKit AceMovi
In YouTube Studio, it is efficient to replace audio from library but you can only add audio from its Audio Library and you cannot edit your video and audio once you add audio from Audio Library. If you want to get a more convenient way to replace audio in YouTube video, the better way is to find a third-party video editor like TunesKit AceMovi.
TunesKit AceMovi Video Editor is a useful video editor that allows users to edit audio and video at the same time on different media tracks. What’s the most important is that in this video editor, you can add your own music from your computer to your video and you can create more creative videos for your viewers.
As a powerful video editor, AceMovi offers rich video editing features and all kinds of video materials including stickers, background music, text templates, filters, transitions, animations, and split-screen templates. It also supports social media output formats like YouTube so you can export a video in YouTube format.
AceMovi Editor for YouTube
- Basic & advanced features boost footage
- Multiple filters, transitions, & stickers
- User-friendly 3-panel workflow
- Import unlimited photos or clips
- Videos can be changed from 0 to 360 degrees
- Flip or mirror video to clone yourself
How to replace audio in YouTube video with your own file via TunesKit AceMovi
Download software
Download TunesKit AceMovi on your computer from its official website and then enter it; its subscribers will get no-watermark videos;
Add video to the timeline
Drag and drop your YouTube video to the media panel in AceMovi and then add it to the timeline;
Delete original audio
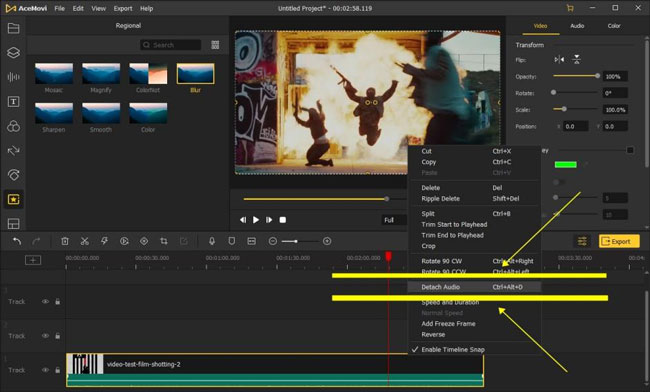
Right-click the video on the timeline and then choose the Detach Audio option to separate audio and video; click the audio track and press the Delete key on your keyboard to delete the original audio;
Add new audio to video
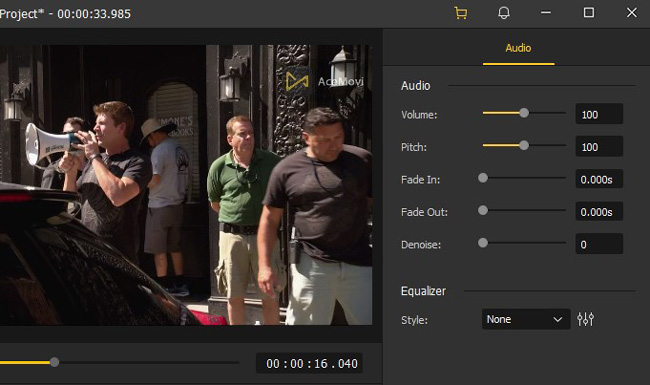
Import your new audio to the timeline and then adjust its length and the place it applies to in your video; on the left audio panel, you can make some detailed changes to your audio;
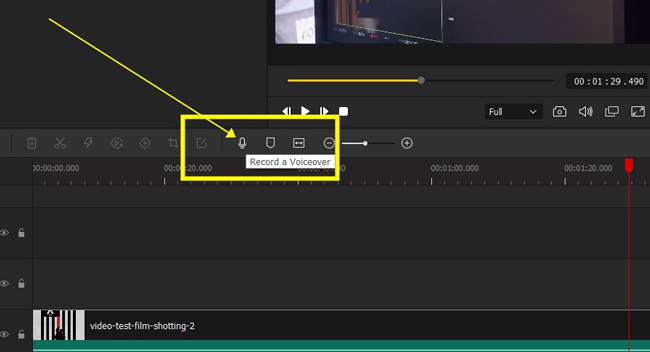
If you want to record your own voice and add it to your video, you can click the Record a Voiceover icon above the timeline to record your voice after you put your video to the timeline.
Export video
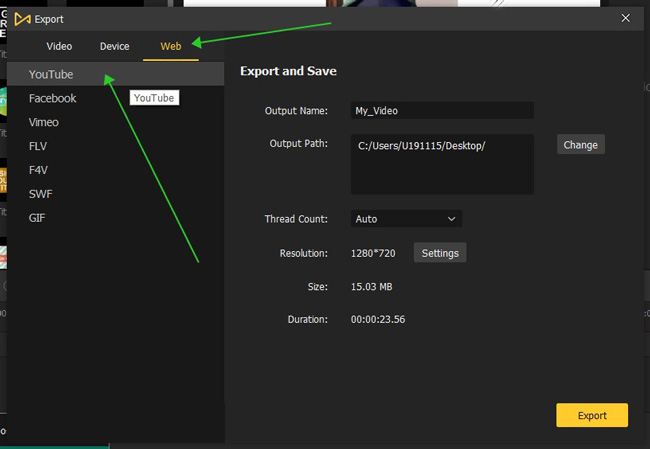
When you finish video editing, you can click the Export icon to enter the Export pop-up where you can customize the output format and save path for your video; click the Export again to save your video to your computer.
FAQ about Audio in YouTube Videos
1. Can I add audio to a YouTube video after posting?
Yes.YouTube Studio allows you to select music and sound effects from YouTube’s own Audio Library. But if you want to add something from outside the Audio Library, you have to do it locally on your computer and re-upload the video to YouTube.
2. How do I remove audio from a video and save it as MP4?
You can use TunesKit AceMovi to delete audio from a video and select MP4 as the output format when you export the muted video to your computer.
Conclusion
With these simple steps, you can easily replace audio in your YouTube videos to enhance their quality and appeal. Experiment with different audio options to keep your content fresh and engaging for your audience while staying compliant with YouTube's policies. YouTube Studio is more efficient but third-party video editors like AceMovi are more convenient and powerful for replacing audio in a YouTube video. You can get one from them to complete your work according to your requirements.