
Split screen is a special way to create content in a video that allows viewers to get different information from various angles of the same scene. As one of the most popular video editing software, Premiere Pro gives many ways to let users get split-screen videos. Now are you ready to elevate your video editing game with captivating split-screen effects in Adobe Premiere Pro? Look no further! In this comprehensive guide, we'll walk you through the process of doing split screen in Premiere Pro that will captivate your audience and enhance the visual storytelling of your videos.
- Method 1. Do Split Screen in Premiere Pro via Crop Effect
- Method 2. Do Split Screen in Premiere Pro via Linear Wipe Effect
- Method 3. Do Split Screen in Premiere Pro via Mask
- Bonus: Best Alternative Video Editing Software to Do Split Screen - TunesKit AceMovi
Method 1. Do Split Screen in Premiere Pro via Crop Effect
Crop Effect can help you create a video with several different screens. But this way has a short that you can just get rectangle screens. Therefore, if you need more split-screen layouts, you can refer to the next solutions. Here are the steps to get a split-screen video via Crop Effect.

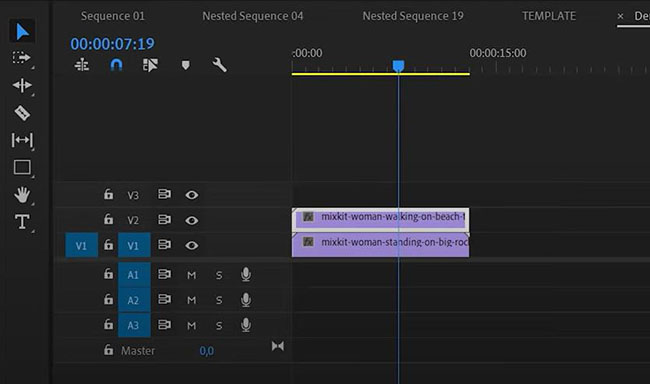
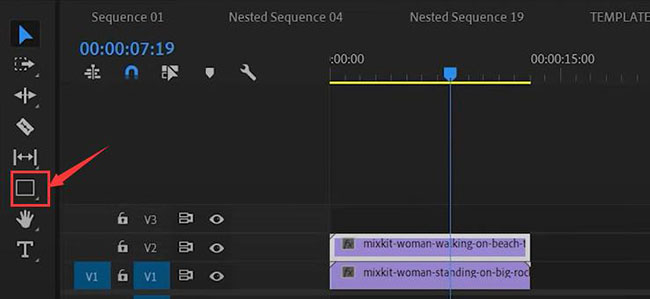
Step 1: Open your Premiere Pro and then put the videos you need to use in your final split-screen video on the timeline; you should make sure that those videos are in different tracks and aligned front and back;
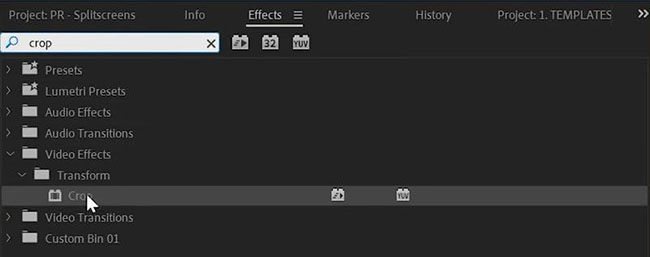
Step 2: Turn to the Effect panel in Premiere Pro to search for the Crop option;
Step 3: Drag the Crop option to each video on the timeline;
Step 4: Click one of the videos on the timeline and then turn to the panel on the left of the preview window and then click the Effect Controls panel;
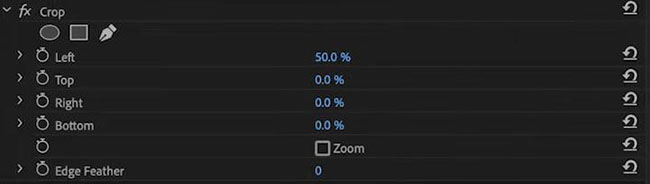
Step 5: Scroll down to find the Crop editing place; you can adjust the cropping scale by adjusting the value of Left, Right, Top, and Bottom; generally, if you change Left or Right, you will get a landscape split-screen screen; if you change Top or Bottom, you will get a vertical split-screen video;
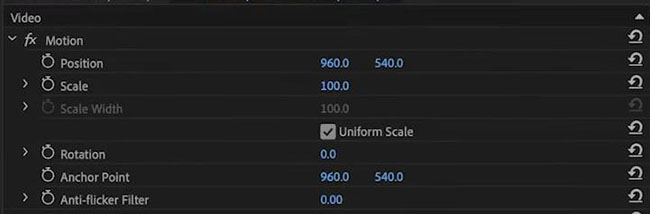
Step 6: You can adjust the position of those videos via the Position option under the Motion editing place;
Step 7: If you want to a gap between two videos, you can adjust the Crop value to leave it blank and click the Rectangle Tool to choose the blank scale to change its color on the right Essential Graphics panel.
Method 2. Do Split Screen in Premiere Pro via Linear Wipe Effect
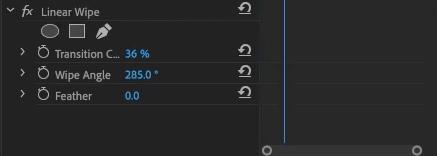
Linear Wipe can help you split your video screen into polygons with a straight line. This line can be rotated at any angle.

Step 1: Drag the videos you need to different tracks on the timeline and align them;
Step 2: Open the Effect panel and search for the Linear Wipe effect;
Step 3: Drag the effect to one of the videos;
Step 4: Go to the Effect Controls panel and find the Linear Wipe editing place to adjust the angle of the line;
Step 5: Turn to the Motion editing place to adjust the video’s position;
Step 6: In the same way, you can edit other videos until the whole screen is beautiful.
Method 3. Do Split Screen in Premiere Pro via Mask
This way allows users to customize the shape of the split-screen videos manually or with built-in shapes, oval and rectangle.

Step 1: Put your videos on the timeline and click one of them;
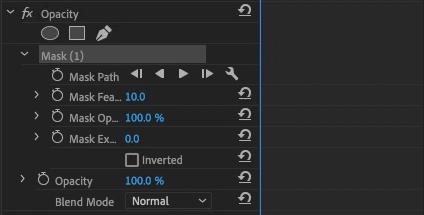
Step 2: Turn to the Effect Controls panel to click one of the icons under the Opacity option; here we will take the oval icon as an example;
Step 3: Adjust the position and scale of the video you just chose under the Motion option;
Step 4: If you want the boundary between two videos to be clear, you need to set Mask Feather to 0.
Bonus: Best Alternative Video Editing Software to Do Split Screen - TunesKit AceMovi
If you think Premiere Pro is too complicated, there is an easy alternative to do the same split-screen video. TunesKit AceMovi is a powerful video editing software that is suitable for both beginners and professionals. For split screen, it offers 30+ split-screen templates so users can apply them to their videos directly instead of designing manually.
Apart from split screen, AceMovi has many other video editing features and materials like filter effects, background music, and transitions. Those features and materials are free to use.

TunesKit AceMovi Video Editor
Security Verified. 5,481,347 people have downloaded it.
- Advanced Color Correction tools and algorithms
- Basic and advanced features that make your video better
- Multiple filters, transitions, text, sound effects, music
- User-friendly interface
- Import as many photos or footage as you want
How to make a split-screen video via TunesKit AceMovi
Prepare to edit video
Download AceMovi on your computer and then import your videos to the software by clicking the Import button;
Do split screen
Click the Split Screen icon on the left of the editing screen and then you will see all alternative split-screen templates;
Choose a template you like and then click the + icon to make the split-screen pop-up appear;
Drag and drop your videos to the number you like; on the right panel, you can adjust the details of your split-screen video;
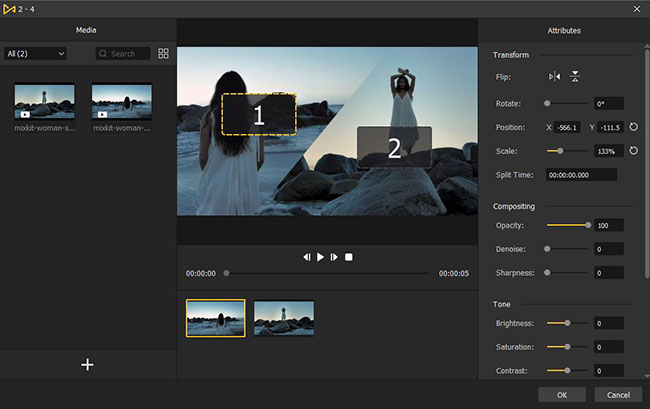
If done, you can click the OK button;
Export video
Click the Export button to enter the Export window; you can choose the format you want from the left options and set the save path and name of your video on the right of the window; click the Export button to save your video to your computer.
Conclusion
By following the step-by-step guide outlined above, you'll be equipped with the knowledge and techniques to do split screen in Premiere Pro that grab your audience's attention and keep them engaged from start to finish. Whether you're producing vlogs, tutorials, or cinematic masterpieces, incorporating split-screen effects into your editing repertoire will add a professional touch to your videos and help you stand out in a crowded digital landscape. If you need an easier solution, TunesKit AceMovi may be a good alternative for it just like the above tutorial. Hope you can get an excellent split-screen video.