
Creating cinematic slow-motion footage can add a dramatic and professional touch to your videos. Final Cut Pro provides powerful tools that enable you to achieve stunning slow-motion effects with ease. In this guide, we’ll provide you with a step-by-step walkthrough on how to do slow motion in Final Cut Pro.
- Part 1. How to Do Slow Motion Effect in Final Cut Pro [3 Methods]
- Part 2. Simple Alternative Video Editing Software for Doing Slow Motion - AceMovi
- Part 3. More Tips about High-quality Slow-down Video
Part 1. How to Do Slow Motion Effect in Final Cut Pro [3 Methods]
1.1 Via Retime
This method is adaptable for the whole video. If you want to know how to slow down certain video clips in a video, you can turn to part 2.
Step 1: Open the Final Cut Pro on your Mac; after that, import your video file to it and put it on the timeline;
Step 2: Click the video on the timeline;
Step 3: Click the Retime icon at the top left of the timeline to decide how to change your video; or you can press Command + R keyboard shortcut to open the Retime menu;
Step 4: Select the speed you desire on the Retime menu; if there is no speed you want, you can click the Custom option to customize your speed manually.

1.2 Via Blade Speed
Step 1: Upload your video to Final Cut Pro and drag and drop it to the timeline;
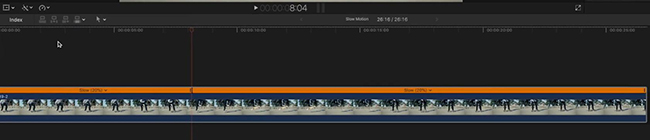
Step 2: Drag the playhead on the timeline to the place you want to start slowing down your video;
Step 3: Click the Retime icon at the top left of the timeline to choose the Blade Speed options from the pop-up;
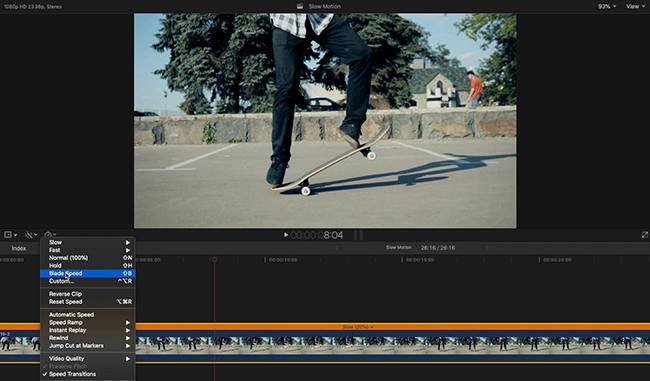
Step 4: Now you can see two retime drop-down arrow above your video; you can choose one of them to slow down it; or you can use the keyboard shortcut, Shift + B, to make Blade Speed work.
1.3 Via Frame Blending/Optional Flow
If you shoot a low frame rate video but still want to slow down your footage, using the above methods will make your videos look choppy because there are no enough frames to cover the duration. At that time, you need to use editing software to extend each single frame to last longer than just a single frame. Final Cut Pro has built-in features to solve this problem.
Step 1: Add your video to Final Cut Pro and put it on the timeline;
Step 2: Press Commend + R to open Retime menu above the video on the timeline;
Step 3: Click the Retime icon and move your mouse to the Video quality option; there are three options: Normal, Frame Blending, and Optional Flow; you can choose one of the later two options to make your slow-motion video smoother;
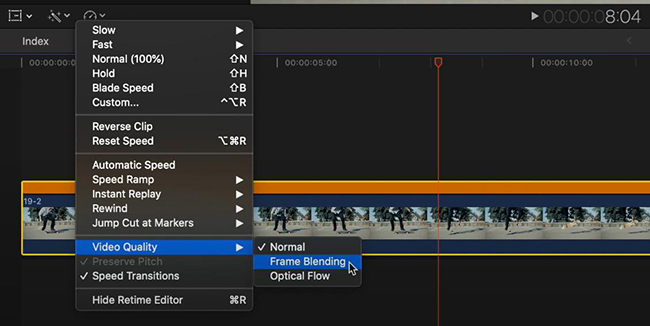
Frame Blending is a technique used to create smoother slow-motion or fast-motion effects by blending adjacent frames. When you slow down footage, there might be a noticeable jitter or stutter due to the reduction in frame rate. Frame blending helps to reduce this jitter by creating intermediate frames that blend the motion between two existing frames.
Optional Flow is an advanced retiming technique used for slowing down or speeding up footage while maintaining smooth and natural motion. Unlike traditional frame blending methods, Optical Flow analyzes the motion in each frame and creates new frames to fill in the gaps, resulting in smoother and more fluid motion.
Part 2. Simple Alternative Video Editing Software for Doing Slow Motion - AceMovi
For more simple tutorials about slowing down videos, a new video editor will be recommended now. This video editing software is TunesKit AceMovi which offers rich and powerful video editing features for users. In addition, there are lots of useful materials such as background music, sound effects, text templates, and filter effects.

TunesKit AceMovi Video Editor
Security Verified. 5,481,347 people have downloaded it.
- Advanced Color Correction tools and algorithms
- Basic and advanced features that make your video better
- Multiple filters, transitions, text, sound effects, music
- User-friendly interface
- Import as many photos or footage as you want
How to slow down video in AceMovi
Prepare to slow down video
Download AceMovi on your computer and then import your video from your computer to it;
Add the video to the timeline and click the video on the timeline;
Slow down video
Click the Speed icon to select the speed you want to change your video to; you are allowed to customize the speed for your video via the Speed Custom feature;
If you want to slow down a specific video clip, you can use the Split tool to select the clip and then click the clip to change its speed;

Polish the video
You can polish your video with the editing features in AceMovi;
Export video
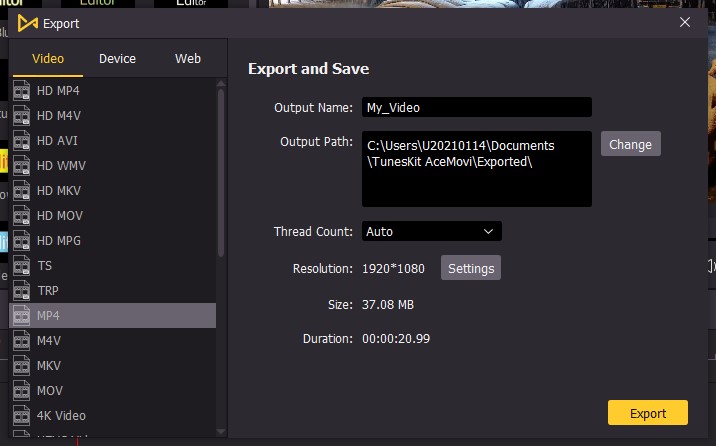
Click the Export button to enter the export pop-up; in this window, you can choose the output format for your video and save it to your computer.
Part 3. More Tips about High-quality Slow-down Video
Capturing high-quality slow-motion footage requires attention to several factors, from camera settings to post-production techniques. Here’s a guide to help you achieve better quality slow-motion videos:
3.1 Camera Selection:
Frame Rate: Choose a camera that can shoot at high frame rates (e.g., 60fps, 120fps, 240fps). The higher the frame rate, the smoother and more detailed your slow-motion footage will be.
Resolution: Higher resolution sensors can capture more detail, which can be beneficial when slowing down footage. Cameras that offer 4K or higher resolutions are ideal.
Sensor Size: Larger sensors generally offer better image quality, especially in low-light conditions. Cameras with larger sensors can produce cleaner and sharper slow-motion footage.
3.2 Camera Settings:
Shutter Speed: Set a faster shutter speed to reduce motion blur, especially if you're shooting fast-moving subjects. A general rule is to double your frame rate (e.g., if shooting at 120fps, use a 1/240s shutter speed).
Aperture: Use a smaller aperture (higher f-number) to increase the depth of field, ensuring that your subject remains in focus throughout the slow-motion sequence.
ISO: Keep the ISO as low as possible to minimize noise in your footage. This may require additional lighting when shooting in low-light conditions.
3.3 Shooting Techniques:
Stabilization: Use a tripod, gimbal, or steadicam to ensure smooth and stable footage. Unwanted camera movements can be more noticeable in slow motion.
Composition: Pay attention to your composition and framing. Interesting and well-composed shots can make your slow-motion footage more engaging.
Lighting: Good lighting is crucial for capturing high-quality slow-motion footage. Use natural light or additional lighting sources to ensure proper exposure.
3.4 Post-Production:
Editing Software: Use professional video editing software to edit your slow-motion footage.
Frame Rate Conversion: If your camera doesn’t shoot at extremely high frame rates, consider using frame rate conversion techniques or software to interpolate additional frames for smoother slow motion.
Color Grading: Enhance the colors and contrast of your footage through color grading to give it a more cinematic look.
Speed Ramp: Experiment with speed ramps to gradually transition between regular speed and slow motion within a single shot. This technique can add dramatic impact to your footage.
Sound Design: Pay attention to the audio as well. Slowing down audio can create a dramatic effect, but you might also want to add background music or sound effects to enhance the mood of your slow-motion video.
Conclusion
Creating stunning slow-motion footage in Final Cut Pro is easier than you think with these step-by-step instructions. Remember to shoot at a high frame rate, select compelling clips, and use speed ramps and the Retime Editor for professional-looking slow-motion effects. Happy editing!