

When you want to show more than one video on a screen, you may think of splitting screen which allows you to put different videos into one video. The way to do this task is up to your video editing software. Final Cut Pro is one of the most popular video editors among video workers, especially for Apple users. There are three different ways to split screen in Final Cut Pro. In this post, we will give you the most detailed tutorials on how to do split screen in Final Cut Pro via the three ways.
- Method 1. Final Cut Pro Split Screen via Cropping
- Method 2. Final Cut Pro Split Screen via Custom Generator
- Method 3. Final Cut Pro Split Screen via Draw Mask
- Bonus: Best Final Cut Pro Alternative - TunesKit AceMovi
Method 1. Final Cut Pro Split Screen via Cropping
Step 1: Add your videos to the timeline;
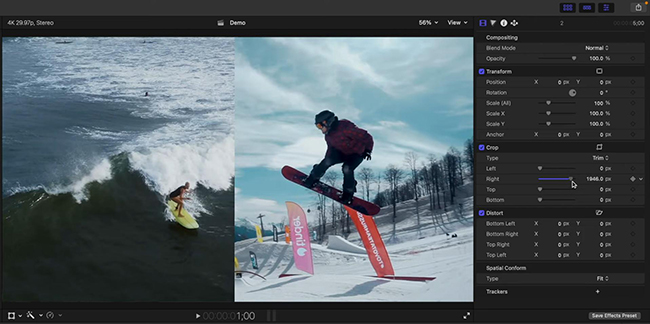
Step 2: Select one of those videos and then open the Inspector panel at the right of the screen;
Step 3: On the Crop part, adjust the size of the video until it satisfies you.
Method 2. Final Cut Pro Split Screen via Custom Generator
Step 1: Add your video clips to the timeline;
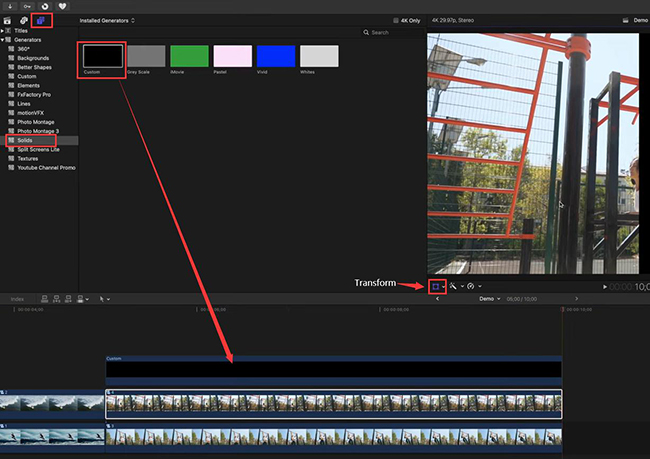
Step 2: Go to the Titles and Generators sidebar and then select the Generators > Solids options; drag the Custom generator to the top of the timeline and make it the same long as your videos;
Step 3: Click the Custom line and then go to the Inspector panel; on the Crop part to adjust the scale of Custom by the Left bar;
Step 4: Select the video under the Custom line;
Step 5: Click the Transform icon at the bottom left of the preview window to re-frame the video as you want;
Step 6: Select the Custom line and its under video at the same time and tap on the Option + G on your keyboard to combine those two into a compound clip;
Step 7: Press V to disable this clip;
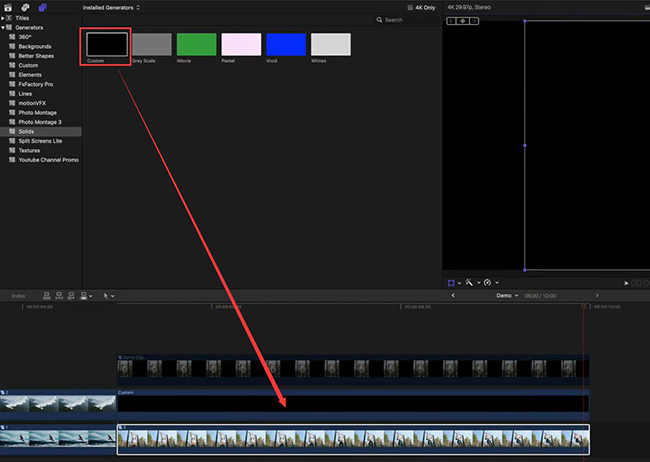
Step 8: Drag another Custom generator to another video clip above and make it the same long as the video;
Step 9: Click the Custom line and then turn to the Crop part of the Inspector panel to adjust the scale of the second video by the Right bar;
Step 10: Now do the same steps as the Step 4 ~ Step 6;
Step 11: Click the first compound clip and press V to re-enable it;
Step 12: Preview your video.
Method 3. Final Cut Pro Split Screen via Draw Mask
Step 1: Put your videos to the timeline;
Step 2: Click the top video on the timeline and press V to disable it;
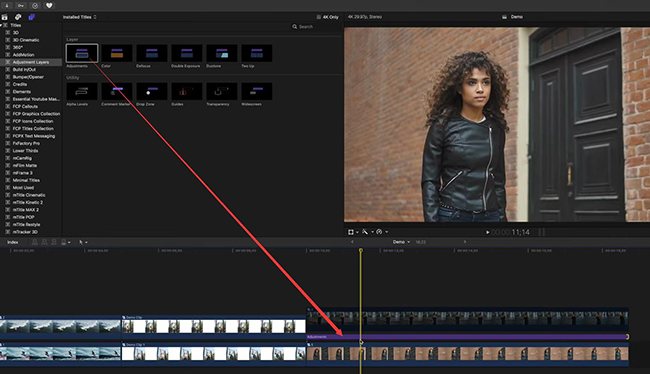
Step 3: Go to the Titles and Generators sidebar and then click the Title > Adjustment Layers options to drag Adjustments to the second video above and make it the same long as your videos;
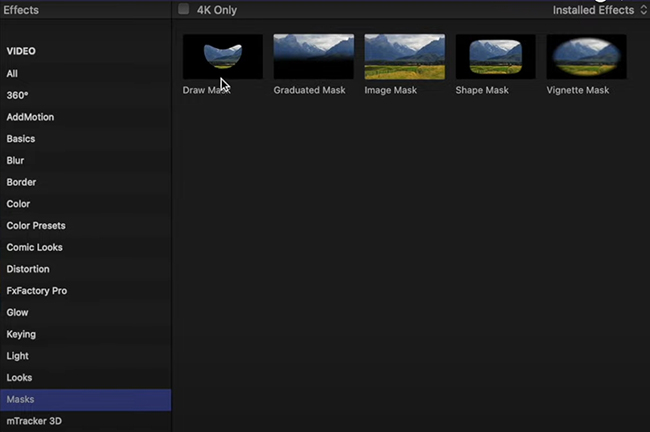
Step 4: Top on the Command + 5 key to open the effects browser;
Step 5: Click the Masks option and drag Draw Mask to the Adjustments layer;
Step 6: Click four points on your preview window to make a rectangle or a square;
Step 7: Go to the Effect part of the Inspector panel;
Step 8: Click the Transforms to make position X and Y 0;
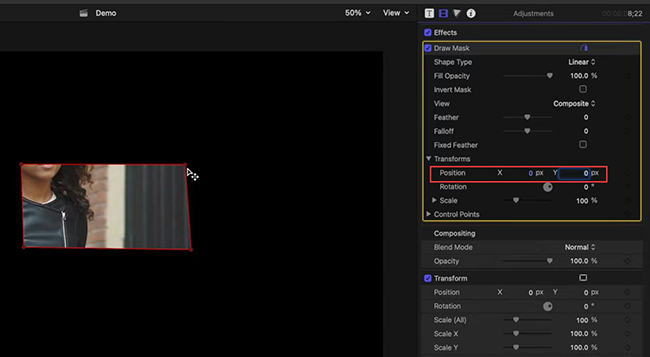
Step 9: Drag and drop the four points as you want to customize your split screen;
Step 10: Click the Transform icon to re-frame your second video;
Step 11: Click the top video on the timeline and then press V to re-enable it;
Step 12: Click the Adjustment layer on the timeline; press the Option key and drag and copy it to the top of the first video;
Step 13: Turn to the Inspector panel and click the Invert Mask square;
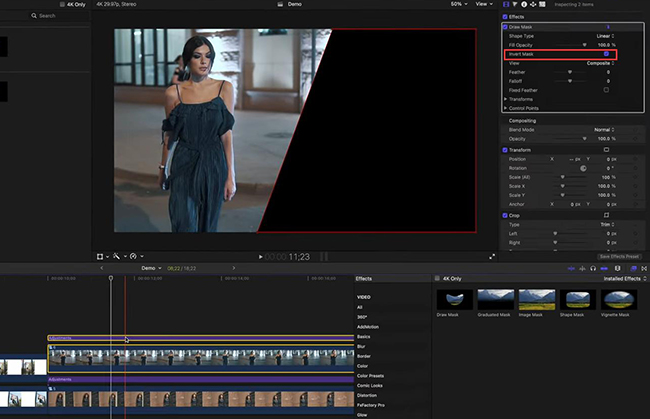
Step 14: Click the Transform icon to re-frame your first video;
Step 15: Combine each video and the adjustment layer above it into compound clips and finally preview your video
Bonus: Best Final Cut Pro Alternative to Split Screen- TunesKit AceMovi
After the above Final Cut Pro steps, you may find that it is really complex to do split screen in Final Cut Pro. To make this task easier, you can try to use TunesKit AceMovi Video Editor. TunesKit AceMovi is a powerful video editing software with various video editing software. What is the most important is that AceMovi offers 30+ split-screen templates that allow you to add your videos to those templates and you don’t have to design a split-screen template manually. The following part is the detailed steps to tell you how to do split screen easily and quickly.

TunesKit AceMovi Video Editor
Security Verified. 5,481,347 people have downloaded it.
- Advanced Color Correction tools and algorithms
- Basic and advanced features that make your video better
- Multiple filters, transitions, text, sound effects, music
- User-friendly interface
- Import as many photos or footage as you want
How to split screen in TunesKit AceMovi
Download and install software
TunesKit AceMovi to your computer, Mac or Windows PC and open it;
Split screen in AceMovi
Click the Split Screen icon on the left of the screen and then choose a split screen template from it by clicking the + button on each template;
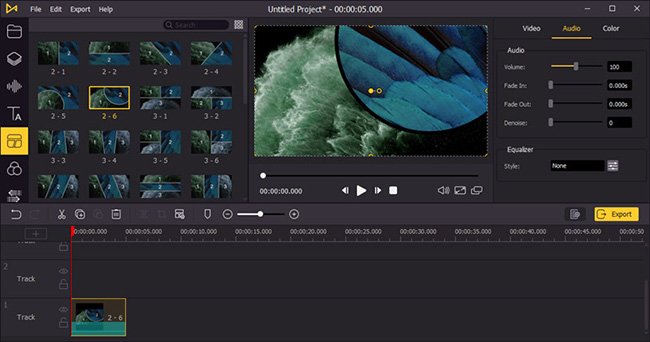
Click the Import button at the bottom left of the split-screen pop-up to add your videos to it;
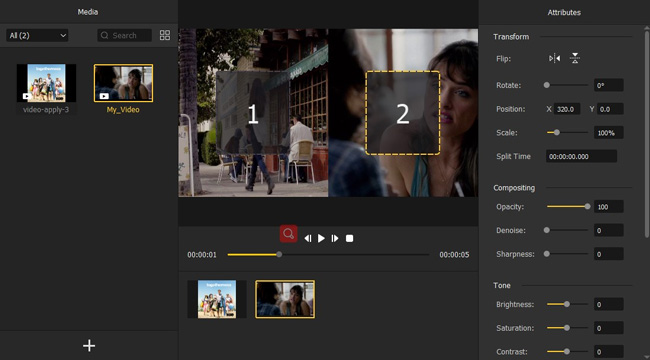
Drag your videos to the corresponding number on the preview window and then drag those videos on the number scale to adjust the showing scale of your video; You can also adjust the split-screen video by the Attributes panel; click the OK button to complete this step;
Export your video
Click the Export icon to enter the save page; in this pop-up, you can set the output format of your video and the saving location.
Conclusion
Final Cut Pro is an amazing video editor. But it is not the only way to do split screen in Final Cut Pro. We introduce an alternative split-screen tool - AceMovi, for you to do this task. Final Cut Pro gives users more freedom to design their split-screen templates, while AceMovi allows users to do split screen in a short time. They have different advantages. You can choose one of them according to your needs.