

Keyframes are an essential tool in video editing, allowing you to create dynamic motion, transitions, and effects in your projects. In Adobe Premiere Pro, mastering the art of keyframe opens up a world of creative possibilities, enabling you to precisely control changes in parameters such as position, scale, opacity, and more over time. Whether you're adding smooth transitions, animating text, or adjusting audio levels, understanding how to use keyframes effectively can elevate the quality and impact of your videos. In this guide, we'll explore the fundamentals of adding keyframes in Premiere Pro and how to leverage them to enhance your editing workflow. Let's dive in.
- Part 1. Add Keyframes to Graphic Images/Texts in Premiere Pro
- Part 2. Add Keyframes to Audio tracks in Premiere Pro
- Bonus: Best Premiere Pro Alternative to Add Keyframes - TunesKit AceMovi

Part 1. Add Keyframes to Graphic Images/Texts in Premiere Pro
Step 1: Import your videos and images to Premiere Pro; then you need to add them to the timeline at the bottom of the video editor; choose the image you want to add keyframes on the timeline;
Step 2: Turn to the top of the screen to click Edit > Effect Controls; if there is no Effect Controls, you can navigate it through Window > Effect Controls to enable it;
Step 3: Drag the playhead line on the right column to the point that you want to add a keyframe;
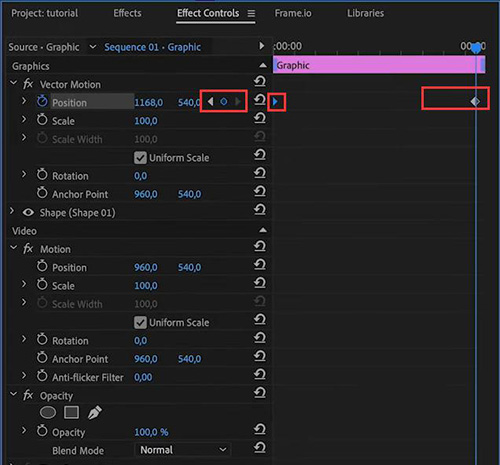
Step 4: Click the icon before the Position option under the Vector Motion option;
Step 5: Adjust the position of the image and drag the playhead line to the point that you want to end the moving; click the Add/Remove Keyframe icon to add the second keyframe to the image;
Step 6: If you desire that the image can move quicker to the position you have set, you can shorten the distance between the two keyframes;
Step 7: Preview the video designed by keyframes.
Part 2. Add Keyframes to Audio tracks in Premiere Pro
There are two plans to add keyframes in Premiere Pro when you want to get changeable audio.
2.1 Add Audio Keyframes in Premiere Pro on Effect Control
Step 1: Add your audio file to the timeline of the Premiere Pro and then click it on the timeline;
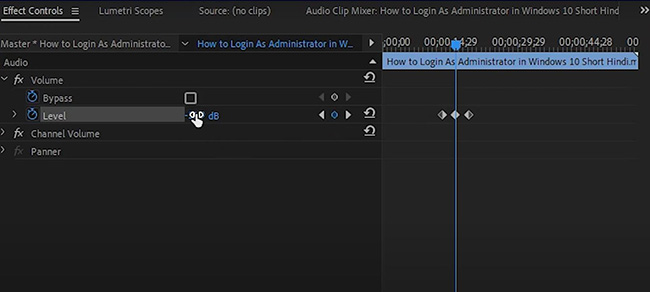
Step 2: Turn to the Effect Controls panel and find the audio points that you need to add keyframes on the right column;
Step 3: Drag the playhead to the first point and then click the Add/Remove Keyframe icon of the Volume > Level option;
Step 4: Drag the playhead to the second point and add a keyframe like the first one; so as the third one;
Step 5: Click the middle keyframe and adjust the volume of the audio between the first and second keyframe;
Step 6: Click the third keyframe and adjust the volume of the audio between the second and third keyframe;
Step 7: Preview the audio on the preview window.
2.2 Add Audio Keyframes in Premiere Pro on the Timeline
Step 1: Import audio to the timeline and click it;
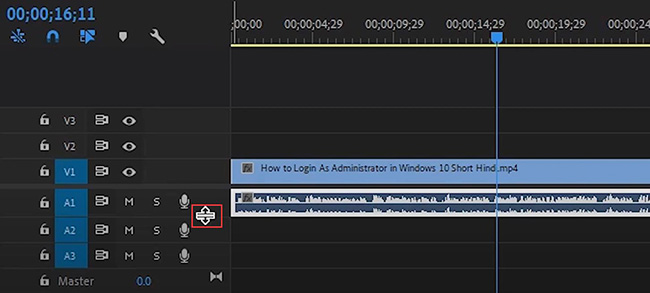
Step 2: Move your mouse to the position like the following picture to make your audio track wider until the keyframe icon appears;
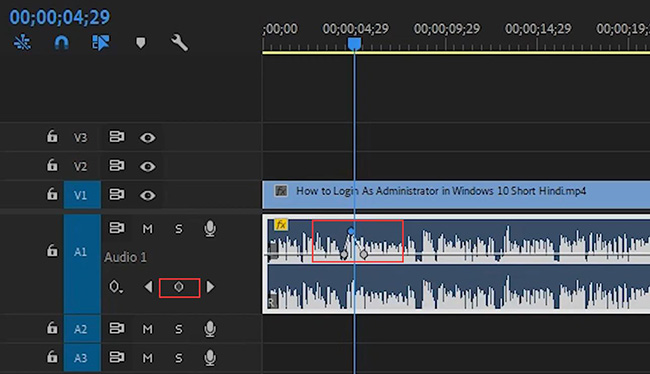
Step 3: Find the beginning point you want to set keyframe and click the keyframe icon ;
Step 4: Do the same steps as the first keyframe to add the second and the third keyframe on your audio track;
Step 5: Click the middle keyframe on the track and then drag it down or up to adjust the volume of the two audio clips;
Step 6: You can play the audio before you export it by the preview window.
Bonus: Best Premiere Pro Alternative to Add Keyframes - TunesKit AceMovi
Apart from Premiere Pro, there are many other software that can help you make active videos through keyframes. TunesKit AceMovi is one of the best Premiere Pro alternatives to add keyframes.
Keyframe is just one of the most useful features in AceMovi. Besides it, AceMovi allows users to add stickers, music, transitions, texts and other elements to their videos. Just as Premiere Pro, AceMovi is also a powerful video editing software for Mac and Windows PC. Different from other video editors, AceMovi offers a built-in Screen recorder for users. Every user can use it for free. You can use it to get related sources from your computer directly.

TunesKit AceMovi Video Editor
Security Verified. 5,481,347 people have downloaded it.
- Advanced Color Correction tools and algorithms
- Basic and advanced features that make your video better
- Multiple filters, transitions, text, sound effects, music
- User-friendly interface
- Import as many photos or footage as you want
How to add keyframes in AceMovi
Download and install software
Download and install AceMovi on your Mac or Windows PC;
Add files to AceMovi
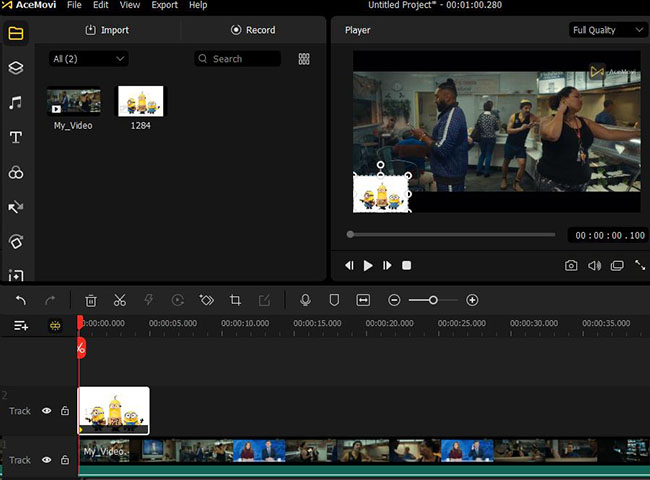
Drag and Drop your files to the media panel in AceMovi; after that, add those files to the timeline; Click the track that you want to add keyframes;
Adjust original status
Confirm the initial state before you add the first keyframe; after that, find the position that you want to make as the beginning of your action and move the playhead to it and click the Keyframing icon from the tool line;
Add the second keyframe
Find the position that you want to make as the end of your action and move the playhead to it; click the Keyframing icon from the tool line above the timeline;
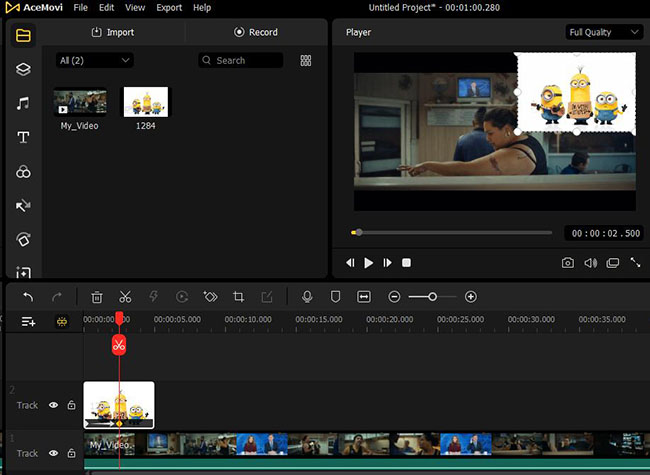
Adjust the end status
Adjust the position and other parameters of the element on the right of the editing screen;
Export the video
Preview your video on the preview window.
Conclusion
When you need to use keyframes to design your video, Premiere Pro must be a good software to help you do that task. The above tutorials can give you a hand when you are confused about that powerful video editor. If you need an easier helper, TunesKit AceMovi would be a good choice whose steps are not as complex as Premiere Pro. Hope you can get your satisfied video.