Are you finding a better way to make your video smoother?Do you need to make your video stand out to draw viewers' attention? Or apart from traditional video cutting, joining and splitting, do you want to learn more video editing skills? Whatever your needs are, you can benefit from this tutorial. In the following discussion, I will introduce a funny video editing skill: how to fade in and fade out a video. From the definition and advantages to the detailed steps to add fade in/out effects, users can learn a comprehensive knowledge about this topic.
- Part 1. What is Fade in/out and When to Use this Effect?
- Part 2. How to Fade in and Fade out a Video?
- Part 3. Final Words
What is Fade in/out and When to Use this Effect?
In video editing or graphics, fade in/out is a term used to achieve a transitional effect. Through fade in/out, the video images can gradually and slowly emerge out of or disappears into a black background. In the past times, it is frequently used in the post-production of film editing. Fade in/out overlaps two shots between video clips, usually at the start or end of the video.
Therefore, fade in/out can be used to let audience know there will a change in video clips. And the next time you intend to guide your viewers to know something different will occur in your video, you can try this transitional effect. Compared with traditional cuts, fades effect can make video natural and smooth to tell the video story.
How to Fade in and Fade out a Video?
A good video editing tool is necessary:
As we know, shooting a video requires a good camera. In the same vein, fade in and fade out a video also needs a good and powerful video editing software. For beginners who have just learnt to fade in/out skills, an easy-to-use tool is more important. All users know Adobe Premiere Pro is a professional tool, but here I am willing to introduce another users-friendly yet versatile tool. It is called TunesKit AceMovi Video Editor, and some users have praised its easiness and multifunctionality.
AceMovi is a desktop software with Mac and Windows versions. In terms of how to fade a video, AceMovi can ensure that a few simple clicks are enough. The Fade in and Fade out buttons are clearly shown in its interface. Besides this function, users can use AceMovi to enjoy more amazing things, like adding texts and animations, to make your video more vivid and alluring. Except for editing functions, user can also make their own video by it built-in recorder, like recording a webcam.

TunesKit AceMovi Video Editor
Security Verified. 5,481,347 people have downloaded it.
- Fade in and fade out a video in just a few steps
- Easy-to-use interface and multiple functions
- A library of special effect templates to make video animated
- Additonal ability to record a video
- Windows or Mac version for users to choose
Ways to fade in and fade out a video by AceMovi:
In this part, I will show the detailed steps to fade in and fade out a video by using AceMovi. And you may download and install the software and then follow the next steps.
Firstly, a video tutorial is prepared for you:
Step 1: Add media file and drag it to track
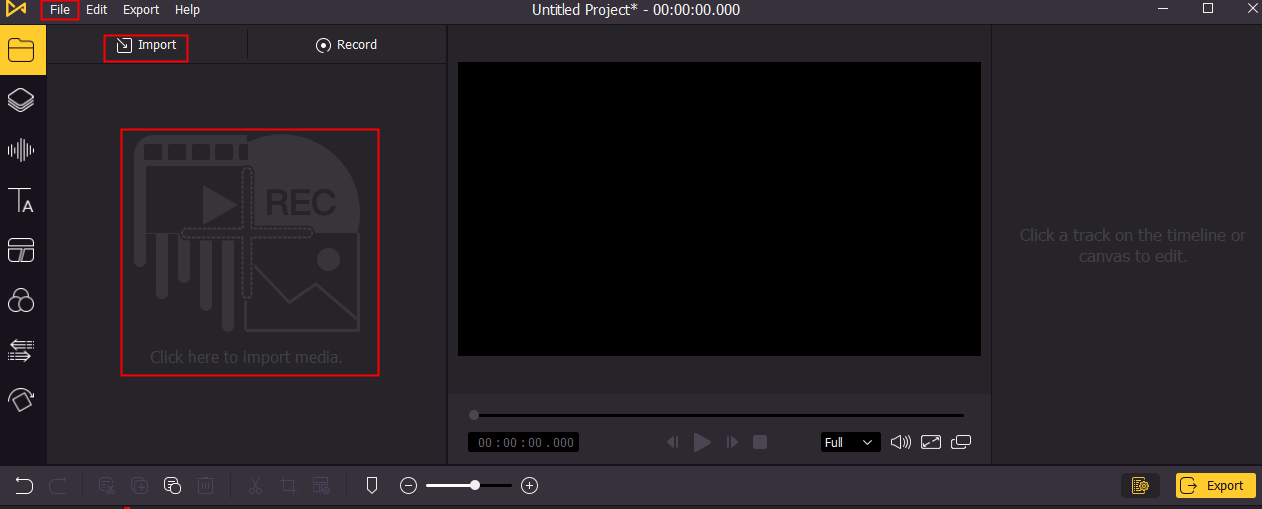
Find your video file you want to fade in and fade out and directly drag the file to the biggest red box. The other two alternative methods are to click Import or File.
Next, drag and drop the file to the track, or right click the video file and press Add to Timeline.
Step 2: Start fade in and fade out a video
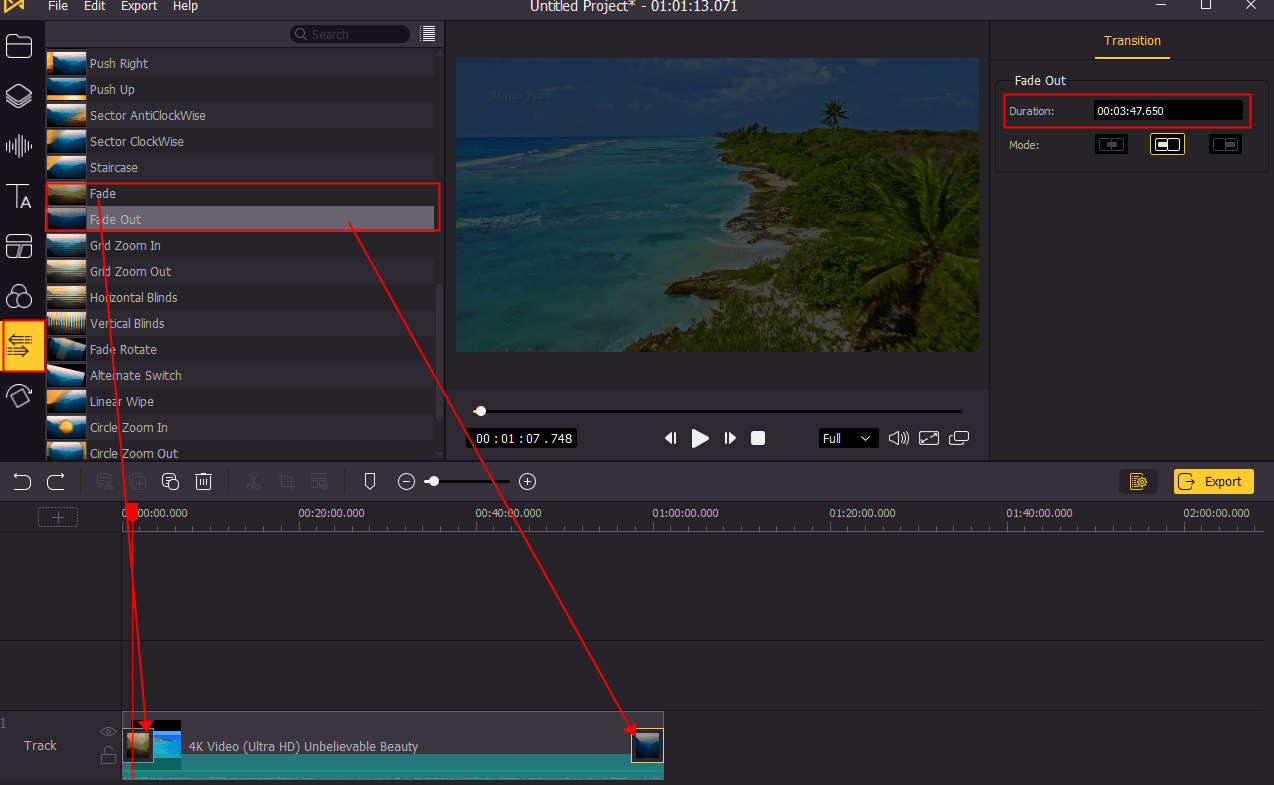
Now you need to find the Transition button in the left sidebar and then choose Fade and Fade out. Next, you can directly drag and drag them to the start and end of the video below. In addition, in the right sidebar, there is a setting frame which is provided for you to adjust the duration of Fade or Fade out effect.
Bonus tips:
How to fade in or fade out between two video clips?
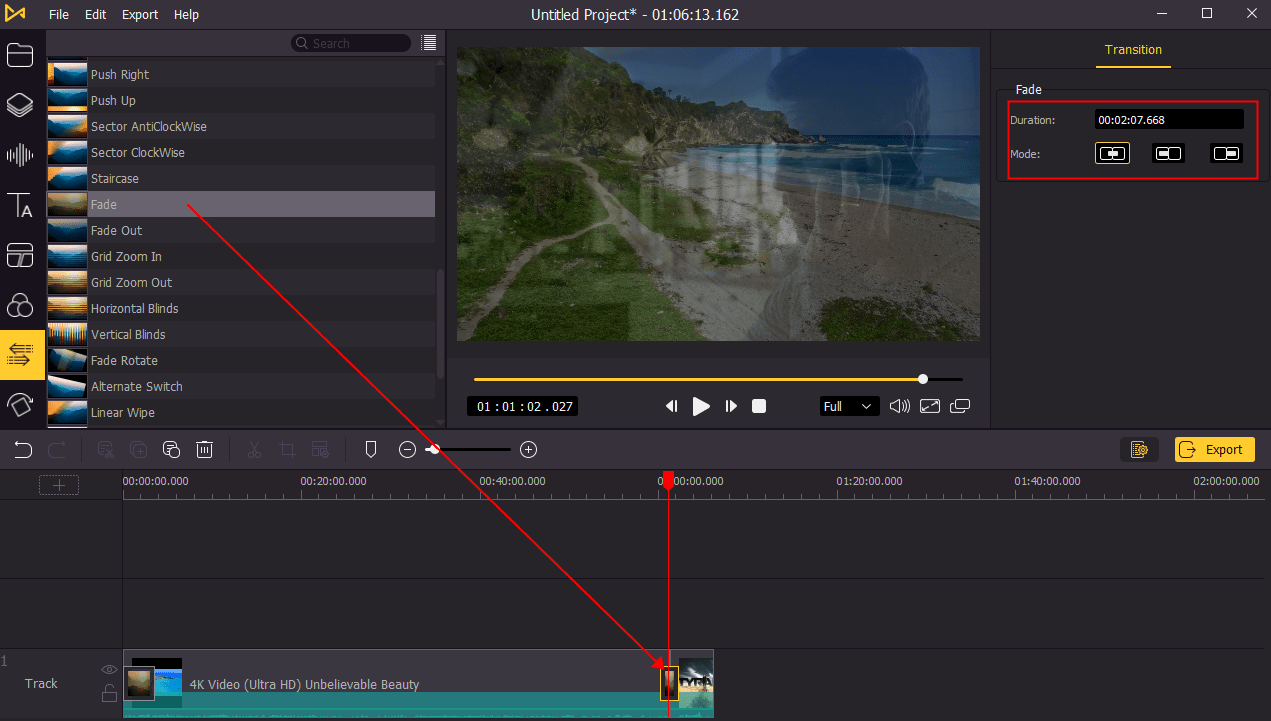
The above step is suitable for a single video. And in this part, I will introduce how to fade in/out between two video clips.
An additional step is to add another video and drag it to the same track. Then you can add Fade or Fade Out to the left or right side besides the crossline or add the effect to overlay the crossline between two clips. Similarly, you can use the right setting box to adjust duration and mode (three modes: Overlap, Prefix and Postfix).
Step 3: Preview and output your faded video
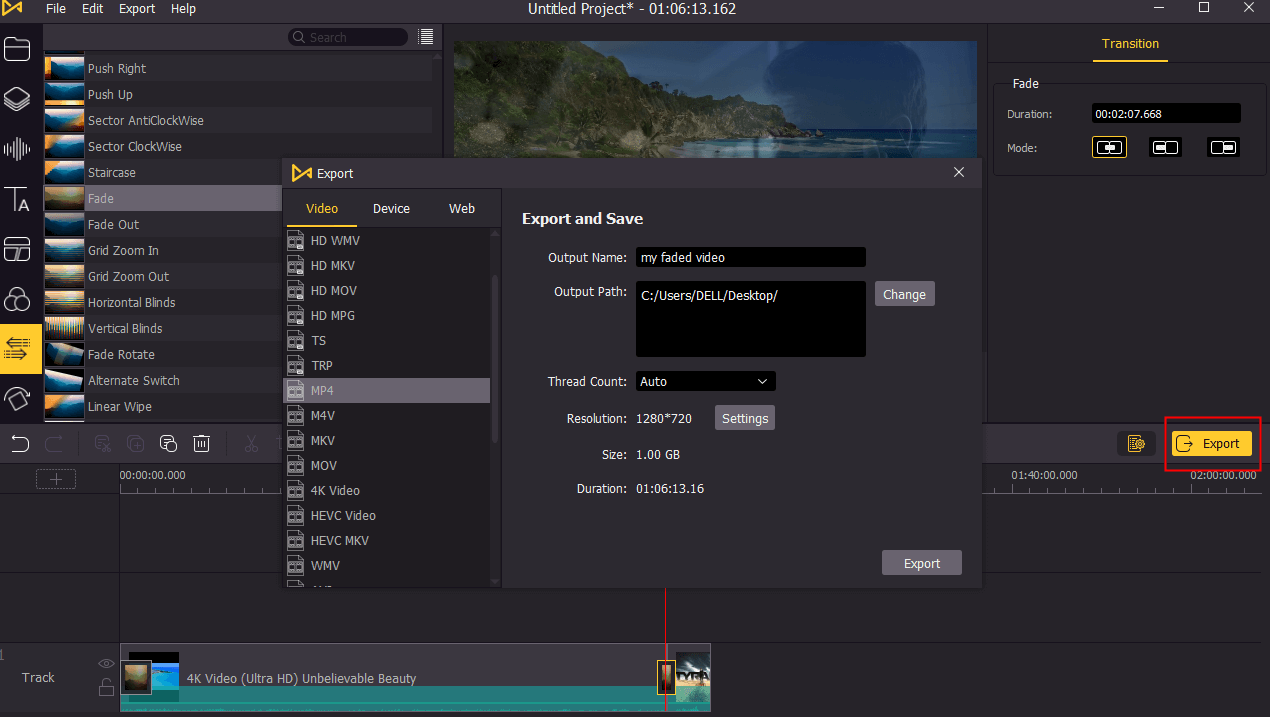
After you finishing the first two steps, just preview your edited video to see if there is any error. If all is OK, now click Export and you may choose a suitable video format from Video button. Just wait for a while and then your final video will be stored in your computer.
Final Words
After reading this tutorial, I guess users can feel the above how-to is quite simple. Well, this feature is what AceMovi aims to offer as soon as possible. The whole process will not waste too much time, but only needs several minutes. If you do not have a taste of this fade in/out effect before, now AceMovi can provide you with a chance to fade in and fade out a video. By doing so, your video can be more attractive and smoother. What' s more, AceMovi gives you additional but rich special effects. Do not hesitate and just try it to get something interesting.

