

YouTube is an online video-sharing platform where you can enjoy all videos of any genre from any corner of the world. If you ask any YouTube video creator, they will tell you about video editing, which is the most important part of the post-production. Video editing requires a fair amount of your skills and technical knowledge about editing and software.
Well, YouTube offers a built-in editing tool that lets users edit their videos before posting them. The YouTube editor made it easy for everyone to edit and remix your videos than the other desktop editing tools. In this article, we will talk about how to use a YouTube video editor to hook your viewers with eye-catching videos. Besides this, we will also introduce Tuneskit AciMovi to edit your YouTube videos with amazing features. So read this article through the end to learn the amazing stuff for YouTube video editing.
- Part 1. How to Edit YouTube Videos?
- Part 2. Better Alternative to Edit Videos for YouTube
- Part 3. Conclusion
How to Edit YouTube Videos?
You know about 300 hours of new video content is uploaded on YouTube every minute, and if you are interested in making your video stand out, then you need at least some elementary editing. There are various editing tools in the market, but if you don't own a video editing program, then check out our next mentioned video editors that will definitely save your time and make your videos professional.
YouTube's Built-in Video Editor
YouTube has its built-in video editor that has the simplest editing features. You could easily edit a video with a wide range of effects and transitions, image stabilization, brightness, contrast, and black-and-white filters.
YouTube editor has added more features after its introduction. Eventually, the editor allowed creating multiple projects with various editing options. The users can add transitions like usuals, crossfade, and wipe, as well as a heart, star, and jack-o-lantern. It is the handiest tool that is appreciated by users for its simplicity and speed of processing videos than other online video editing tools.
Furthermore, YouTube video editing software allows the following options and features.
• Add filters
• Add text to videos
• Add music to videos
• Add transitions to videos
Here's how to edit videos with a YouTube video editor.
Step 1: Firstly, go to YouTube in a browser. We would recommend you to use Google Chrome for the best results. Also, some features may not function properly in other browsers.
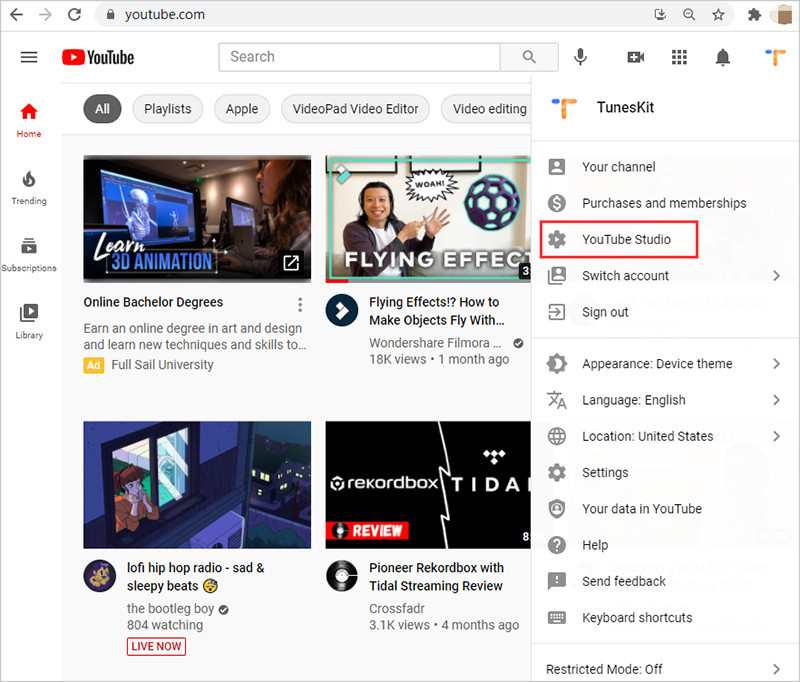
Step 2: From the top-right corner, click your avatar and choose YouTube Studio.
Step 3: Now, choose the 'Videos' option in the panel on the left of the screen. Here you should see a list of all your published or drafted videos on YouTube.
Step 4: Choose the video that you want to edit with the YouTube video editor.
Step 5: After you have chosen the video, click the 'Editor' option in the panel on the left of the screen.
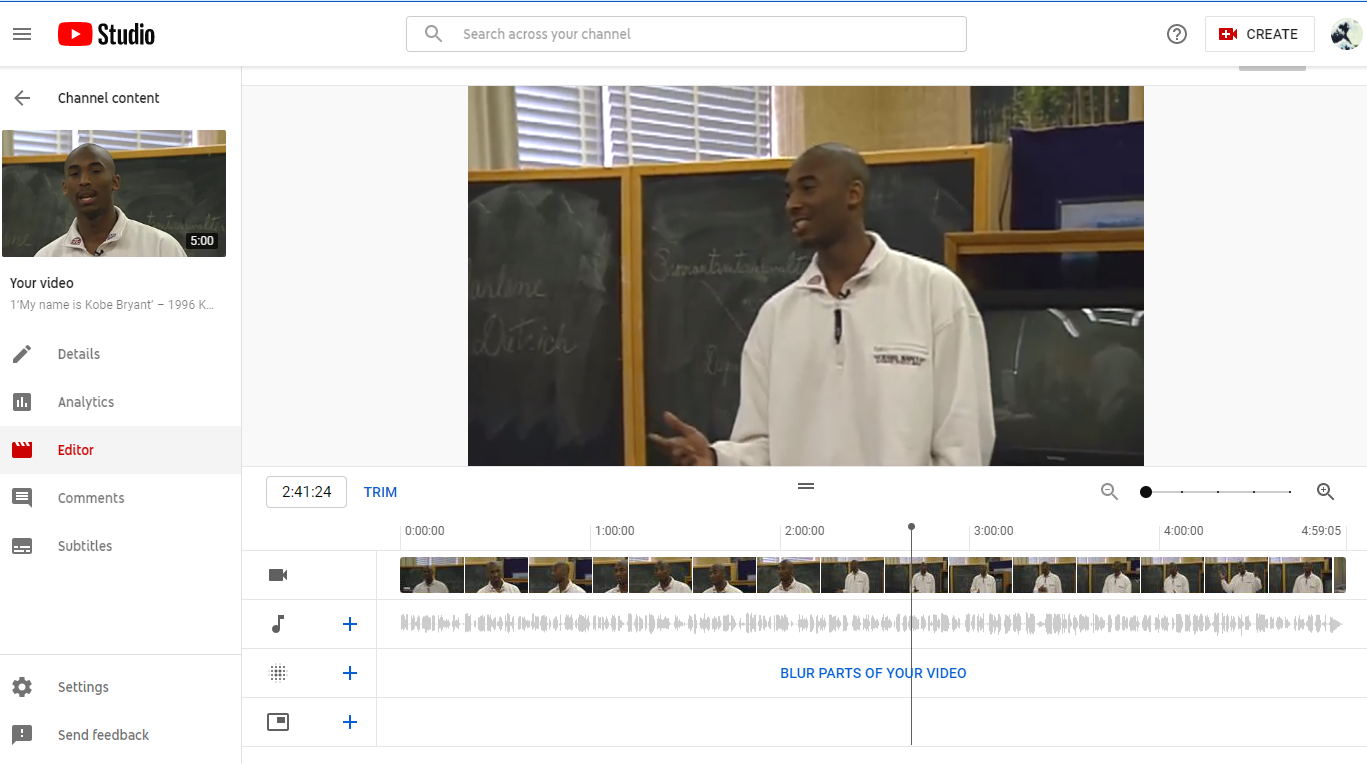
Step 6: Under the preview section, you can apply the trim, blur, or split features to your video. If you want to cut unnecessary parts, then go for the 'Trim' feature and simply set the start and endpoints of your video. You can also split your video from the 'Split' option. The editor also offers a blur option to blur the faces or background.
Better Alternative to Edit Videos for YouTube
Unleash your imagination with easy video editing tool-Tuneskit AceMovi Video Editor is an advanced video editing software that will enhance your videos with incredible effects, filters, transitions, animations, music, or text.
With the powerful and simple interface, high-quality videos can be created easily. You can use basic editing features such as split, rotate, crop, flip, and advanced editing effects like filters, transitions, animations, text, or audio. So if you are looking for an easy way to edit your YouTube videos, then Tuneskit AceMovi is the right tool for you.
Download and install the TunesKit AceMovi tool on the desktop and follow the below steps to edit the videos.

TunesKit AceMovi Video Editor
Security Verified. 5,481,347 people have downloaded it.
- Record your screen with high quality
- Create and edit YouTube videos with ease
- Provide basic and advanced editing features
- A lot of flexible output options including YouTube
- User-friendly interface and clear navigation
Add Images, Videos, or Audio Files
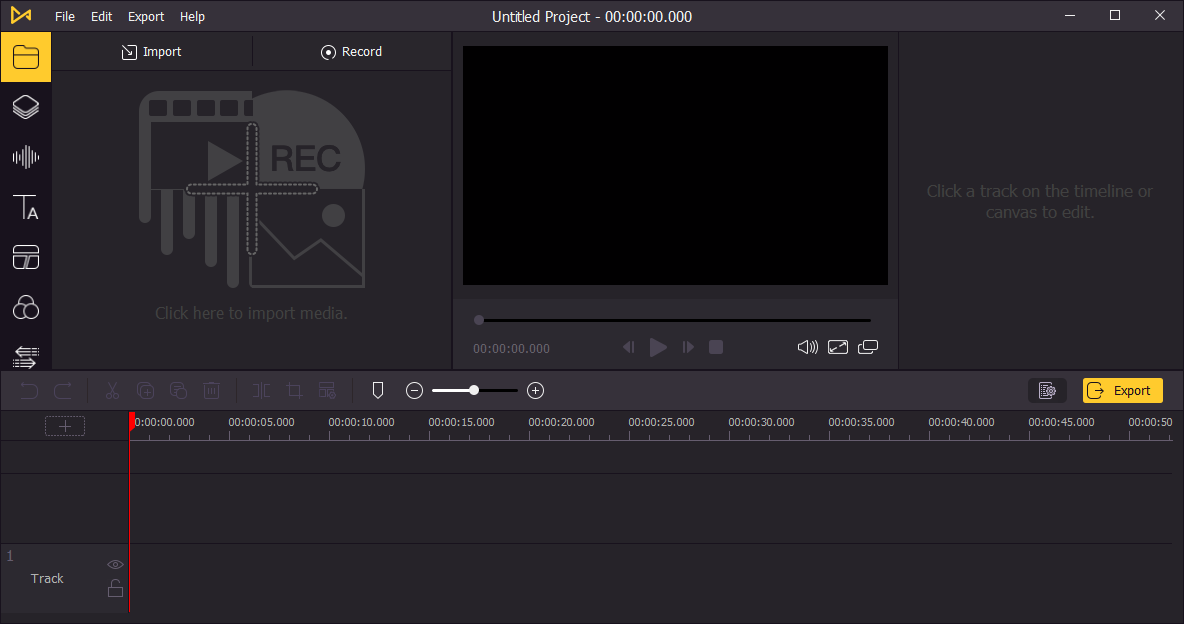
Add the required images, videos, or audio files by simply clicking the 'Import' or '+' buttons to add the media files in the TunesKit. If you don't have an existing video, then go to the 'Record' button to start the built-in screen recording app. After capturing your screen, the video will be added automatically.
However, if you want to continue the editing of an old project, then double click the project file or choose the 'File' > 'Open Project' > 'Open Recent' options to open it in the editing software.
Note: The step helps create a new project. If you wish to edit an old project, click the project file, and select the "Open Project" option.
Edit the Videos, Images, Audio, or Text
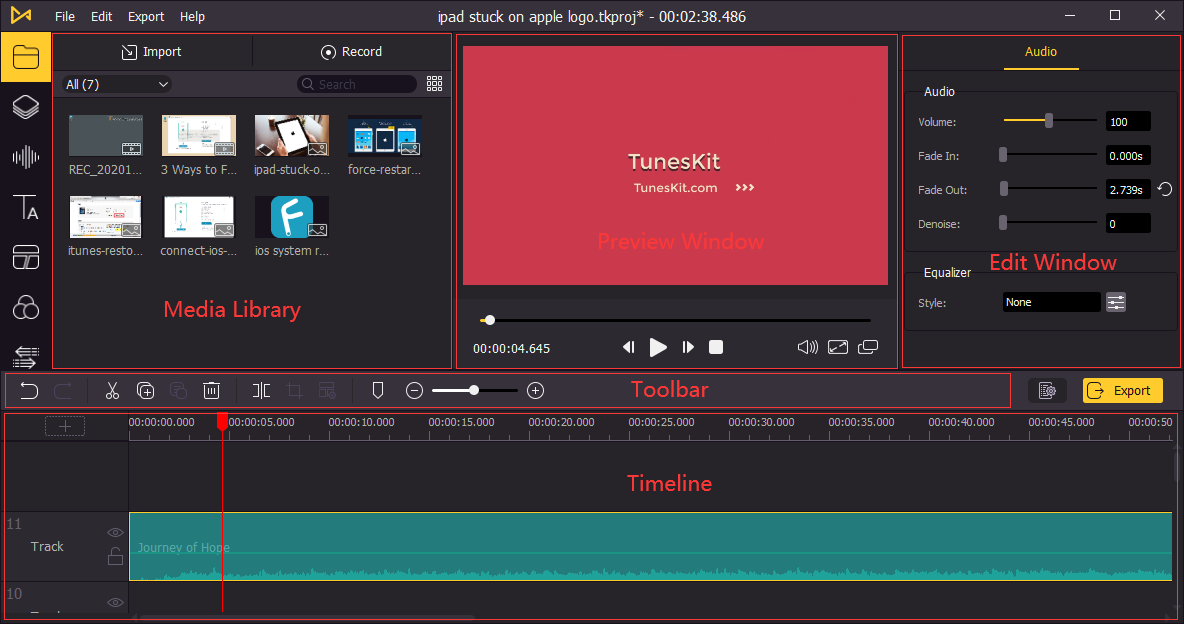
After adding the project, you can start the editing process. Import the media file such as image, video, or text from the 'Media Library' section of TunesKit. You can arrange and edit the media files or clips from the 'Timeline' option, which is available on the bottom with multiple pieces of music or video tracks.
TunesKit also allows its users to find some simple editing tools from the 'Toolbar.' After some editings, you can preview your project with the 'Preview Window,' present in the center of the interface. You can also adjust the media's parameters like position, volume, or contrast from the 'Settings' icon.
Below are some effects that you can use for your video editing.
Library: Explore a growing number of stickers, arrows, background images, or more.
Audio: Add royalty-free background music and sound effects.
Text: Offers shapes, callouts, arrows, or lower thirds to highlight important points.
Split Screen: Splits the screen into multiple parts.
Filter: Enhances video presentation with filters.
Transition: Allows transitions for a natural and smooth look.
Animation: Offers various animations.
Transfer Your Videos to a Computer or Other Devices
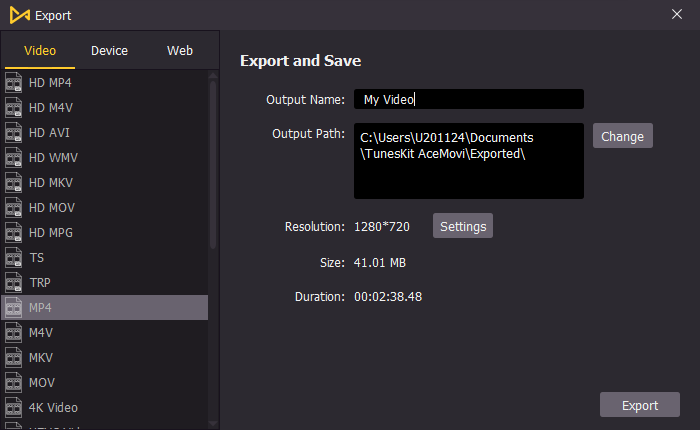
When you have done all the editing for a video project, click the yellow 'Export' button to transfer it to the computer or other devices like iPod, iPhone, Apple TV, or Android, etc. You can set the output formats such as MP4, AVI, 4K Video, etc., and can change the path, resolution, bit rate. The tool also enables you to share the project on sites like YouTube or Facebook.
Conclusion
Video editing is fun if you choose the right editing tool. We have mentioned the way for how to use the YouTube video editor and the TunesKit AceMovi tool. Both tools offer a clear interface with powerful and efficient features that will surely make your videos worth-watching. So, we urge you to try them and make your editing experience memorable.