
No matter you’re uploading videos on Instagram, TikTok or other social media, making them square can easily catch viewers’ eyes with more involving images. Square video has a better viewer retention rate on social media on your phone, why? Imagine you’re scrolling down the feeds and find a video that takes up a huge part of your screen, you definitely will stop by and check it out. Compared to traditional horizontal video, square videos cover 78% more space in newsfeeds, so it’d be more compelling to post a square video on your channel which can easily stand out.
In the following parts, I’m going to show you how to make a square video on your computer and make it outstanding on your feeds.
- Part 1. Video Squarer: What You Need to Make A Square Video
- Part 2. How to Make A Square Video in 2 Ways
Video Squarer: What You Need to Make A Square Video
To make a square video, you’ll need a video editor that can do the job. With TunesKit AceMovi, you can easily make a square video in just a few steps. Also you can use AceMovi to convert videos in other dimensions to square.
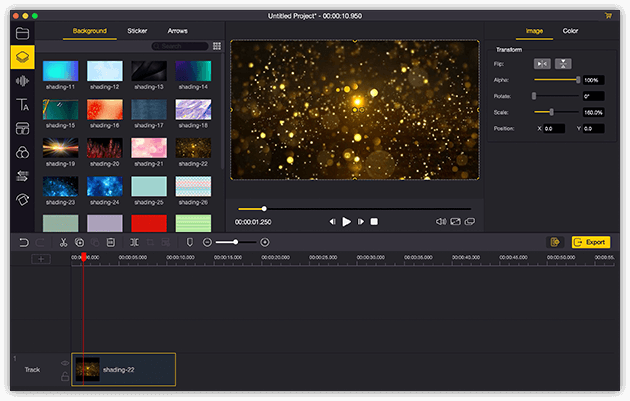
TunesKit AceMovi Video Editor is a versatile video editor that provides multiple effects and transitions. It comes with a screen recorder which can record images as well as the sound coming out of your computer. As a well-established video editor, AceMovi is mounted with features like split screen, filters, animations, texts, and music library. The user-friendly interface comes with all the effects and tools you need to embellish your video. With an abundance of resources, AceMovi allows you to easily make a logo out of them and edit it directly in the software. You can customize the aspect ratio of your video to make it square, also you can change the project settings to make your whole video project in square dimension.

TunesKit AceMovi Video Editor
Security Verified. 5,481,347 people have downloaded it.
- Basic and advanced features that make your video better
- Multiple filters, transitions, text, sound effects, music
- User-friendly interface
- Import as many photos or footage as you want
- Make a square video in just a few steps
How to Make A Square Video in 2 Ways
In this part, you're going to learn two ways to make a square video in TunesKit AceMovi. Before you edit your video, make sure that you have already installed TunesKit AceMovi on your computer, this software currently supports Windows and Mac systems.
Method 1: Change the Aspect Ratio
If you already have a video that's not square, you can convert it by changing the aspect ratio. Note that this method will change the look of your video, it'd be better to preview the result before you export the video.
Step 1. Add Media Files to TunesKit AceMovi

Open TunesKit AceMovi on your computer, then import your video clips to the media box. You can click on the import button to upload or directly drag and drop the media files into the box.
Step 2. Add Media to the Timeline
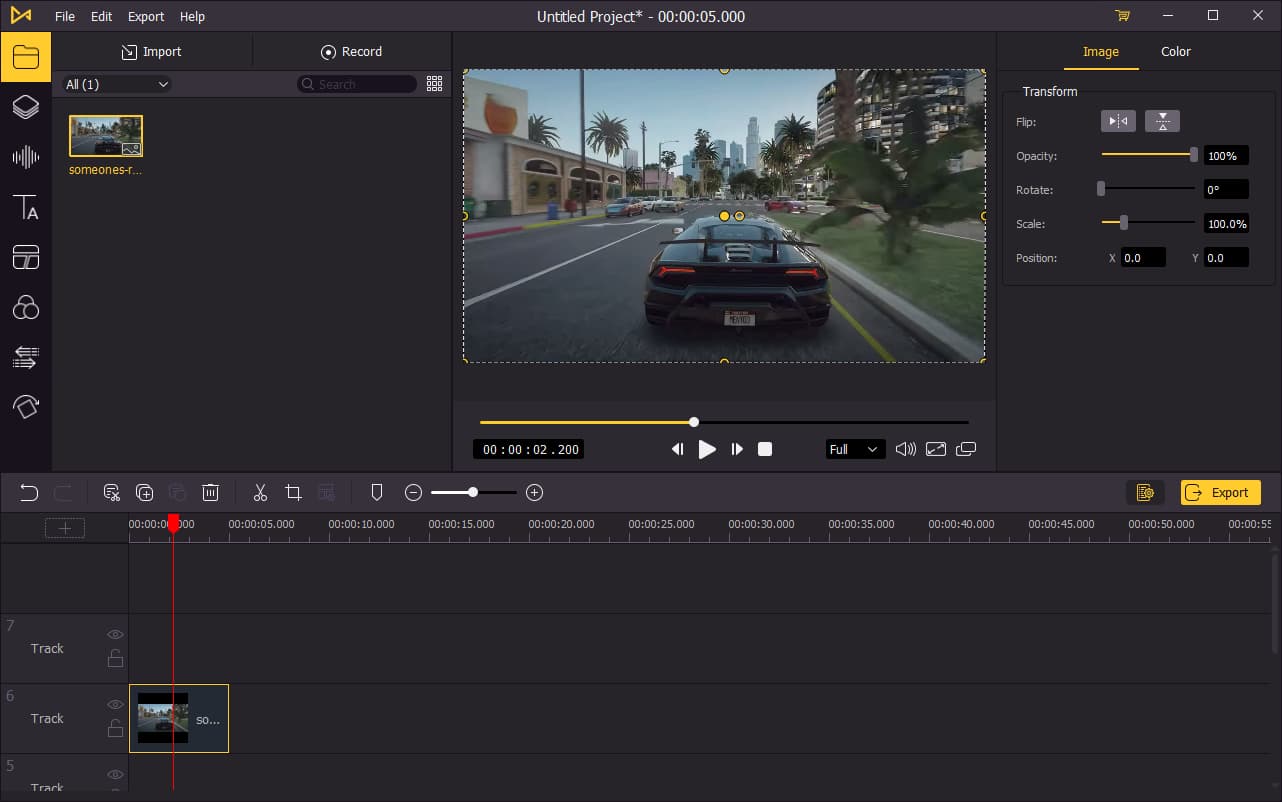
To add your media to the timeline, you can directly drag and drop them one by one. Or you can press Ctrl+A to select all the media files and drag them to the timeline. To be able to show the logo on top of your video, the logo will need to be placed one track above the video track.
Step 3. Change the Ratio of Your Video
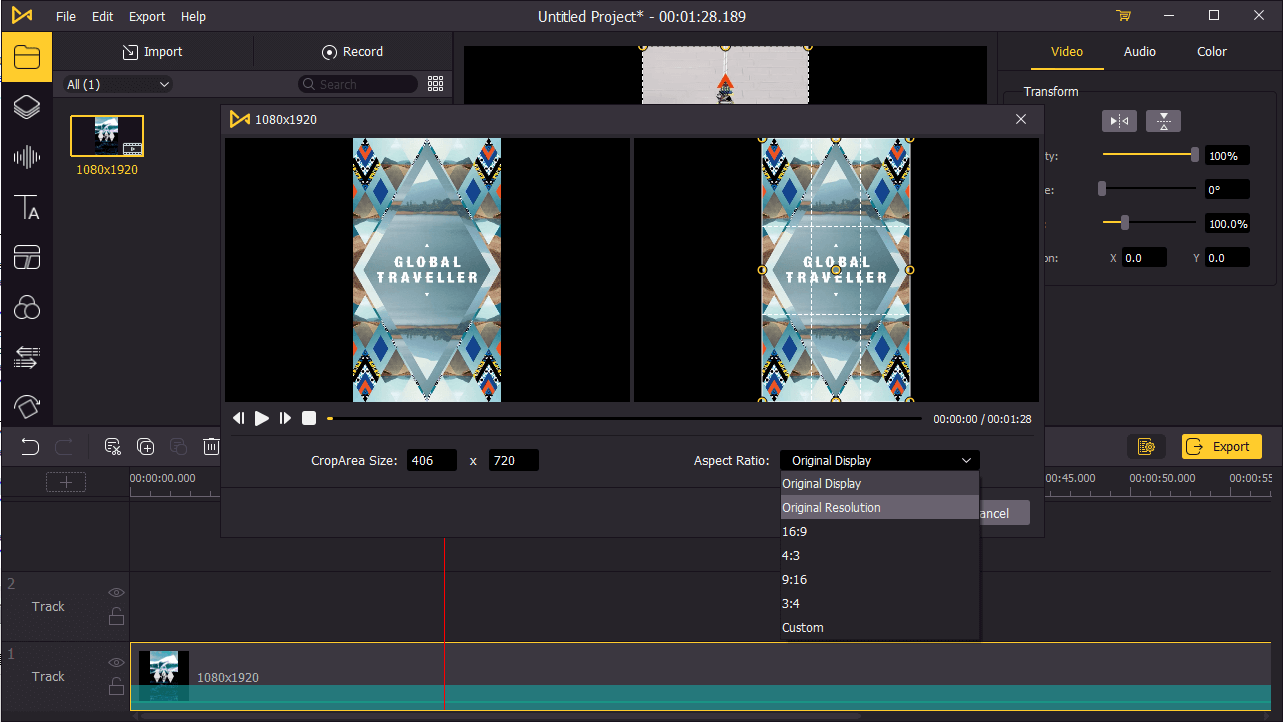
To change the ratio of your video, click on the ![]() icon on the menu above the timeline. Next to the Aspect Ratio, choose Custom. Then go to the Crop Area Size, type in the ratio you want. To make it look square, both parameters should be the same.
icon on the menu above the timeline. Next to the Aspect Ratio, choose Custom. Then go to the Crop Area Size, type in the ratio you want. To make it look square, both parameters should be the same.
After editing the video, move the playhead to the point where the video starts and press the Space on your keyboard to preview it.
Step 4. Export Video
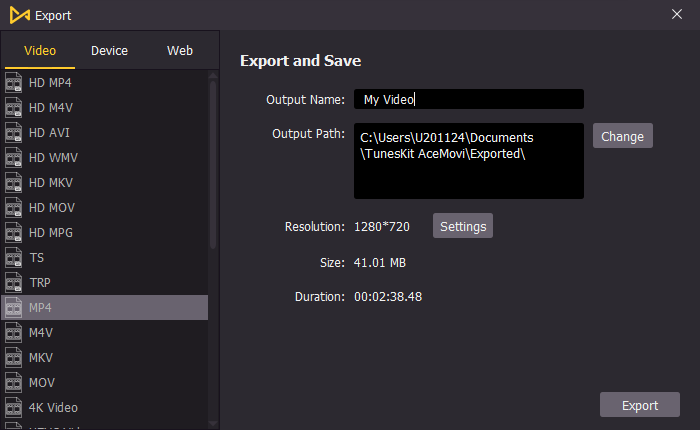
Once done editing your video, click the Export button on the middle left and export your video. Click the Settings, you'll be able to choose the output parameters. And by clicking the Change button, you can change the output location.
Method 2: Change Project Settings
If you're about to make a square video from scratch, changing the project settings will help you convert all the media you add into square view. Here's how to change project settings in AceMovi:
Step 1. Open Project Settings in TunesKit AceMovi
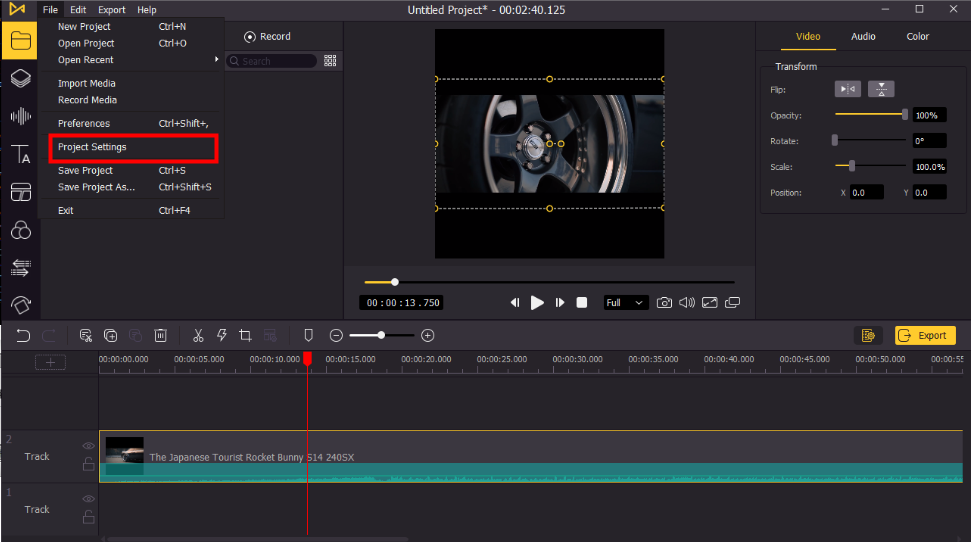
Launch TunesKit AceMovi on your computer, then go to File > Project Setting to open Project Settings.
Step 2. Change Project Settings in TunesKit AceMovi
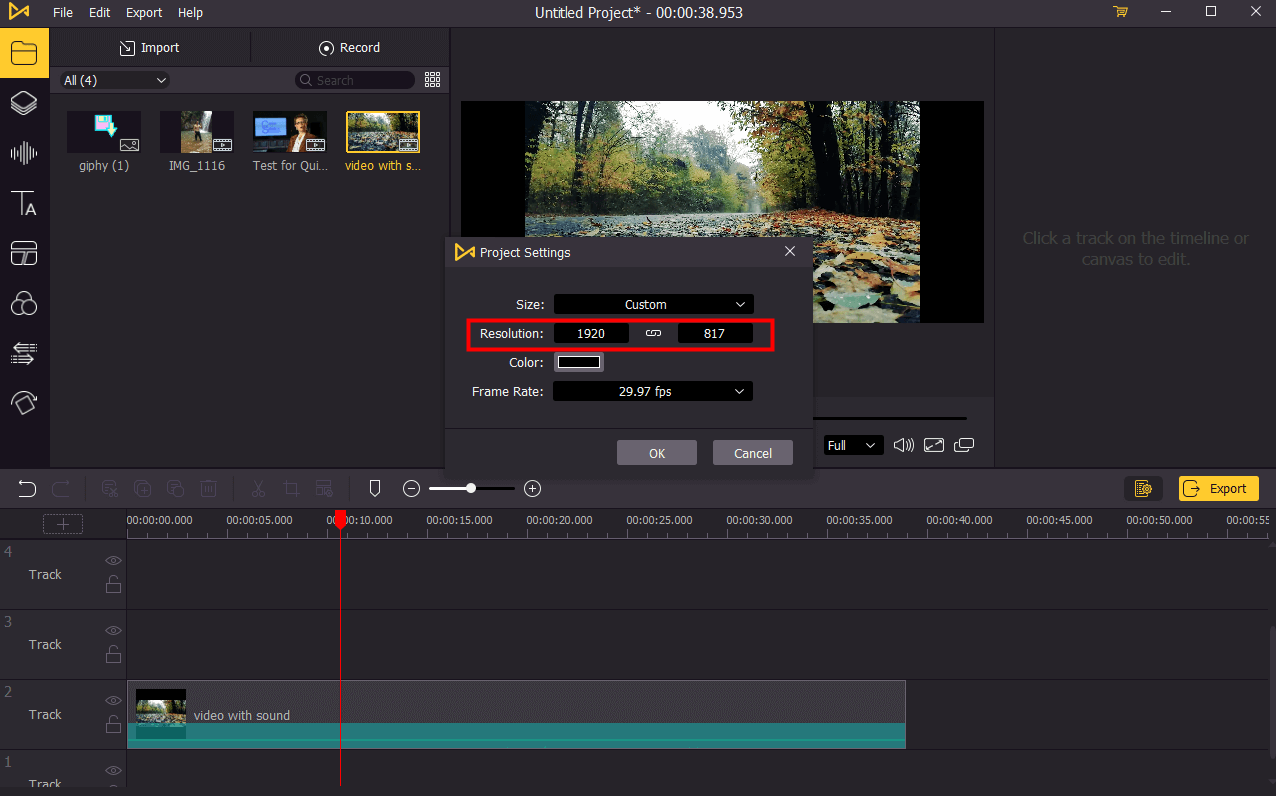
Next to Size, click on the down arrow and choose Custom in the drop-down menu. Then change the resolution of your project, both the height and width should be the same. Here are references of video dimensions for different social media:
Instagram: Minimum resolution required : 600 x 600.
TikTok: 1:1 aspect ratio with the file size of no more than 287.6 MB.
Twitter: 240 x 240 pixels, 480 x 480 pixels and 640 x 640 pixels for the best viewing experience.
Pinterest: Square recommended dimensions: 600 x 600 pixels.
Step 3. Import & Edit Video in Square Dimension
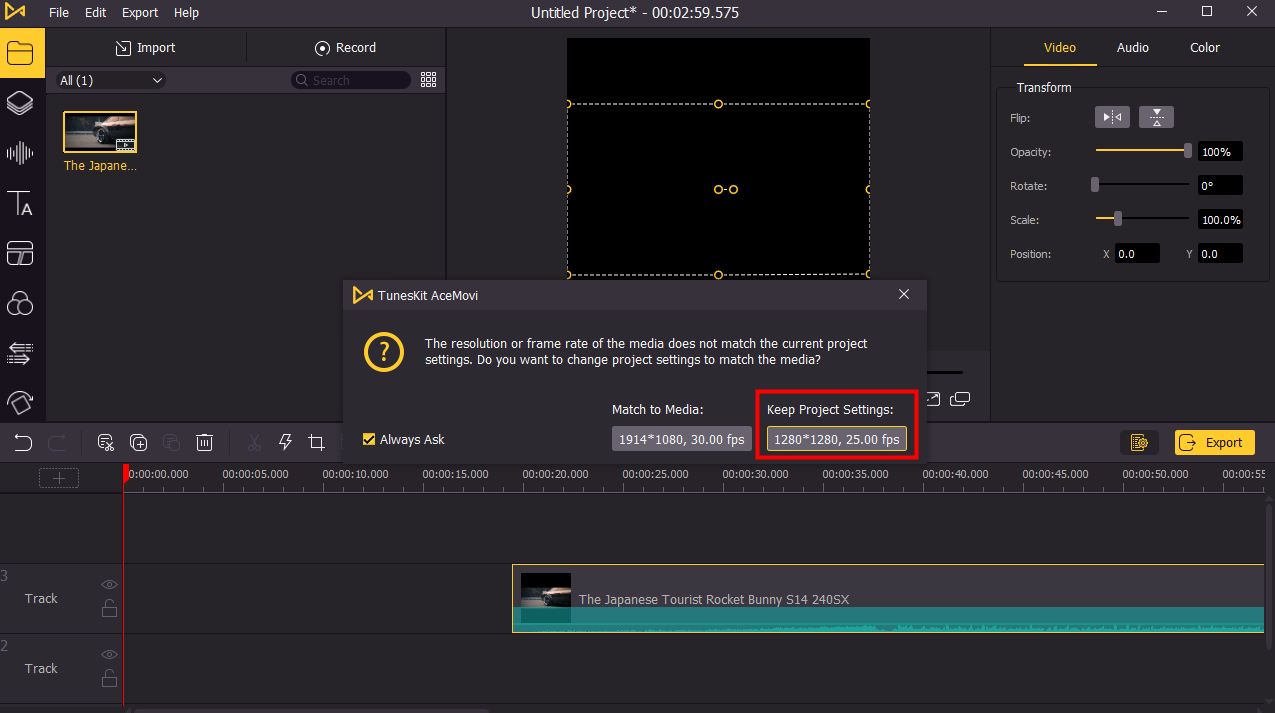
Once the project settings are done, you can now import your video to the timeline. A prompt will show up to let you choose the resolution and frame rate you want to use. To make your video square, you're supposed to choose the Keep Project Settings. Then you can start edit end export your video.

