
YouTube has been known as the most versatile platform introduced in the market, providing internet users with a base for uploading videos of mixed genres. With millions of hours' worth of videos uploaded across the platform, people prefer utilizing YouTube to keep themselves updated on all major uploads throughout the world. You might have considered YouTube as a platform developed for people to view videos, where it is to be kept in mind that the platform is equally significant for users who are to upload something informative for the populous.
This article takes up the procedure to edit YouTube audio and features a comprehensive discussion of editing the YouTube audio through the platform's built-in editor, followed by other processes that would allow the development of a perfect YouTube video to be uploaded for the mass population.

- Part 1. Edit YouTube Audio with YouTube Video Editor
- Part 2. Edit YouTube Audio with TunesKit AceMovi
Part 1. Edit YouTube Audio with YouTube Built-in Video Editor
YouTube Studio has been part of the system for a decade, where it has been integrated with YouTube's operation to allow users to easily edit their uploaded videos. This led the market to perform a few finishing touches across the video that would help them get the maximum reach out of the uploaded content. The use of the built-in editor is, however, considered important.
#1 Find YouTube Built-in Video Editor
Before leading towards the guide explaining an impressive explanation to edit YouTube audio online, you need to look across the following steps defining an appropriate process of opening and initializing the YouTube built-in video editor.
Open YouTube and Access Avatar
Initially, you are advised to access an appropriate browser and open YouTube on it. Following this, you need to tap across the avatar displaying your account's image to open a detailed drop-down list.
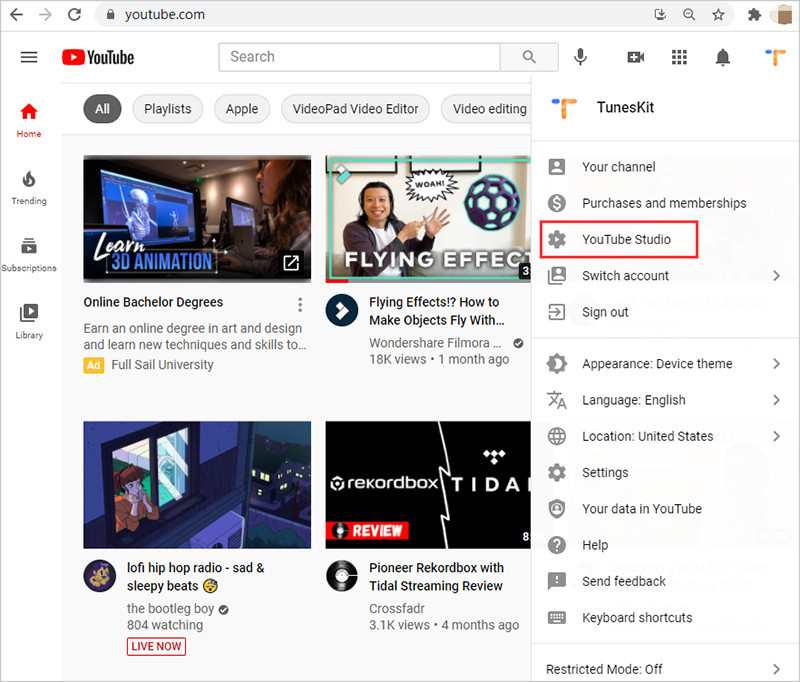
Open YouTube Studio
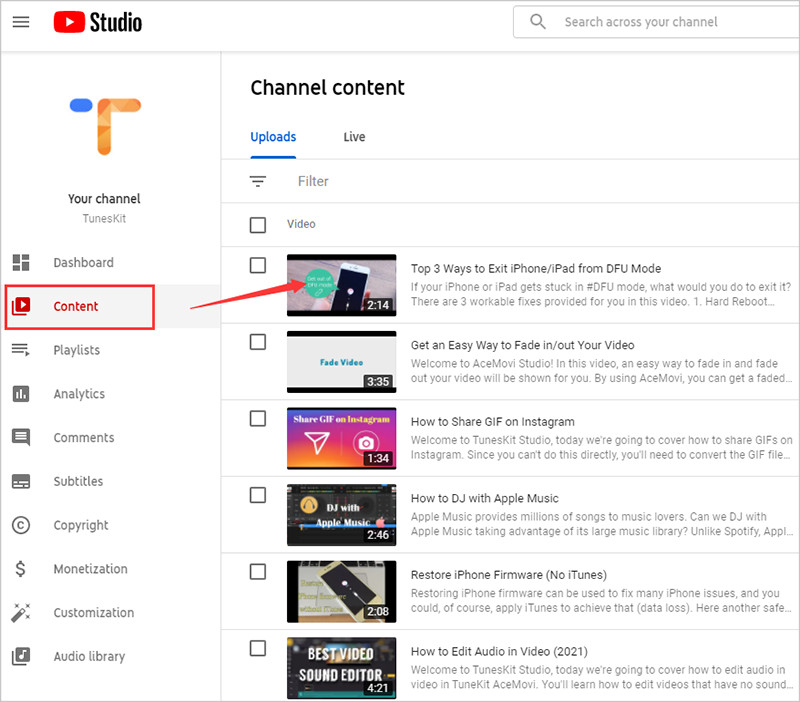
Select the option of "YouTube Studio" lead towards the next screen that opens up across the browser. Tap on the "Content" section on the left pane of the screen and observe all videos that have been drafted or published across your YouTube.
Start Editing
Locate any specific video out of the list and tap on its title to open it on a new screen. Select "Editor" from the left-pane to initiate editing the video.
#2 Edit YouTube Audio with Built-in Video Editor
If you are a user who is in search of developing an interactive video to upload across the service, you can always consider adding a fine-tune throughout the video for presenting a better image to the viewers. To simply add audio across your YouTube video, you can effectively utilize the tools offered by their built-in editor. For understanding the process of explaining how to edit YouTube audio with ease, you need to follow the steps explained as follows.
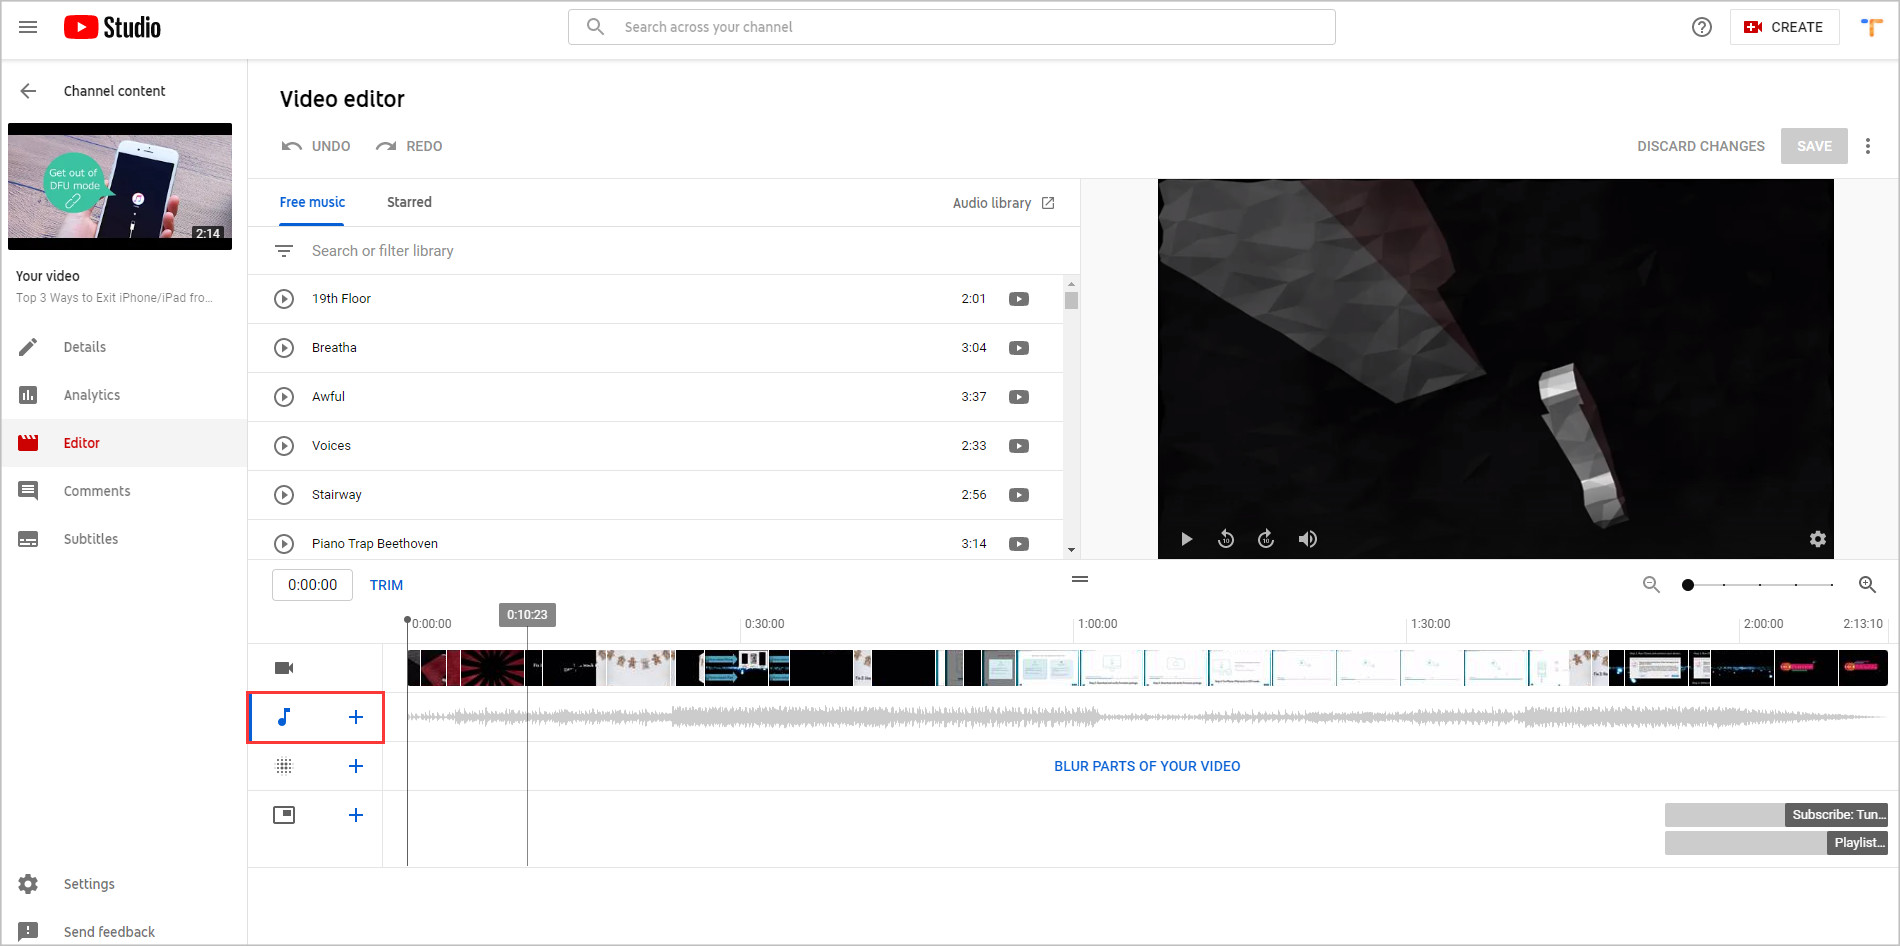
1. Expand Audio Track. After opening a certain video across the editor, you need to tap on the drop-down arrow adjacent to the music icon within the timeline for expanding the audio track.
2. Access YouTube Audio Library. The audio library offered at YouTube contains a variety of free music that can be added to any YouTube video through the editor with ease. Tap on the "+Audio" link for opening the library within a new tab.
3. Select Music. Over accessing the library, you can easily select the music according to the mood or choice of genre. Tap on the "Genre" tab or the "Mood" tab for filtering out the music, allowing an easier selection of the best music suiting the environment. Tap on the play button for previewing the music.
4. Add Audio in Video. Once you are done searching for the best audio track for your video, you need to tap on "Add to Video" to simply induce the audio within your YouTube video.
Part 2. An Impressive Alternative to YouTube Video Editor – TunesKit AceMovi
There are several users who do not prefer utilizing the basic services of the built-in video editor offered within YouTube. They prefer consuming the services of third-party platforms that offer unique and adequate services of video editing. Not only are these platforms known for providing an effective toolkit, but they also feature impressive characteristics that make them a genuine choice in the market.
TunesKit AceMovi is a proficient alternative to YouTube's built-in video editor that offers a very diverse set of features with exceptional results. The tool is considered a very easy video editing tool for its intuitive and interactive user interface. As this tool is available across Mac and Windows, the users can practice exceptional diversity within the video editing sector with the variety offered in video editing.

TunesKit AceMovi Video Editor
Security Verified. 5,481,347 people have downloaded it.
- Edit YouTube audios within a few quick steps
- Replace audio in video, or Remove noise from video etc.
- Multiple filters, transitions, text, sound effects, music
- Import as many photos or footage as you want
- User-friendly interface and easy to use
To understand how to add audio to YouTube videos with TunesKit AceMovi, you need to follow the steps provided as follows.
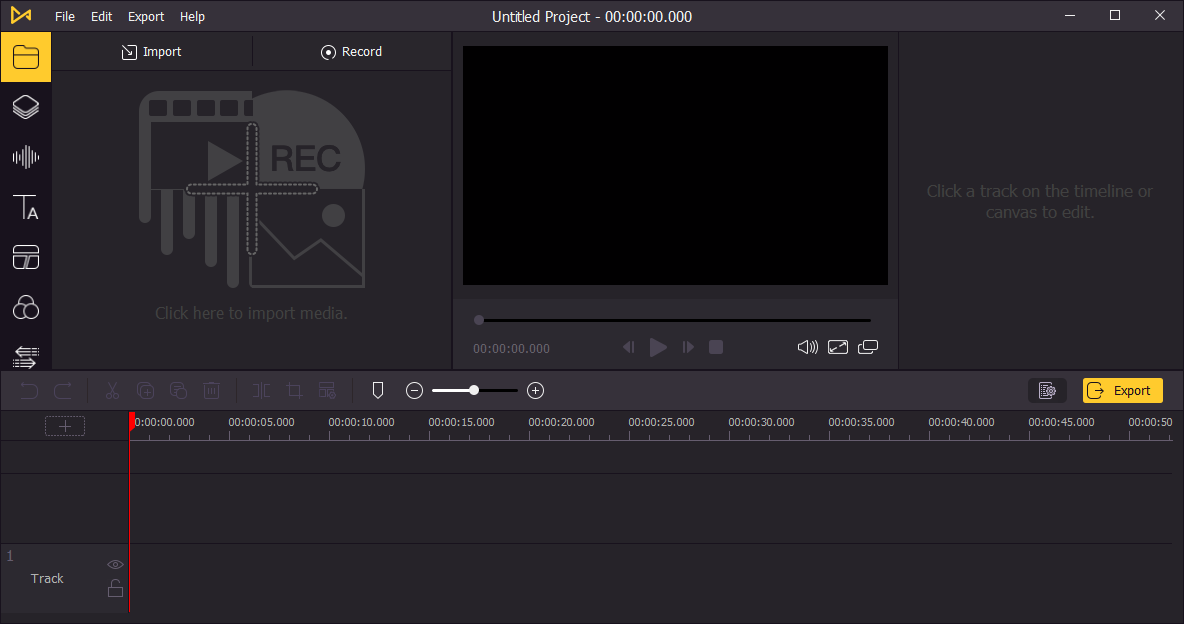
Step 1: Launch and Import Files
You need to download and install TunesKit AceMovi on your desktop and proceed towards launching it. If you are having pre-recorded video files on your desktop, simply tap on the "Import" or the "+" icon for adding media files within the tool.
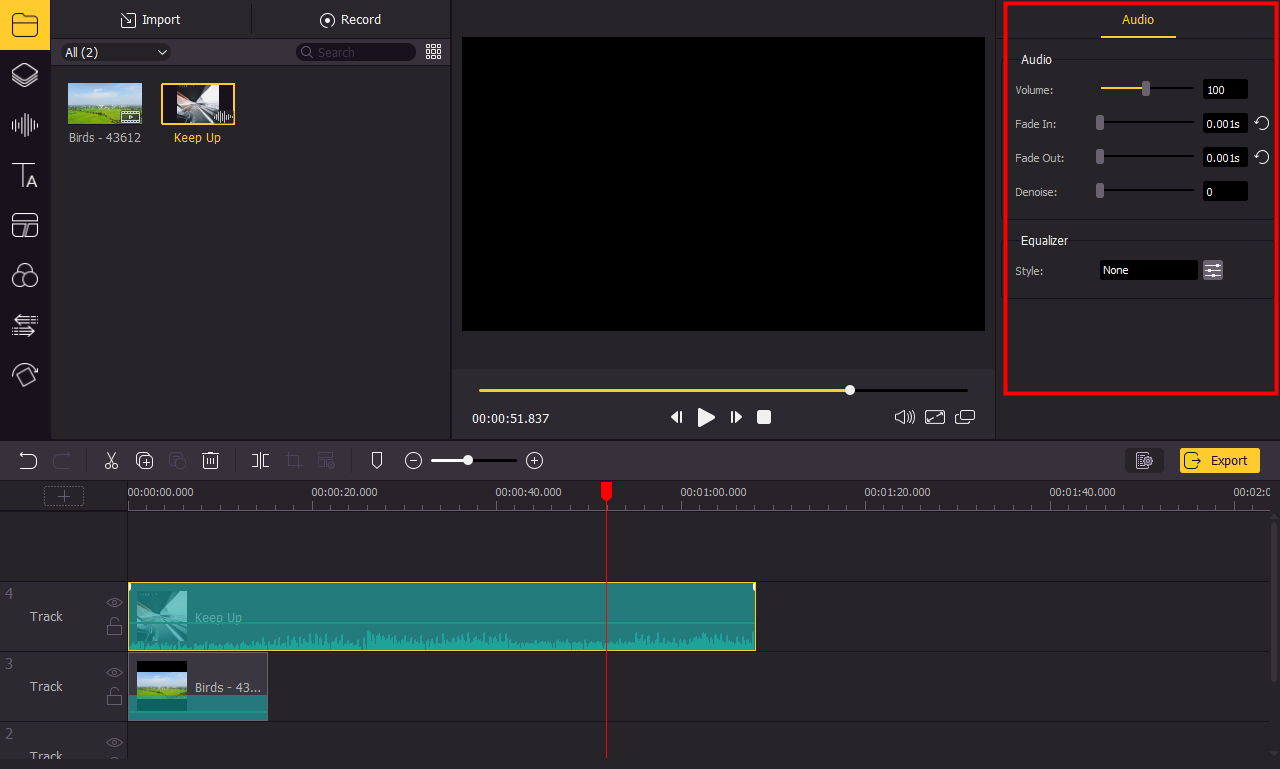
Step 2: Add Audio within Video
After you are done adding files to your timeline, you may observe the "Audio" icon on the left pane of the window. Add royalty-free background music and other sound effects from its library through simple drag-and-drop. You're also allowed to add your own audio or voiceover to AceMovi and drag it to match the video.
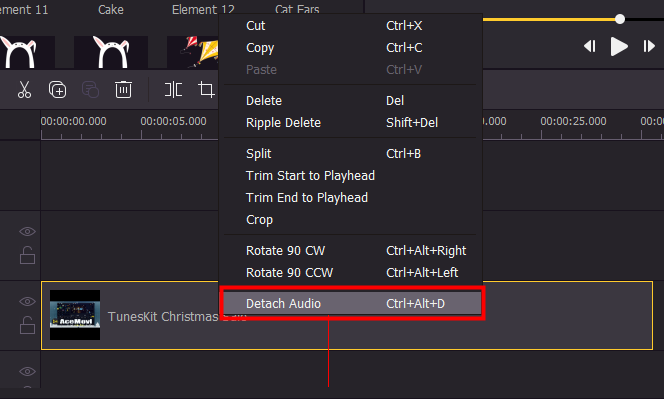
If your YouTube video already has audio or background music in itself, you can also use AceMovi to delete it and then add another audio file you want to the video. Just click on the YouTube file and right-click to select the "Detach" option. The audio will be separated on the timeline and click the Delete icon ![]() to delete it.
to delete it.
Step 3: Export Files
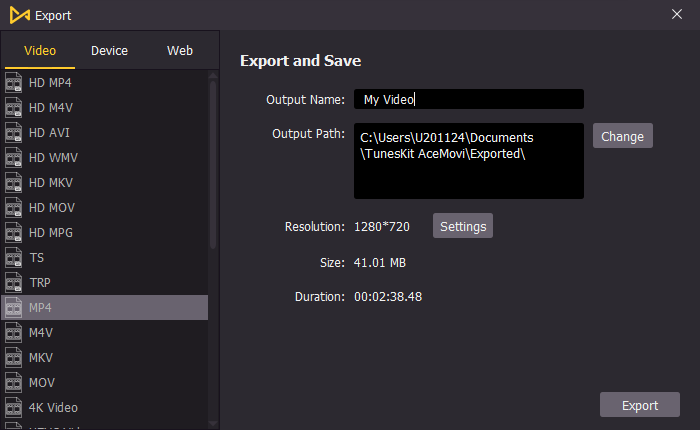
Once you are done adding audio in your video, you need to simply tap on the "Export" button on the right side of the screen to lead towards saving the file. Select the location of exporting your video, which includes various devices along with social media platforms such as YouTube and Facebook. You can save your video in a variety of different file formats within the export window. Following this, you can change different video features such as video resolutions, bitrates, and frame rates.
Conclusion
The article has particularly explained a very comprehensive guide to edit YouTube audio with ease. With a built-in tool available across the service, users can easily add the audios of their choice in the videos. Along with that, the use of an efficient YouTube audio editor under the name of TunesKit AceMovi is also promoted. You need to look across the article to get to know more about the exceptional tools and their respective guides.