
When we play a video on TV, sometimes we may discover black bars appear on the top, bottom or both sides of the screen. Are you familiar with this situation? Why black bar appears? And how to remove it? Do not be worried and keep reading.
In fact, the reason why the back bars occur is associated with the aspect ratio. In some cases, before we record a video, we are not aware of the importance of aspect ratio. After we shoot a video by following a 4:3 aspect ratio, what will happen if playing it on a TV or other platforms with a 16:9 screen. With no doubt, the answer is black bars. Due to black bars, the video looks smaller when watching, which may disturb viewers.
Next, in this tutorial, I am willing to show you how to remove black bars from video by different ways.
- Part 1. Remove Black Bars from Video by Video Editing Software
- Part 2. Remove Black Bars from Video Online
- Part 3. More Knowledge before Making a Video
- Part 4. Final Words
Remove Black Bars from Video by Video Editing Software
These days, various video editors have made its way into the market. Among these software, I’ d like to recommend you to use TunesKit AceMovi Video Editor. If you intend to remove black borders from video, a few clicks are enough.
Actually, AceMovi aims to provide users with easy-to-use functions. Cutting, trimming, splitting or combining video files are its basic roles. To make your video animated, you can also use its special effects by adding filters, subtitles, transitions or split screen. In addition, it confers more rewards, such as built-in recorders and varied export formats.

TunesKit AceMovi Video Editor
Security Verified. 5,481,347 people have downloaded it.
- Basic and advanced features that make your video better
- Multiple filters, transitions, text, sound effects, music
- User-friendly interface
- Import as many photos or footage as you want
- Remove black bars from video in just a few steps
Steps to remove black bars with AceMovi
In this part, I’ d like to introduce the detailed steps to remove black borders. Get ready and do not forget to download AceMovi in advance for a better experience.
Step 1: Add media files
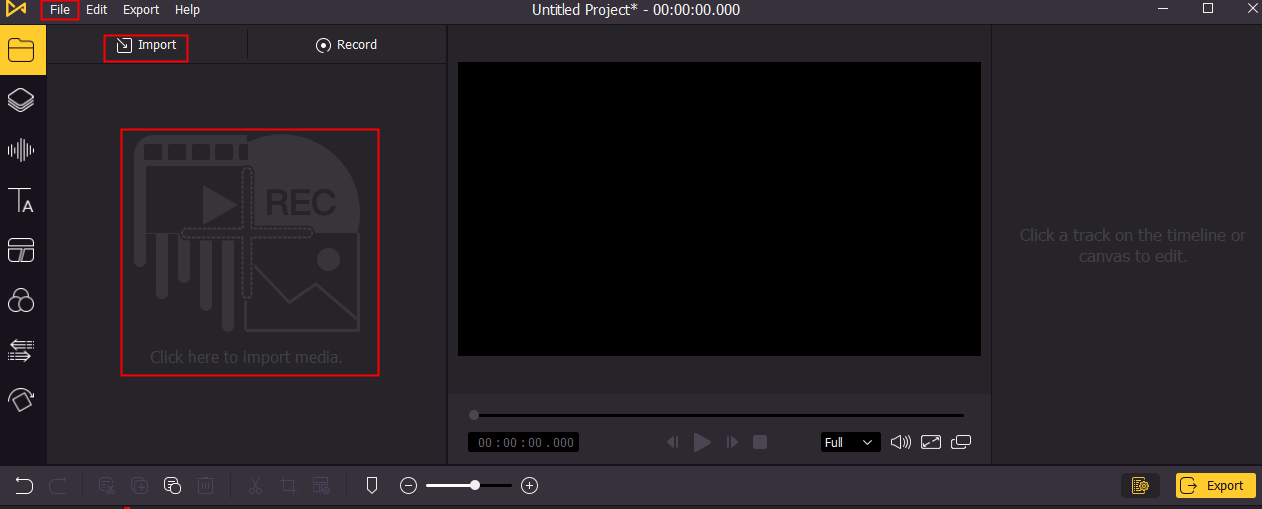
Firstly, find the video file with black bars and open AceMovi which can support various video formats. As you can see in the picture above, the three red boxes are designed to import your video. All of them are useful. Or there is another simplest way. You can directly drag the video file from your desktop. Next, you need to drag and drop the video to the track.
Step 2: Start to remove black bars in the video
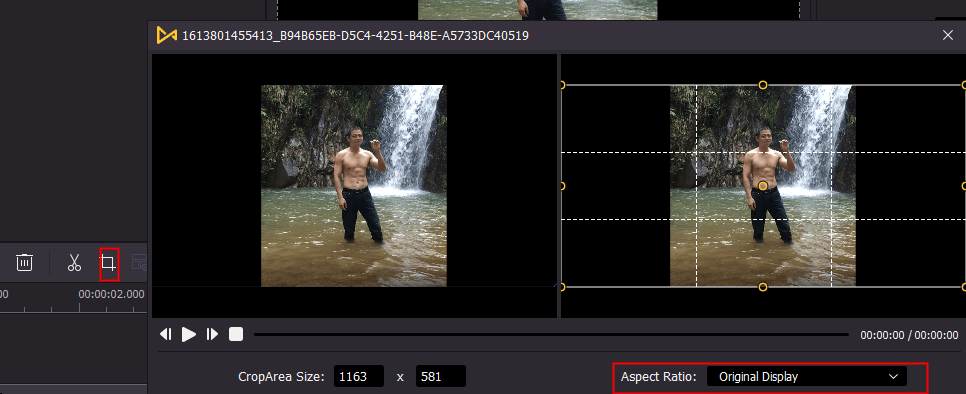
Now it is your time to remove black bars. A simple way is to use Crop and Zoom button. You need to press the crop icon or right click the video clip and then choose the Crop button. Next, you will see there is aspect ratio for you to adjust and you can select 16:9 or 4:3. Or you can manually move the frame line to adjust its size and eliminate the black bars.
Step 3: Save the edited video

Before you export the video, you may choose to preview the edited video and see whether it meets your expectations. If it is ok, then just click Export. In this step, you can reset the video format or quality as you like.
Remove Black Bars from Video Online
In this section, I will introduce how to remove black bars by using online tools. If you only need to adjust one video for one time, using this kind of tools may be easier. The following steps is based on the online tools Clideo.
Steps to remove black bars with Clideo
Step 1: Upload the file you want to remove black bars

Open Online Video Resizer in any browser. Press the big blue button in the centre of the tool’s homepage and upload a video file with black bars. Or you can choose a video from Google Drive or Dropbox.
Step 2: Remove black bars
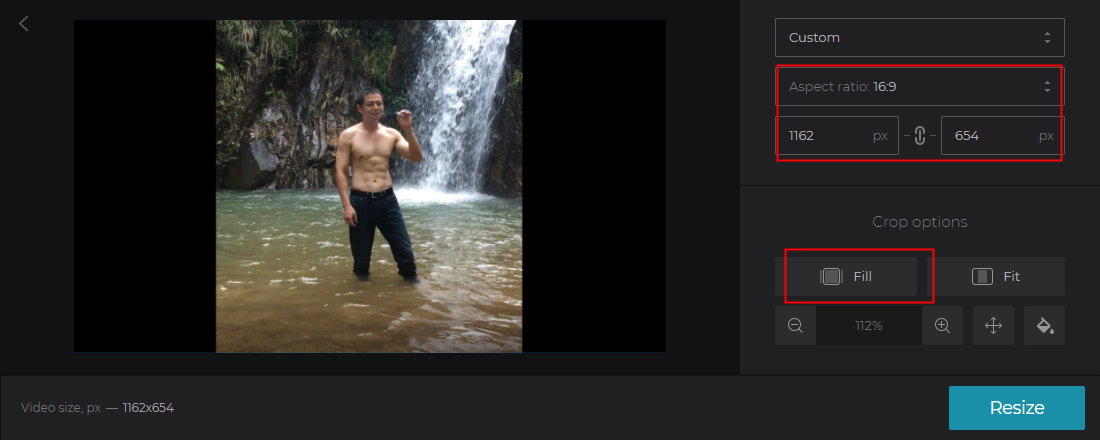
When open the file, you will see a menu on the right side. Choose the suitable aspect ratio or manually alter video’s width and height. To get rid of the bars – on the left and right sides, or on the top and bottom – click Fill button under the Crop options. Use the special arrows to move the frame and catch the needed part of it.
Step 3: Save your video
After the black bars are removed, you can click Resize to export your final video files. If you are happy with your video without black bars, you can click Download to save the file.
More Knowledge before Making a Video
I guess users are not willing to spend too much time adjusting or removing black bars from video. In this situation, users may need to look for and set proper aspect ratio before recording a video. Here is the frequent aspect ratio for major social media platforms and users can adjust a correct aspect ratio in advance during recording.
• YouTube: 16:9 (max upload 4k - 3840 x 2160)
• Facebook: 16:9 or 9:16 (max upload 4k - 3840 x 2160)
• Instagram: 16:9 or 9:16 (max upload 1080p)
• Twitter: 16:9 (max upload 1080p)
• Snapchat: 9:16 (1080 x 1920)
Final Words
With an improper aspect ratio, black bar occurs and further negative affects the viewers’ experience. With the help of AceMovi, you can easily and freely remove black bars from video. Both professional video editors and online tools are good choices. But if for more complex operation, I guess a powerful video editor is more suitable and can allow you to make video vivid and attracting.