A timer is often embedded to convey the coming of an important event, it can be a stopwatch wireframe or countdown subtitle. For example, before every bomb goes off in a movie, there will be a timer to let you know the exact timing, without any doubt, which strengthens the tension and grabs our audiences' emotions to indulge. If you want to add a timer to a video without too much effort, this page is helpful and targeted. You can find three ways to complete the mission, also, there will be designed video templates with various countdown timer genres.
- How to Add a Countdown Timer to a Video in Windows & Mac
- How to Put a Timer on Your Workout Video Online
- How to Insert a Pro Counter to Clip for Windows
- Conclusion
AceMovi: How to Edit a Timer into a Video on Computers
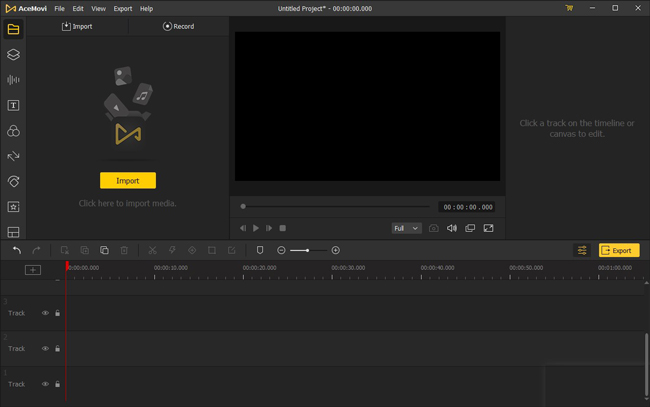
There are multiple genres and templates of timer built-in AceMovi Video Editor, you can find and put any type of them from the Text - Dynamic panel on the interface. This panel features the Countdown modes and Timing modes, which suffice your different needs. The important point lies in that you can try and render the sample freely.
Besides that, AceMovi will intelligently adjust the timer duration according to the video size rather than keeping a fixed period as you need to click and drag the element's edge to realize this operation. You can even resize and reposition the timer on the canvas flexibly.
AceMovi Video Timer Editor
- Offer a lot of timer shapes and modes
- Change size, color, style, font, opacity, etc.
- Play and render countdown timer in real-time
- A vast library of static and dynamic texts
- It's able to export movies up to 60fps
- Split clip into multiple parts and delete ripples
How to Add Timer to Video with AceMovi
Import Your Files to Media
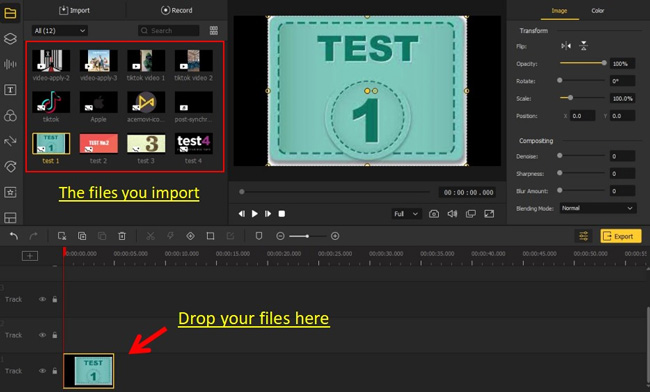
Click the "Import" button to make your files uploaded to the Media. Then right-click the clip to add it to the timeline. Or just drag-n-drop the files under the track.
Begin to Add a Timer to Your Video
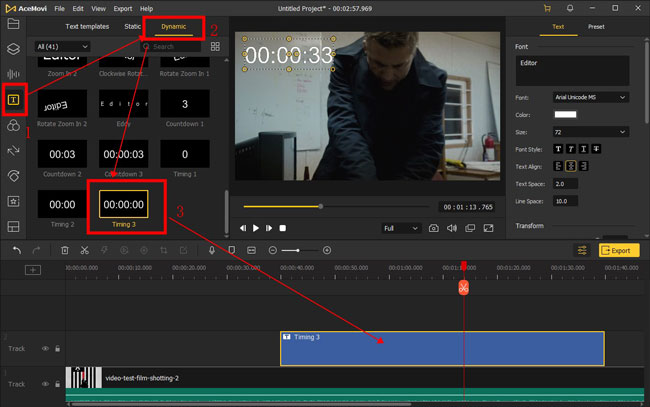
You can find the timer templates from the "Text" panel in the left sidebar, including digital-only timers - "Countdown 1" and "Timing 1", minute hand and second hand timers - "Countdown 2" and "Timing 2", hour hand, minute hand and second hand timers - "Countdown 3" and "Timing 3".
Time is moving forward in those "Timing" modes, while time is counting down in those "Countdown" modes. You need to drop your wanted one under a new track and go to adjust the duration by dragging the edges.
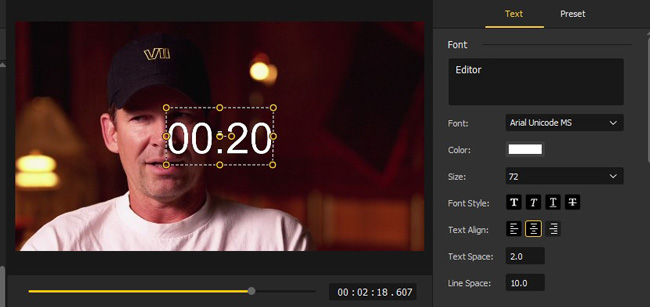
Next up, it's available to edit the timer from the "Properties" plate. You can fine-tune font, color, size, font style, text alignment, text space, line space, opacity, rotation degrees, scale, position, and many more. You need to perform a blank filling or slider rolling to realize it.
Download the Video
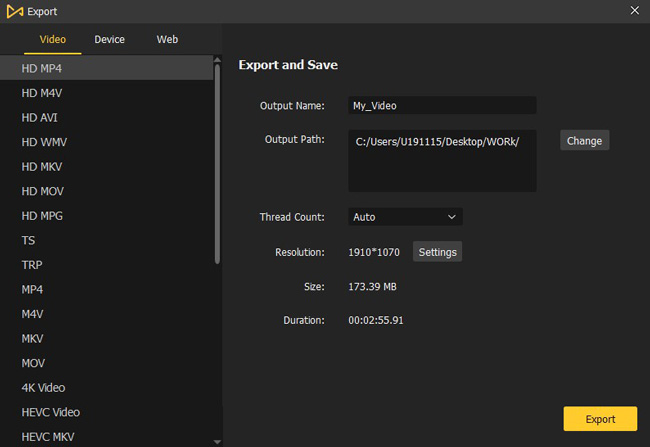
When it comes to downloading the edited video from AceMovi, users should click the "Export" button and choose the output format. The exporting resolution and file quality can be changed in the process. For YouTubers and other social media players, you can find Autofit format from the "Web" panel.
How to Add a Countdown Timer to Video Online with FlexClip
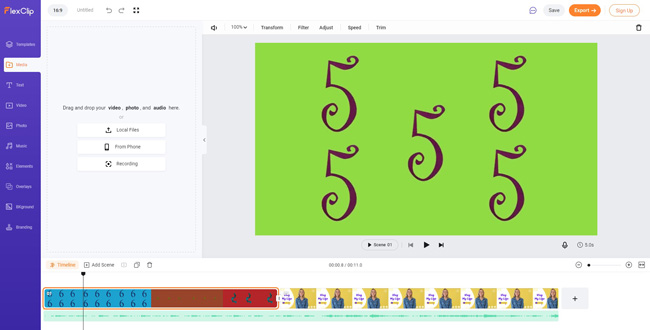
Want to figure out how to put a timer on a video using an online video editor? One of the best options is FlexClip, which has designed templates with an intro clip that contains countdown timer. What different from AceMovi is the genre of the timer is fit for birthdays, weddings, or other specific projects rather than a "bomb" in your movie. Those video templates have ready-made color, music, transition, background, and more. Scroll down to see the guides.
Insert Clips to the Template
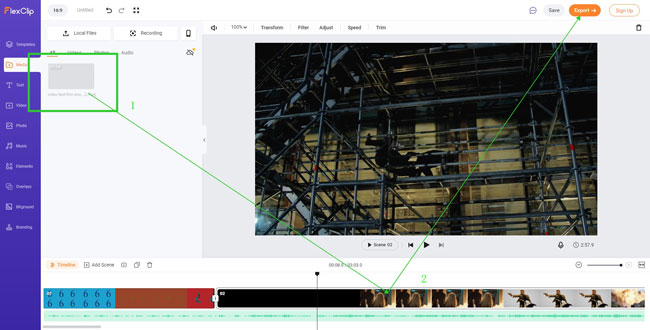
There are channels to add media from local files and record the screen or the webcam. Also, it's accessible to drop to add new files. Then you need to put the files under the track to combine those clips. You can play the video to check whether it's satisfying.
Download the Edited, New Video
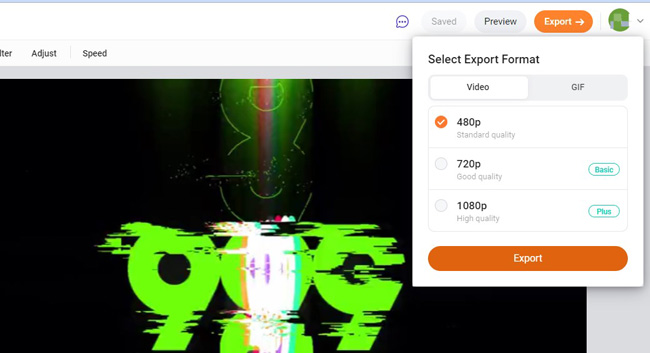
It's completely free to download your video on 480p resolution or GIF format. Otherwise, you can upgrade to the Basic or Plus plans to improve the file quality.
How to Add Timer to a Video with VSDC for Windows 10 & 11
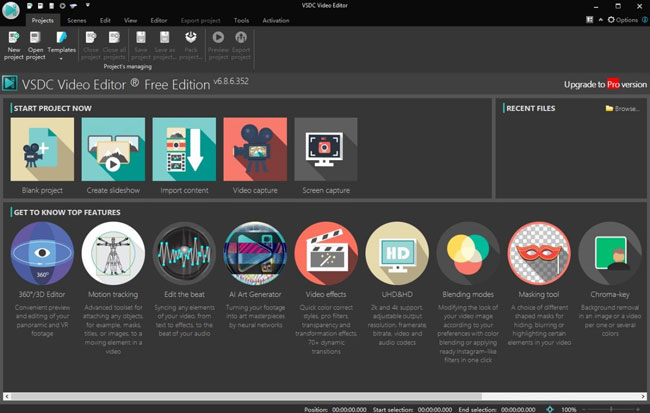
Try to learn how to add an advanced countdown timer to your workout video? Here the recommendation is named VSDC. As a powerful and pro tool for video and audio editing, VSDC is an open-source and cross-platform toolkit yet compatible with Windows merely. You also need a high-end computer to download and use if you want to edit large-size files. To begin with, it may be intricate to use, don't worry, here is the tutorial for you.
Import Files & Add a Timer to Video
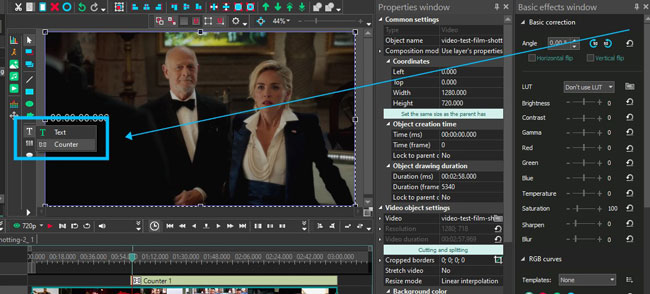
You can create a new project on the user interface, then drop files to the timeline. After that, you can add the timer to the canvas by clicking on the "Text" and "Counter" buttons in the left sidebar.
There are properties and effects on the "Properties Window" and "Basic Effect Window". The size, creation time, drawing duration, blur, saturation, brightness, and curve settings are under control.
Export Video on VSDC
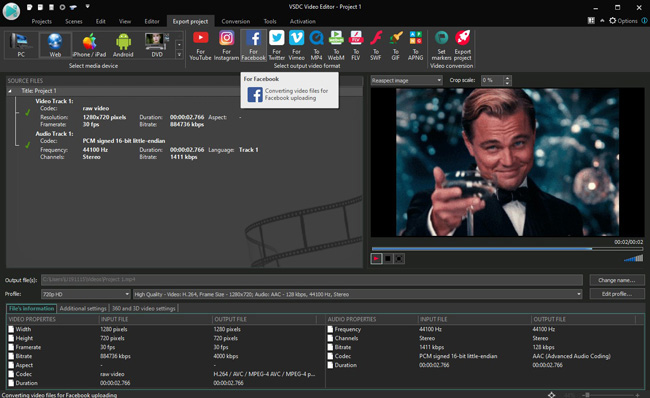
In case you want to share the file on social media, like Facebook, YouTube, or Facebook, just click the "Export Project" from the menu bar. Or you have one channel to export the video to a designated folder. Before that, you can change resolution, set aspect ratio, and improve quality.
Conclusion
AceMovi provides you with colorful timer templates and meticulous settings in font, color, and more to fine-tune. If you want to continue to trim, combine, or convert the clip, just give AceMovi a try. While the timer in VSDC is limited to one genre and can be downloaded on Windows only. But it comes with LUTs and more coordinates you may be intrigued.

