The full name of MKV is Matroska Video File, which is a container format that assembles pics, video, audio, as well as subtitle tracks. Compared to MP4 and AVI video formats, MKV brings much more storage. Mixing and matching individual file formats to MKV can be processed easily, such as H.264 media and MP3 music, several SRT subtitle files, or the media for multi-language support. In the whole process, you may want to learn how to add subtitles to MKV video permanently. That’s it! The four best methods to complete the mission will be given to you. Choosing those recommendations for further promotions is advised as well. It’s the start!
- How to Add Subtitles to MKV Video with AceMovi [PCs]
- How to Use MKVToolNix to Add Subtitles [PCs]
- How to Hardcode SRT to MKV on Clideo Website [Online]
- Lastly
How to Add Subtitles to MKV Video in Win/Mac - AceMovi
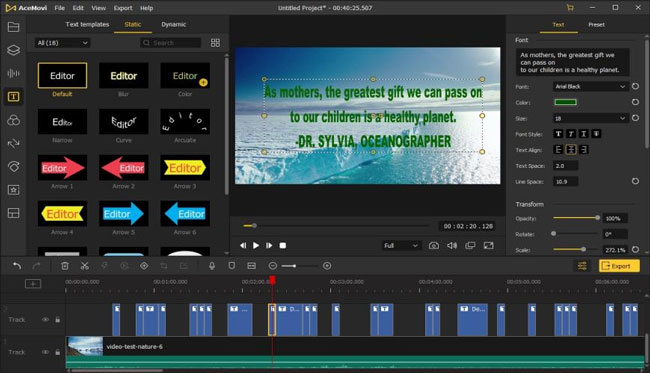
You can perform both add subtitles to MKV video and overlay text templates to make a piece of intro and outro clip to combine into an MKV file with AceMovi Video Titler. It's available to edit, trim, rotate, flip, convert, resize, speed, and sync MKV video up to 60FPS without losing frames. On the streamlined interface, multiple tracks are permitted, meaning that you can also add subtitles to more than one MKV file.
This software is applied to low-end computers. Even if you operate Windows XP, 7, or 8, you can download and apply it directly. Now, more than millions of YouTubers and Facebookers have joined the AceMovi community to create content using the built-in features and effects. They upload files to social media accounts with the selected quality, format, codec, bitrate, aspect ratio, and resolution.
AceMovi Video Titler
- 165+ text templates for making intro clips
- A variety of subtitle fonts and colors
- Export MKV video on HD/Full HD/4K resolution
- Convert videos to MKV file without any hassle
- Run on low-end Windows and Mac systems
- Easy-to-learn interface design for beginners
AceMovi Video Tutorial: How to Add Subtitles to Video
When you use AceMovi, you can simply drop your files under the timeline. Another way to upload files is to click the "Import" button.
Add Subtitle to Your Video
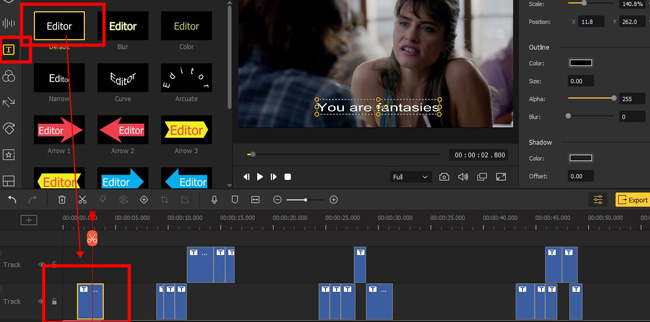
You need to open up the "Text" panel, then drop the "Default" sample under a new track. In this case, you can preview the subtitle on the canvas. But not enough, you need to do further editing to the text font, size, alignment, and more from the right sidebar. Here are some details:
Fine-tune the font, color, size, color, font style, text align mode, text space, line space, opacity, scale, and position: Go to the "Properties" > "Text" to adjust the sliders.
Change the duration: Go to the timeline, then click, hold, drag and drop the edge of the text to shorten or lengthen it.
Dwonload/Convert Your File
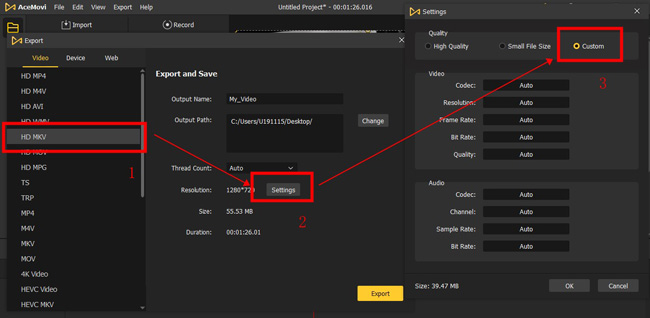
You can now export the edited MKV video on HD resolution in a designated folder. Other formats are available to convert into, including MP4, AVI, DivX, and WMV. There are buttons to automatically convert your files into high-quality or small file size. If not, you can go to the "Custom" to operate your settings.
Add Subtitles to MKV in MKVToolNix
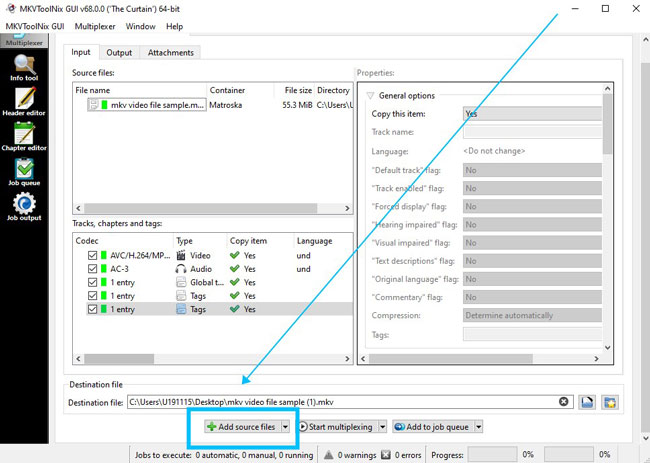
If you want to know how to merge MKV with subtitles (SRT files), the way to easily extract the audio from the MKV video, or determine the audio properties of an MKV video, the MKVToolNix software is worth a try. It's not a streamlined video editor yet you can master the skills without effort. Basically, you perform the actions on the Multiplexer panel with tools like the rotator, extractor, and titler. To begin with, click the "+ Add source files" to upload your MKV video.
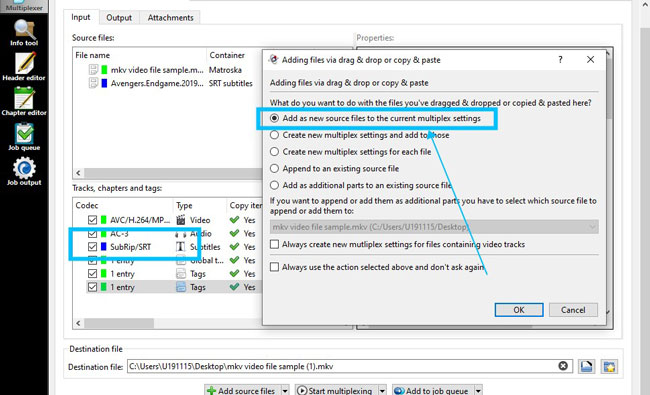
You should drop your SRT file under the interface and select the first option to add the SRT file as a new source file to the current multiple settings. After that, you will see the "SubRip/SRT" line pops up in the editing field.
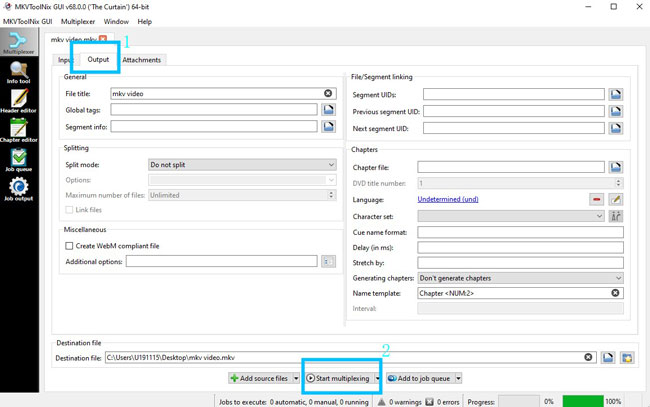
To set related metadata of your clip, just click the "Output" icon from the menu. Then you have the access to set the file title, global tags, and segment information. If you want to split the MKV video, you need to choose the "Split mode" and switch the default option to your wanted one. Finally, click the "Start multiplexing" button.
How to Add Subtitles to a MKV Video Permanently Online - Clideo
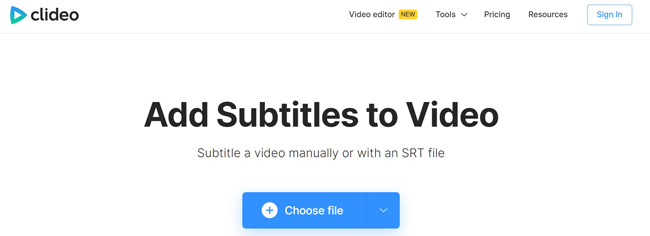
Want to know how to add subtitles to a video MKV online? Clideo is the target you may want according to its overall performance. What must surprise you is the multiple channels for Clideo to add subtitles to your video: you are allowed to add subtitles manually, upload an SRT file, or let the program generate texts automatically.
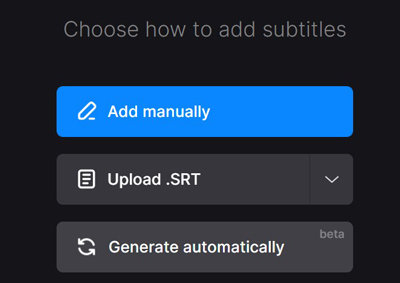
Now, you can choose one of the modes to get started. If you want to add the SRT file to MKV videos, you'd better prepare both the video and the SRT file beforehand, there is no template on the Clideo website.
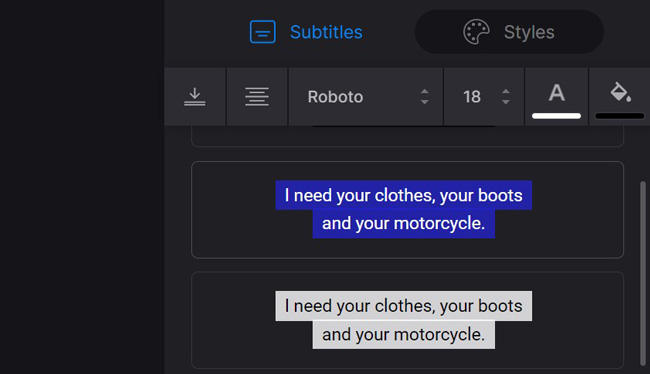
Now, we come into the workflow of Clideo. You can perform a content alteration, change the font size, and color, and reset the alignment from the "Styles" panel, while the "Subtitles" panel is used to playback the subtitles and video in real-time. In the final step, you need to upgrade to a premium account for removing watermarks.
Lastly
Which one is the best software or online website to add subtitles to MKV video is still a mystery. But we've discovered and tested three methods to help you do a quick and easy subtitle addition work. There are more parameters of MKV video to fine-tune and balance via MKVToolNix; If you want to try split-screen, PiP, green screen, slow-motion, or reversion, AceMovi is worth a try.

